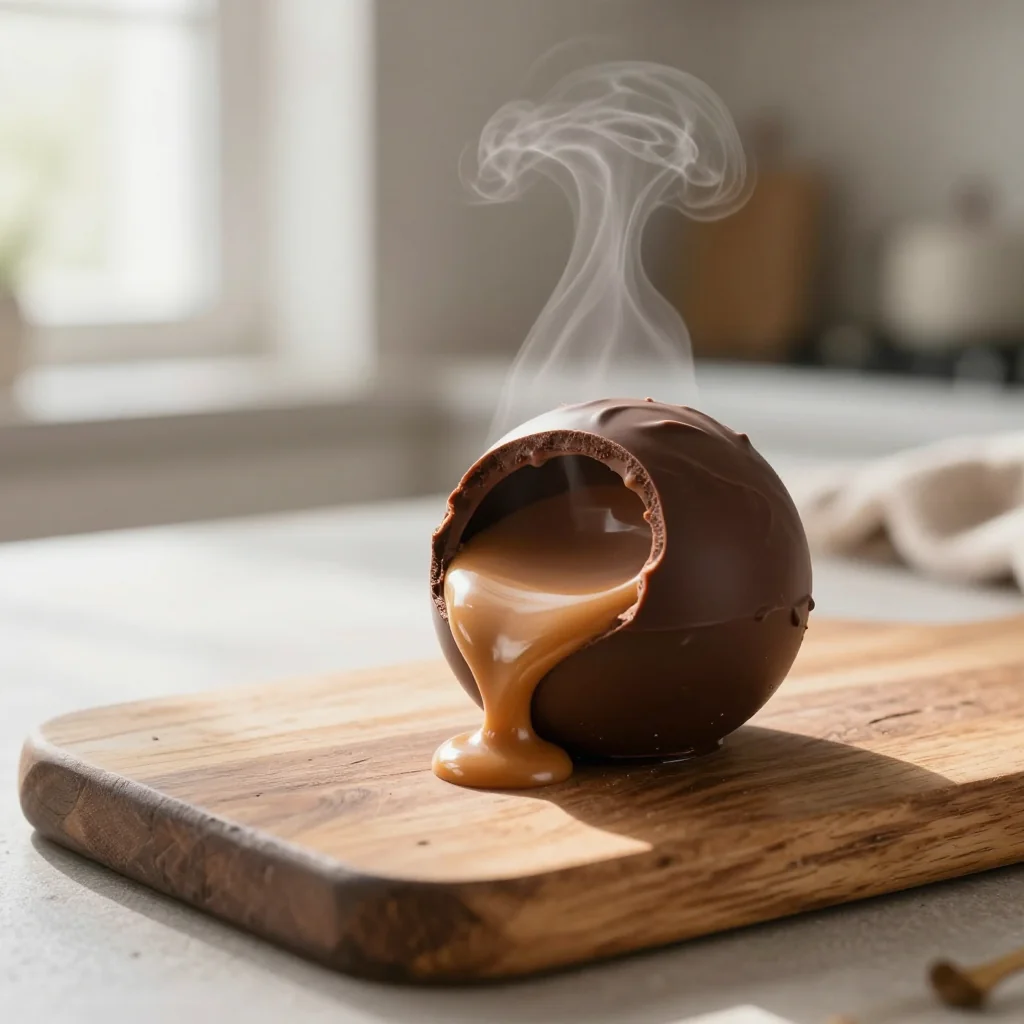
A whimsical burst of cocoa and marshmallow that melts in your mug for instant comfort.

The first time I saw a chocolate bomb, it was at a cozy winter market in Prague, where steam rose from mugs like tiny clouds and the scent of cocoa wrapped around the stalls. I remember watching the glossy sphere crack open, releasing a cascade of fluffy marshmallows that floated like sweet snowflakes. That moment sparked an obsession with the magical transformation of solid chocolate into a liquid hug.
Hot chocolate bombs have their roots in the Japanese “Pudding Bomb” trend, but they quickly became a global sensation, especially during the cold months when comfort food reigns supreme. Combining rich dark chocolate with airy marshmallows creates a textural contrast that feels both indulgent and playful—perfect for a quick treat or a show‑stopping party dessert.
In this guide, I’ll walk you through every detail: from tempering the chocolate to achieving a smooth melt, to crafting a marshmallow filling that stays soft yet doesn’t dissolve too quickly. You’ll learn the science behind tempering, the art of shaping the shells, and the little tricks that make each bomb burst perfectly.
I’m thrilled to share this recipe with you because it turns an ordinary mug of hot cocoa into a theatrical experience. Grab your favorite mug, gather the ingredients, and let’s create a moment of pure, melt‑in‑your‑mouth joy.
🌟 Why This Recipe Will Capture Your Heart
These chocolate bombs aren’t just a dessert; they’re an experience that engages all your senses from sight to taste.
- ✨ Spectacular Visual Impact: The moment the shell cracks, a cloud of marshmallows erupts, creating a photo‑worthy spectacle that impresses guests.
- ✨ Perfect Balance of Sweet and Bitter: Dark chocolate provides depth while marshmallows add gentle sweetness, satisfying both chocolate lovers and those who prefer milder flavors.
- ✨ Customizable Flavor Profiles: You can swap cocoa powders, add a pinch of chili, or drizzle caramel for endless variations.
- ✨ No‑Bake Convenience: The entire process relies on melting and setting, making it ideal for kitchens without an oven.
- ✨ Ideal for Gifting: Packaged in a clear jar or a decorative box, they become a thoughtful, handmade present.
- ✨ Mood‑Boosting Chemistry: Chocolate triggers serotonin release, while the warm milk base soothes, turning a simple snack into a mood‑lifting ritual.
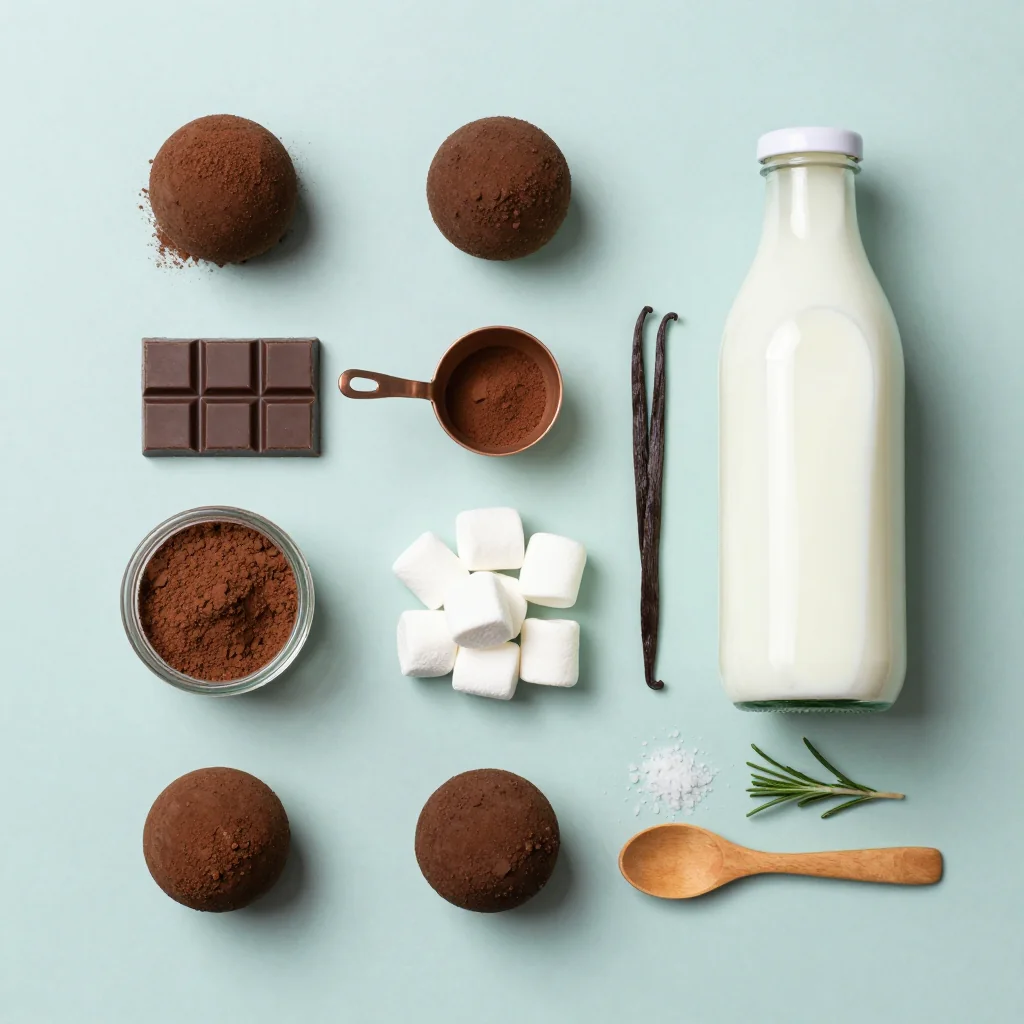
🥗 Ingredients
📝 Complete Ingredient List
For Chocolate Shells:
- 200 g dark chocolate (70% cacao)
- 2 tbsp coconut oil
- 1 tsp vanilla extract
- 1 pinch sea salt
For Marshmallow Filling:
- 120 g mini marshmallows
- 50 ml heavy cream
- 1 tbsp unsalted butter
- 1 tbsp honey
For Garnish/Dust:
- 2 tbsp cocoa powder
- 1 tbsp powdered sugar
- to taste crushed peppermint candy (optional)
🔍 Focus on Key Ingredients
Dark Chocolate (70% cacao)
Dark chocolate is the backbone of the bomb, providing structure and a deep, slightly bitter flavor that balances the sweetness of the marshmallows. Look for a bar that lists cocoa solids first and has a glossy surface—these indicators mean the chocolate has been well‑tempered at the factory and will respond predictably when you melt and re‑tempered it at home.
Mini Marshmallows
Mini marshmallows melt just enough to become soft and pillowy without turning into a sticky mess. Their small size ensures an even distribution inside the shell, creating a consistent melt‑and‑pour experience with each sip. If you prefer a chewier texture, you can substitute regular marshmallows, but be sure to chop them finely.
Coconut Oil
Coconut oil lowers the melting point of the chocolate, making it easier to coat the molds and giving the final shell a glossy finish. It also adds a subtle tropical aroma that complements the cocoa. If you have a nut allergy, you can replace it with a neutral‑flavored oil such as grapeseed or vegetable oil.
🔄 Quick Substitutions
| If you don’t have... | Use instead... |
|---|---|
| 70% dark chocolate | 70% milk chocolate (will be sweeter) |
| Coconut oil | vegetable oil or melted butter |
| Mini marshmallows | regular marshmallows, chopped finely |
👨🍳 Step‑by‑Step Instructions
Follow these detailed steps to create perfectly tempered chocolate shells that crack open with a cloud of marshmallow goodness.
📋 Phase 1: Preparation and Setup
Gather your tools and prepare the chocolate for tempering.
Temper the Dark Chocolate
Chop the dark chocolate into uniform 1‑cm pieces and place two‑thirds of it in a heat‑proof bowl over a pot of simmering water (double boiler). Stir constantly until the chocolate reaches 45‑46 °C (113‑117 °F). Remove the bowl, add the remaining third of chopped chocolate (the “seed”), and stir until the temperature drops to 31‑32 °C (88‑90 °F). This tempering process aligns the cocoa butter crystals, giving the shells a glossy sheen and a crisp snap.
Prepare the Silicone Molds
Lightly brush each cavity of your silicone bomb molds with a thin layer of coconut oil using a pastry brush. This ensures the chocolate releases cleanly after setting. Place the molds on a parchment‑lined tray to catch any overflow.
🔥 Phase 2: Assembly
Create the shells, fill them, and seal the bombs.
Coat the Molds
Using a small spoon, pour a thin layer of tempered chocolate into each mold cavity, swirling to coat the sides evenly. Tap the tray gently to release air bubbles. Return the tray to the fridge for 2‑3 minutes until the chocolate sets but is still pliable.
Add a Second Layer
Once the first coating is firm, apply a second, slightly thicker layer of chocolate to reinforce the shell. Chill again for another 5 minutes until fully set.
Prepare the Marshmallow Filling
In a saucepan over low heat, melt butter, then stir in heavy cream, honey, and mini marshmallows. Cook gently, stirring constantly, until the marshmallows have softened and the mixture is glossy. Remove from heat and let cool slightly—this prevents the filling from melting the chocolate when you add it.
✨ Phase 3: Finishing and Serving
Seal the bombs, dust them, and enjoy the melt‑in‑your‑mouth magic.
Fill and Seal the Bombs
Using a small spoon, place about 1 tablespoon of the marshmallow mixture into each chocolate shell, leaving a small margin at the top. Quickly cover with a second chocolate‑coated half, pressing gently to seal. Refrigerate for 10 minutes to ensure a firm seal.
Dust with Cocoa and Sugar
In a shallow dish, combine cocoa powder and powdered sugar. Lightly roll each sealed bomb in the mixture, tapping off excess. This adds a decorative finish and a hint of extra flavor.
Serve
Place a bomb in a pre‑heated mug (just off the boil). Pour hot milk (or plant‑based alternative) over it. Within seconds, the shell will crack, releasing marshmallows that melt into a velvety, aromatic hot chocolate. Stir gently and enjoy.
💡 Expert Tips and Tricks
🛒 Choosing the Right Ingredients
Always buy couverture chocolate with a cocoa butter content of at least 31%; this ensures proper tempering. Look for a chocolate that snaps when broken—if it bends, it’s not suitable. For marshmallows, choose the mini size because they melt evenly and don’t overwhelm the shell. When selecting coconut oil, pick the unrefined, cold‑pressed variety for a subtle aroma.
🔪 Preparation Techniques
When chopping chocolate, use a sharp knife and a clean cutting board to avoid contaminating the chocolate with water. Pat the silicone molds dry before brushing with oil; any moisture will cause the chocolate to seize. Use a small offset spatula to spread chocolate inside the mold for an even thickness.
🌡️ Mastering the Cooking Process
Tempering is the most critical step. Keep the chocolate temperature within the target range using a digital thermometer. If the chocolate cools too quickly, gently re‑warm it over the double boiler for a few seconds. When melting the marshmallow filling, keep the heat low to prevent scorching; the goal is a smooth, glossy mixture.
🍽️ Presentation and Service
Serve the bombs on a simple white plate to let the colors pop. Dust a few extra cocoa powder specks around the plate for a rustic look. Offer optional toppings such as whipped cream, a drizzle of caramel, or a pinch of sea salt for an elevated experience.
🏆 Pro Tips
Professional chefs rely on precision, timing, and a few secret tricks to elevate a good recipe into an unforgettable one.
- 🎯 Control Crystal Formation: The key to a glossy shell is stable cocoa butter crystals. By cooling the chocolate to 31 °C after seeding, you lock in the right crystal form (β‑V), which prevents bloom and gives that satisfying snap.
- 🎯 Use a Silicone Ice‑Cube Tray for Uniform Size: Standard silicone ice‑cube trays create perfectly sized, uniformly thick shells, ensuring each bomb melts at the same rate.
- 🎯 Add a Pinch of Cornstarch to the Filling: This absorbs excess moisture, keeping the marshmallow core from becoming overly runny when the bomb is dropped into hot milk.
- 🎯 Chill the Molds Between Layers: A brief chill (2‑3 minutes) between the first and second chocolate layers creates a stronger bond, reducing the chance of cracks during handling.
- 🎯 Use a Heat‑Resistant Spoon for the Filling: Stainless steel or silicone spoons won’t transfer heat to the chocolate, preserving the seal.
- 🎯 Finish with a Light Spritz of Edible Gold Dust: For a luxe presentation, a very thin layer of gold dust adds visual sparkle without altering flavor.
"Chocolate is a perfect example of how science and art can coexist on a plate." — Jacques Torres
🔄 Variations and Adaptations
The base recipe is a canvas; feel free to experiment with flavors, textures, and dietary needs.
🥬 Vegetarian/Vegan Version
Swap dark chocolate for a vegan‑friendly dark chocolate that contains no dairy. Replace butter with a plant‑based margarine and use coconut cream instead of heavy cream. The marshmallows can be substituted with vegan mini marshmallows made from agar‑agar.
- Vegan dark chocolate (70% cacao, dairy‑free)
- Coconut cream in place of heavy cream
- Vegan butter or coconut oil for richness
🌶️ Flavor Variations
Change the flavor profile with these ideas:
Spicy Chili Version:
Add ½ tsp of ground cayenne pepper to the chocolate melt and a dash of chili‑infused honey to the marshmallow filling. The heat pairs beautifully with the cool cocoa.
Mediterranean Twist:
Incorporate a pinch of ground cardamom and a drizzle of orange blossom honey. Garnish with finely chopped pistachios for a nutty crunch.
Asian Matcha Fusion:
Mix 1 tsp of high‑quality matcha powder into the cocoa dust and add a splash of toasted sesame oil to the filling. Finish with toasted sesame seeds on top.
⚠️ Dietary Adaptations
Gluten‑Free:
The recipe is naturally gluten‑free; just ensure any added toppings (like crushed cookies) are certified gluten‑free.
Lactose‑Free:
Use coconut cream or oat cream instead of dairy heavy cream, and select dairy‑free chocolate.
Low‑Calorie:
Reduce the amount of chocolate by 20 % and replace half the heavy cream with unsweetened almond milk. Use a sugar substitute like erythritol in the dust.
👶 Kid‑Friendly Version
For younger palates, use milk chocolate instead of dark chocolate and add a splash of vanilla‑flavored syrup to the marshmallow mixture. Top with colorful sprinkles for a fun, festive look.
📦 Storage and Reheating
🧊 Conservation
Refrigerator:
- Duration: Up to 5 days
- Recommended container: Airtight plastic box
- Tip: Keep the bombs in a single layer to avoid crushing.
Freezer:
- Duration: Up to 2 months
- Method: Place each bomb on a parchment sheet, freeze, then transfer to a zip‑lock bag.
- Defrosting: Move to the fridge for 1‑2 hours before use.
💡 Avoid storing the bombs in a warm environment, as the chocolate may bloom (develop a white haze) which affects texture and appearance.
♨️ Reheating
🔥 Oven (Recommended):
- Preheat to 150 °C (300 °F).
- Place bombs on a parchment‑lined tray.
- Heat for 5‑7 minutes until the shell softens slightly.
- Remove and immediately pour hot milk over the bomb.
⚡ Microwave (Quick):
- Place bomb in a microwave‑safe mug.
- Heat on medium power for 20‑30 seconds.
- Stir gently to ensure even melting.
🍳 Stovetop (Optional):
Submerge the bomb in a saucepan of simmering milk for 30 seconds, then stir. This method is gentle but requires close attention to prevent over‑melting.
🍷 Perfect Pairings
🥗 Side Dishes
- Spiced Shortbread Cookies: Their buttery crunch contrasts the silky chocolate.
- Fresh Berries: The tartness of raspberries cuts through the richness.
- Caramelized Pear Slices: Adds a subtle sweetness and elegant presentation.
🍷 Wine & Beverage Pairings
- Ruby Port: Its deep fruit notes echo the chocolate’s richness.
- Dark Stout Beer: The roasted malt complements the cocoa.
- Non‑Alcoholic: A spiced chai latte provides warm spices without alcohol.
🍰 Complementary Courses
Begin with a light citrus salad dressed with honey‑mint vinaigrette, then serve the chocolate bombs as the main dessert. Follow with a simple vanilla bean panna cotta to cleanse the palate.
❓ Frequently Asked Questions
Q: Can I use milk chocolate instead of dark chocolate?
Yes, milk chocolate will produce a sweeter, softer shell and a milder flavor profile. Keep in mind that milk chocolate has a lower melting point, so you’ll need to be extra careful during tempering to avoid overheating.
Q: How do I prevent the chocolate from blooming?
Proper tempering is the most effective way to prevent bloom. Store the finished bombs in a cool, dry place away from direct sunlight. If bloom does appear, gently melt the chocolate again and re‑temper before reshaping.
Q: What type of milk works best for the final drink?
Whole milk gives the richest texture, but you can also use oat milk, almond milk, or coconut milk for dairy‑free options. Each brings its own subtle flavor—coconut milk adds a tropical note, while oat milk creates a creamy mouthfeel.
Q: My shells cracked while I was filling them—what went wrong?
The chocolate may have hardened too much before you added the filling. Ensure the shells are still slightly pliable (after the second coating) and work quickly. Keeping the molds at room temperature for a minute before filling helps.
Q: Can I add alcohol to the hot chocolate?
Absolutely! A splash of Baileys, Kahlúa, or spiced rum adds depth. Add the liquor after the milk is poured, stirring gently to blend.
Q: Is it possible to make these bombs ahead of time?
Yes, you can prepare the shells and filling up to 24 hours in advance. Store the shells sealed in the refrigerator and keep the marshmallow mixture in an airtight container. Assemble just before serving for the freshest experience.
🎉 Let’s Get Cooking!
Hot Chocolate Bombs with Marshmallows turn a simple cup of cocoa into a theatrical, comforting ritual that delights both the eyes and the palate. By mastering tempering and embracing the playful assembly, you’ll create a dessert that feels luxurious yet approachable. Remember, the secret lies in the balance of bitter chocolate, sweet marshmallows, and that satisfying crack when the shell gives way.
I encourage you to experiment with the variations, share your favorite toppings, and make this recipe your own. Whether you’re serving it at a holiday gathering or enjoying a quiet night in, these bombs are sure to become a cherished favorite.
Have you tried this recipe?
Leave a comment and rating below! Share your photos on Instagram with #ChocolateBombMagic to be featured.
Hot Chocolate Bombs with Marshmallows
A whimsical burst of cocoa and marshmallow that melts in your mug for instant comfort.
📝 Ingredients
Chocolate Shells
Marshmallow Filling
Garnish/Dust
👨🍳 Instructions
- 1 Temper the dark chocolate using the seeding method until it reaches 31‑32 °C.
- 2 Brush silicone bomb molds with a thin layer of coconut oil and set aside.
- 3 Coat each mold cavity with a thin chocolate layer, chill, then add a second layer for strength.
- 4 Melt butter, then combine heavy cream, honey, and mini marshmallows; stir until smooth.
- 5 Fill each chocolate shell with a tablespoon of marshmallow mixture and seal with the other half.
- 6 Dust the sealed bombs in cocoa‑powder and powdered‑sugar mixture.
- 7 Store the bombs in the refrigerator if not serving immediately.
- 8 To serve, place a bomb in a mug and pour hot milk over it; watch the shell crack.
- 9 Stir gently, add optional whipped cream or a drizzle of caramel, and enjoy.
- 10 Share your creation on social media with #ChocolateBombMagic!
🥗 Nutrition (per serving)
*Nutrition values are estimates based on listed ingredients.
📚 You Might Also Like
Spiced Pumpkin Hot Chocolate
Salted Caramel Chocolate Truffles
Matcha White Chocolate Bombs


💬 Comments & Reviews
Leave a Comment
No comments yet. Be the first to share your thoughts!