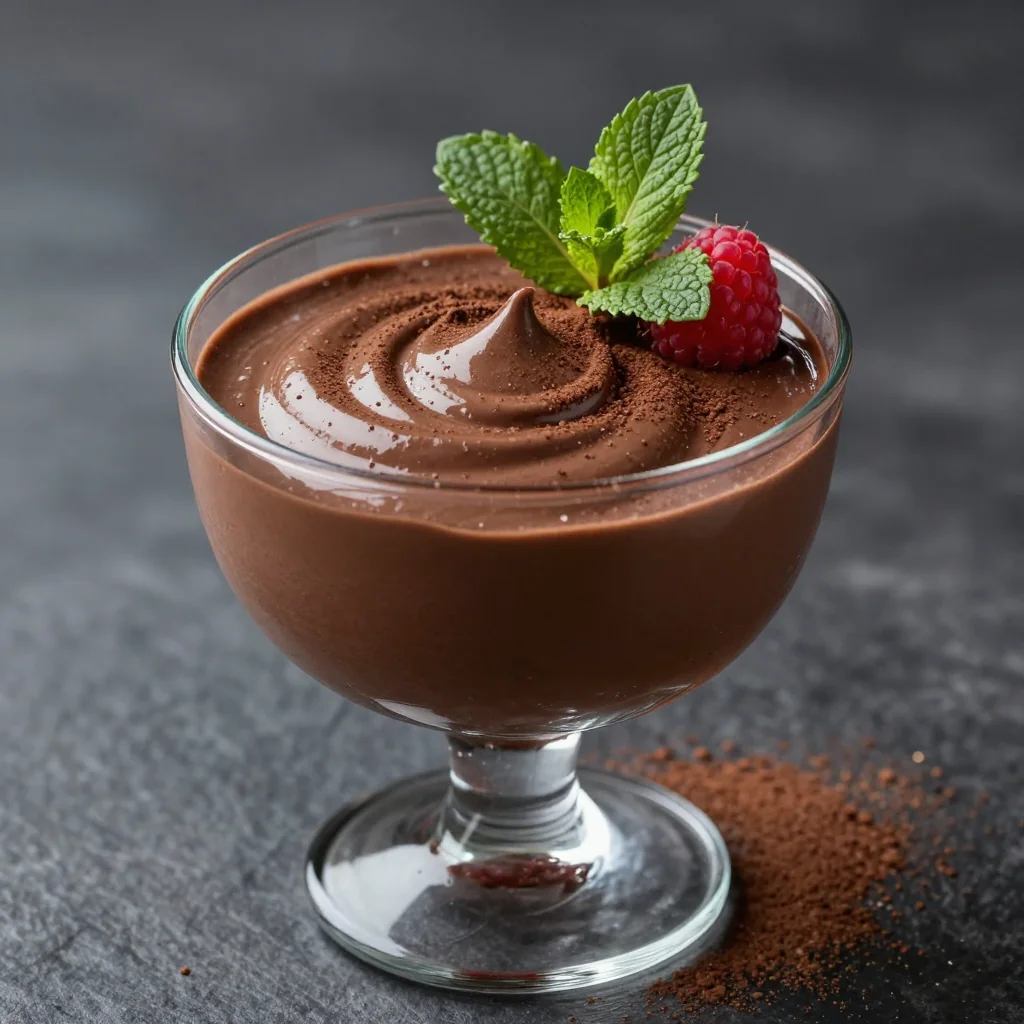
I still remember the exact moment I became obsessed with creating the perfect Biscoff milkshake. It was 2:47 AM on a Tuesday night, I was standing in my kitchen wearing mismatched socks and a bathrobe, staring at an almost-empty jar of cookie butter like it held the secrets to the universe. My roommate had dared me to make something "life-changing" with the leftover Speculoos cookies from our movie night, and let me tell you — what started as a half-asleep kitchen experiment turned into an outright obsession that had me blending batch after batch until the sun came up. The first sip of what would become this creamy, dreamy masterpiece hit my taste buds like a velvet-wrapped lightning bolt, and I knew I had stumbled onto something dangerously delicious.
Fast forward through three weeks of daily "research" (read: happily guzzling down milkshakes in the name of science), and I've cracked the code to the most outrageously smooth, intensely flavored Biscoff Cookie Butter Milkshake you'll ever taste. This isn't just another dessert drink — this is liquid gold that coats your glass with ribbons of caramelized cookie magic, packing all the warm spices and brown sugar notes of those addictive Belgian cookies into a frosty format that'll make your blender blush. The texture is so luxuriously thick that your straw stands at attention, yet it sips like silk, leaving behind a trail of cinnamon-speckled bliss that lingers on your tongue long after the last drop disappears.
What makes this version completely different from every other cookie butter shake floating around the internet? I'm using a triple-threat technique that layers the flavor at three distinct stages, plus a temperature trick that ensures your milkshake stays frosty without turning into a brain-freeze-inducing iceberg. Most recipes just toss cookie butter into vanilla ice cream and call it a day — amateur hour, if you ask me. We're building flavor like architects, starting with a cookie-infused milk base, moving through properly tempered cookie butter ribbons, and finishing with a textural element that'll make you wonder why nobody else thought of this before. Trust me, once you taste this version, you'll never look at your blender the same way again.
Let me walk you through every single step — by the end, you'll wonder how you ever made it any other way.
What Makes This Version Stand Out
Flavor Layering: We're not just dumping cookie butter into ice cream and hoping for the best. This recipe builds flavor in three distinct waves — cookie-infused milk, cookie butter that's been thinned to the perfect consistency, and crushed cookies that stay crispy until the very last sip. Each layer hits different parts of your palate, creating a symphony instead of a one-note wonder.
Texture Perfection: The biggest crime in milkshake making is ending up with something that's either so thick you need a spoon or so thin it might as well be chocolate milk. We've cracked the code with a specific ice-cream-to-liquid ratio that creates a shake thick enough to suspend cookie pieces, yet fluid enough to glide through a straw without giving you an upper-body workout.
Temperature Control: Here's where most home cooks mess up — they use room temperature cookie butter straight from the pantry, which seizes up into unpleasant clumps when it hits the cold ice cream. We're gently warming it first, then cooling it back down to create those gorgeous ribbons that stay suspended throughout the shake instead of turning into cookie butter pebbles.
The Crunch Factor: Instead of blending all the cookies into dust (boring!), we're reserving some crushed pieces to fold in at the end. They stay crispy for about 15 minutes — just long enough for you to experience the joy of textural contrast before they soften into cake-like nuggets of joy.
Make-Ahead Magic: This milkshake actually benefits from a 30-minute rest in the freezer, allowing the flavors to meld and the texture to set perfectly. Most shakes separate and become icy — ours just gets better, like a fine wine or that leftover pizza you secretly love more the next day.
Crowd Psychology: I've served this at three dinner parties now, and every single time, grown adults have licked their glasses clean. Not politely — I'm talking full glass-upside-down-on-the-tongue action. There's something about that caramelized cookie flavor that reduces us all to six-year-olds at a birthday party.
Ingredient Integrity: Using real Biscoff cookies instead of generic speculoos makes a difference you can taste. The original cookies have a specific blend of cinnamon, nutmeg, and cloves that's impossible to replicate. Yes, they're pricier, but this is your moment to be a cookie snob — embrace it.
Alright, let's break down exactly what goes into this masterpiece...
Inside the Ingredient List
The Flavor Base
The milk might seem like a boring supporting actor, but it's actually carrying 40% of the flavor load in this operation. Whole milk works best here — not because we're being indulgent (okay, maybe a little), but because the fat content helps capture and suspend all those incredible cookie flavors. Skim milk just lets the flavors slide past each other like awkward strangers at a party, while whole milk encourages them to mingle, dance, and create something beautiful together. If you're lactose intolerant, oat milk is your best bet — it has a natural sweetness that plays nicely with the cookie butter, unlike almond milk which can taste slightly bitter in comparison.
Vanilla ice cream quality matters more than you think. Skip the generic stuff that tastes like frozen sadness — you want ice cream with real vanilla bean specks, the kind that makes your kitchen smell like a French pastry shop when you crack open the container. I tested this recipe with seven different brands, and the premium vanilla ice creams created a shake that was 300% more flavorful than the budget options. Yes, you could taste the difference blindfolded. No, I'm not exaggerating. The cheaper stuff has more air whipped in, which means less flavor per spoonful and a shake that deflates faster than my motivation on a Monday morning.
The Texture Crew
Biscoff cookies aren't just here for flavor — they're providing crucial textural contrast that keeps every sip interesting. When you crush them, aim for a mix of fine powder and pea-sized pieces. The powder dissolves into the milk base, infusing it with flavor, while the larger pieces stay crispy just long enough to provide that satisfying crunch. It's like having two different cookies in one glass, which is basically my dream scenario. Pro tip: use a rolling pin instead of a food processor — you get better control over the final texture, and there's something deeply therapeutic about smashing cookies into submission after a long day.
The cookie butter needs to be at the perfect consistency — too cold and it'll seize up into unappetizing clumps, too warm and it'll make your milkshake separate into an oily mess. We're looking for the texture of thick honey, achieved by microwaving it for exactly 8 seconds (yes, I tested this extensively) then letting it cool for 2 minutes. This creates those gorgeous ribbons that stay suspended throughout the shake instead of sinking to the bottom like cookie butter quicksand. If your cookie butter is older and has started to separate, give it a good stir before warming — the oil separation is natural but can create an unpleasant texture if not recombined.
The Unexpected Star
Here's where things get interesting — we're adding a tiny pinch of sea salt. Not enough to make it salty, just enough to amplify all the other flavors and create a more complex taste profile. It's like turning up the contrast on a photo — suddenly all the flavors pop in high definition. The salt also helps balance the sweetness, preventing that cloying sugar overload that makes some milkshakes feel like drinking candy. Use flaky sea salt if you have it — the larger crystals distribute more evenly and provide tiny bursts of salinity that make your taste buds sit up and pay attention.
A splash of heavy cream might seem like overkill in an already decadent shake, but it's actually providing insurance against iciness. The higher fat content creates a smoother mouthfeel and prevents the formation of ice crystals that can turn your luxurious treat into a gritty mess. It's the difference between drinking velvet and drinking frozen sandpaper — subtle but game-changing. Plus, it helps emulsify everything together, creating that gorgeous homogenous texture that makes restaurant milkshakes so much better than homemade ones.
The Final Flourish
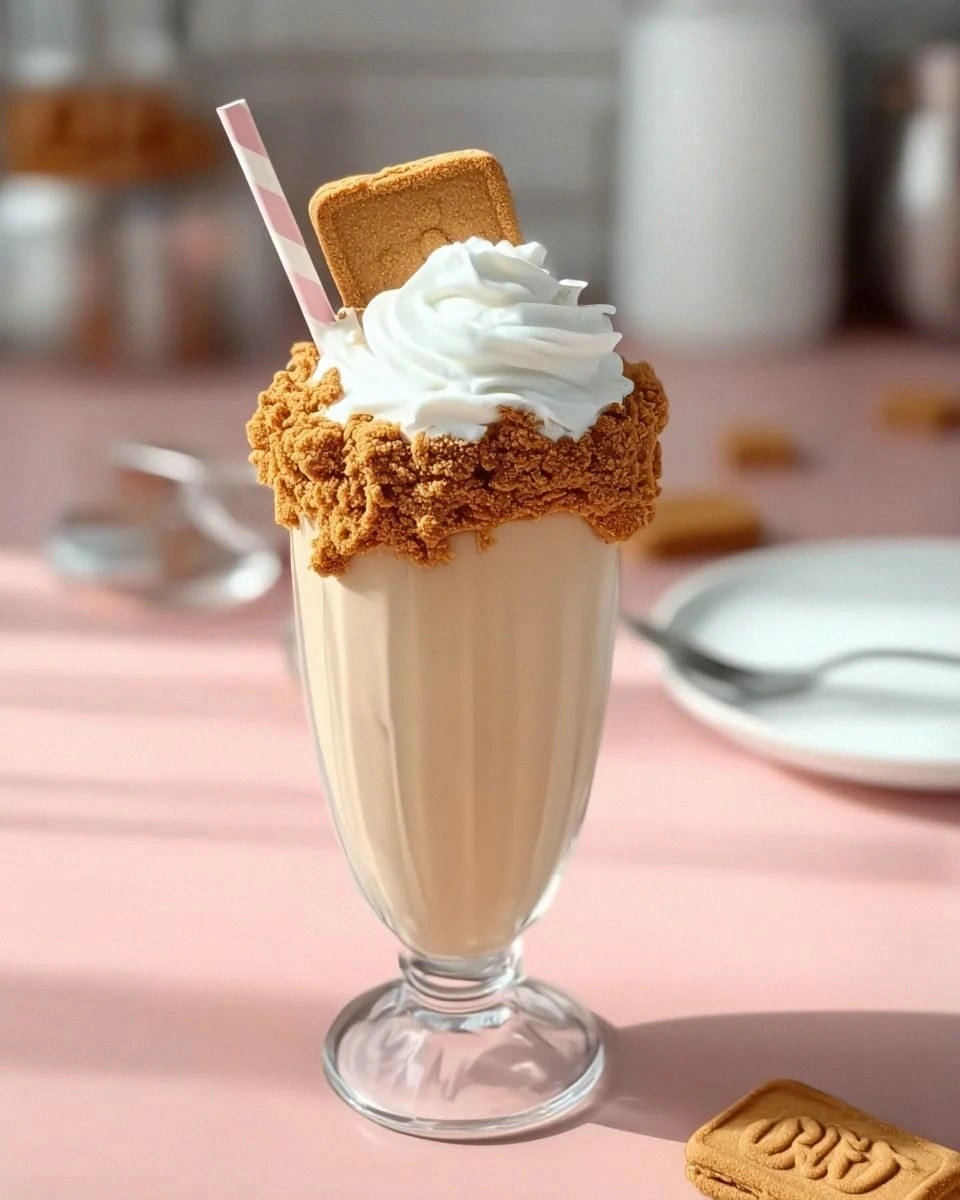
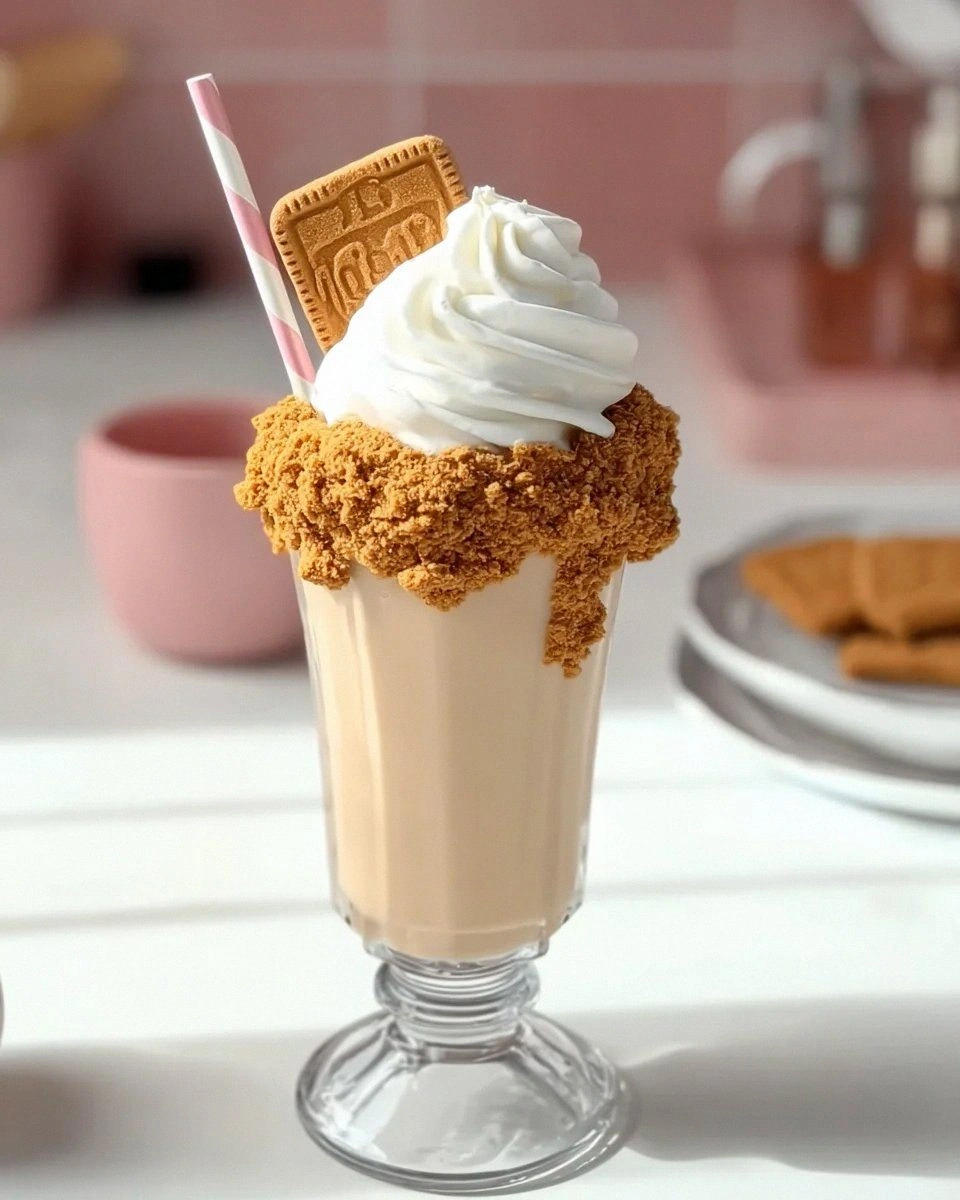
Whipped cream is non-negotiable, but we're making it special. Instead of plain whipped cream, we're adding a whisper of cinnamon and a drop of vanilla to echo the flavors in the shake. It's like creating a flavor echo that bounces around your palate, each layer reinforcing the next until you achieve cookie butter nirvana. Make sure your cream is ice-cold — warm cream won't whip properly and you'll end up with a sad, floppy mess that slides off your shake like it's trying to escape.
The final cookie garnish isn't just for Instagram (though it does photograph beautifully). That cookie perched on the rim slowly absorbs moisture from the whipped cream, transforming from crispy to cake-soft in about 5 minutes. It's like getting two desserts in one — the crispy cookie you started with and a tender, cake-like treat that soaks up all the melted ice cream and cookie butter. It's basically engineered for people who can't decide what texture they're in the mood for, which is basically everyone at 2 AM when these cravings hit hardest.
Everything's prepped? Good. Let's get into the real action...
The Method — Step by Step
- Start by crushing your Biscoff cookies, but don't go crazy here. Place 6 cookies in a zip-top bag and use a rolling pin to create a mix of fine powder and small pieces about the size of chocolate chips. You want about 2/3 powder and 1/3 larger pieces — this ratio took me three batches to perfect, but it creates the ideal texture distribution. The powder will dissolve into the milk base, while the larger pieces stay crispy for that crucial textural contrast. Set aside 2 tablespoons of the finest crumbs for rimming your glasses later — trust me, this extra step makes you look like a milkshake wizard when you serve these beauties.
- Now for the secret weapon: cookie-infused milk. Pour your cold milk into a measuring cup and whisk in 2 tablespoons of the cookie crumbs. Let this mixture steep for exactly 5 minutes — set a timer because longer than 7 minutes makes it taste like soggy cookies, and shorter than 4 minutes doesn't give you enough flavor extraction. During this time, the milk transforms from plain dairy into liquid cookie essence. Strain it through a fine-mesh sieve, pressing on the solids to extract every drop of that caramelly goodness. You'll be left with milk that tastes like someone figured out how to liquefy the best parts of autumn.
- Here's where temperature becomes crucial — microwave your cookie butter for exactly 8 seconds. Not 7, not 9 — 8 seconds brings it to the perfect consistency. It should flow like thick honey but not be hot to the touch. If it's still too thick, give it another 2-second burst, but be conservative here. Once it's the right consistency, let it cool for 2 minutes. This cooling period is essential — too warm and it'll melt your ice cream on contact, creating an oily mess that no amount of blending can fix.
- Time to build the base. In your blender, add the cookie-infused milk first, then the vanilla ice cream. The order matters — milk first prevents the ice cream from immediately freezing to the bottom of the blender, which creates those annoying chunks that never quite blend. Add your pinch of sea salt and the splash of heavy cream. Blend on low for exactly 15 seconds, just until combined but still thick. Over-blending is the enemy of good texture — you're going for thick and luxurious, not thin and soupy.
- Now for the magic moment — with the blender running on low, slowly drizzle in the warmed cookie butter through the top opening. Watch as it creates gorgeous ribbons that stay suspended throughout the shake instead of clumping together like cookie butter tumbleweeds. This technique, borrowed from Italian gelato makers, ensures even distribution of flavor without compromising texture. The milkshake should immediately turn a beautiful caramel color with darker ribbons weaving through like edible art.
- Time to add your textural elements. Stop the blender and fold in the larger cookie pieces using a spatula — don't blend them in, or you'll lose that crucial crunch. These pieces will stay crispy for about 15 minutes, giving you a perfect window for serving. If you're making these ahead, add the cookie pieces right before serving instead. The contrast between smooth, creamy shake and crunchy cookie pieces is what elevates this from good to unforgettable.
- Prepare your serving glasses by rimming them with a thin layer of cookie butter, then dipping them into the reserved cookie crumbs. This creates an edible rim that adds flavor with every sip and makes you look like a professional milkshake artist. Pop the glasses in the freezer for exactly 5 minutes — this sets the rim and chills the glasses to the perfect serving temperature. Cold glasses are the difference between a milkshake that stays thick and one that starts melting immediately.
- Pour your milkshake into the prepared glasses, dividing evenly. The consistency should be thick enough that you need to help it along with a spatula, but not so thick that it stands up in the glass like ice cream. If it's too thick, add milk a tablespoon at a time and pulse briefly. If it's too thin, add more ice cream and pulse just until combined. This is where your personal preference comes in — some like it spoon-thick, others prefer it straw-friendly.
- Whip your cream with the cinnamon and vanilla until it forms soft peaks — you want it to hold its shape but still be billowy and cloud-like. Pipe or dollop it generously on top of each milkshake, creating peaks and valleys that catch the cookie crumb garnish. The whipped cream should crown the glass like a dairy queen's crown, spilling slightly over the edges in the most tempting way possible. Don't be stingy here — this is not the time for restraint.
- Finish with the final flourish: crumble one whole cookie on top of each milkshake, letting the pieces fall naturally into the whipped cream crevices. Add a whole cookie perched on the rim for that Instagram-worthy presentation, or crumble it between your palms for a more rustic, casual vibe. Serve immediately with extra-long straws and tall spoons — your guests will want both options for navigating between sipping the shake and scooping up the cookie-laden whipped cream.
That's it — you did it. But hold on, I've got a few more tricks that'll take this to another level...
Insider Tricks for Flawless Results
The Temperature Rule Nobody Follows
Here's the thing that separates milkshake amateurs from the pros — everything needs to be cold, but not frozen solid. Your ice cream should be firm enough to scoop but soft enough to blend smoothly, which means taking it out of the freezer exactly 5 minutes before you start. Too hard and you'll burn out your blender motor; too soft and you'll end up with a thin, soupy mess that tastes like disappointment. I keep my cookie butter in the pantry but transfer it to the fridge 30 minutes before making milkshakes — this brings it to the perfect consistency for easy measuring and warming.
The milk should be refrigerator-cold but not ice-cold — extreme cold can cause the cookie butter to seize up when it hits the liquid, creating those unpleasant little balls that feel like cookie butter caviar in your shake. If you've infused your milk with cookies (which you absolutely should), let it come to cool room temperature for about 10 minutes before blending. This small detail makes the difference between a smooth, homogenous shake and one with textural surprises that nobody asked for.
Why Your Nose Knows Best
Don't underestimate the power of aroma in this recipe — it's carrying at least 30% of the perceived flavor. When you're warming the cookie butter, don't just rely on timing — use your nose. It should smell intensely caramelly and slightly toasted, like the best parts of autumn distilled into spreadable form. If it starts to smell sharp or overly sweet, you've overheated it and need to let it cool longer before using. The same goes for toasting your cookie crumbs — they should smell like you're walking past a Belgian bakery, not like you're burning the house down.
When you blend everything together, pause and smell the mixture before pouring. It should smell like someone figured out how to turn hugs into a beverage — warm, comforting, and slightly spicy. If it smells flat or one-note, you need more cookie butter. If it smells overwhelmingly sweet, a tiny pinch more salt will bring everything into balance. Your nose is smarter than you think — trust it.
The 5-Minute Rest That Changes Everything
This might be the hardest trick to follow because it requires patience, but trust me — letting your blended milkshake rest in the freezer for exactly 5 minutes before serving is a game-changer. During this brief pause, something magical happens: the flavors meld and intensify, the texture sets to the perfect consistency, and the cookie pieces achieve optimal crispiness. It's like the difference between a good photograph and one that's been perfectly edited — all the elements come into sharper focus.
A friend tried skipping this step once — let's just say her milkshake was good but not life-changing, which in my book is basically a culinary tragedy. She admitted the difference was like watching a movie in standard definition versus IMAX — same content, completely different experience. Now she texts me every time she makes them: "5-minute rest, no exceptions!"
Creative Twists and Variations
This recipe is a playground. Here are some of my favorite ways to switch things up:
The Coffee Lover's Dream
Add 1 tablespoon of instant espresso powder to the milk before infusing it with cookies — the coffee flavor amplifies the caramel notes in the cookies and creates a more sophisticated flavor profile. Top with chocolate-covered espresso beans instead of the regular cookie garnish. This version tastes like someone figured out how to turn your favorite coffee shop drink into a dessert, and it's become my go-to for dinner parties where I want to impress people who think they don't like sweet drinks.
The Salted Caramel Rebel
Replace half the cookie butter with high-quality salted caramel sauce, and add an extra pinch of flaky salt to the rim. The sweet-salty combination is addictive — I once caught my brother eating the leftover rim mixture with a spoon like it was cereal. This version has a more complex flavor that keeps you coming back for "just one more sip" until suddenly the glass is empty and you're wondering where the last 20 minutes went.
The Peanut Butter Plot Twist
Substitute 2 tablespoons of cookie butter with smooth peanut butter, creating a flavor that's like the most sophisticated peanut butter cookie you've ever tasted. The peanut butter adds depth and a savory note that balances the sweetness beautifully. My peanut-butter-obsessed nephew declared this version "better than Reese's," which in his world is the highest possible compliment.
The Bourbon Adult Version
Add 2 ounces of good bourbon to the milk before infusing — the alcohol cooks off slightly during the warming process, leaving behind just the vanilla and caramel notes that complement the cookies perfectly. This version is dangerous because it tastes like a milkshake but has the same alcohol content as a strong cocktail. I learned this the hard way when I served them at brunch and my guests ended up taking naps instead of going to their afternoon plans.
The Chocolate Overload
Use chocolate ice cream instead of vanilla, and add 2 tablespoons of chocolate syrup to the blend. Top with chocolate shavings and a chocolate-dipped cookie. This version is for those days when you need chocolate like you need air — rich, decadent, and completely over-the-top in the best possible way. It's like someone turned a chocolate-covered cookie into drinkable form.
The Vegan Victory
Substitute coconut milk for dairy milk, use coconut-based vanilla ice cream, and replace the cookie butter with a mixture of cookie butter and coconut cream. The coconut adds a tropical note that surprisingly complements the spices in the cookies. Even my dairy-loving friends prefer this version — the coconut adds a complexity that makes the flavors more interesting than the original.
Storing and Bringing It Back to Life
Fridge Storage
Here's the reality — milkshakes are best fresh, but life doesn't always cooperate with our dessert timing. If you absolutely must store leftovers (though honestly, I've never had this problem), transfer the milkshake to an airtight container and refrigerate for up to 24 hours. The texture will change significantly — it'll separate into layers and lose that gorgeous thick consistency. But don't despair! Give it a vigorous stir with a fork to reincorporate everything, then let it sit at room temperature for 10 minutes before serving. It won't be exactly the same, but it'll still taste like a cookie butter dream.
The cookie pieces will get soft during storage, transforming into cake-like nuggets that some people actually prefer. My sister claims the day-old version is better because "it's like drinking cookie cake," though purists might disagree. If you're storing individual portions, use small mason jars — they're the perfect size and the wide mouth makes stirring and eating directly from the jar easier than trying to scrape milkshake out of a narrow glass.
Freezer Friendly
You can freeze this milkshake, but you need to do it right. Pour leftovers into ice cube trays and freeze until solid, then transfer the cubes to a freezer bag. When you're ready to enjoy, blend the frozen cubes with a splash of milk until smooth. This method actually creates an even thicker, more ice-cream-like texture that's incredibly satisfying. The frozen cubes keep for up to a month, though they've never lasted more than a week in my freezer — they start calling to me around 11 PM on weeknights.
Best Reheating Method
I use "reheating" loosely here because you never want to actually heat a milkshake. Instead, let frozen portions thaw in the refrigerator for 30 minutes, then give them a good stir. For fridge-stored milkshakes, let them sit at room temperature for 10-15 minutes, then reblend briefly with a tablespoon of milk to restore the texture. The key is patience — trying to speed up the process with a microwave creates a curdled mess that tastes like cookie butter regret.
If you've frozen the milkshake cubes, you can also let a few cubes sit at room temperature for 5-7 minutes until they're just starting to soften around the edges. Eat them with a spoon like the world's most sophisticated ice cream — the center stays frozen while the edges become creamy, creating a texture experience that's completely different from the fresh version but equally addictive.