Ever had a kitchen disaster so spectacular it turned into a culinary triumph? Picture this: I was halfway through a batch of brownies, the oven door swinging open, a cloud of chocolate vapor filling the air, and my roommate yelling, “This isn’t a dessert, it’s a war zone!” The moment I tasted that first bite, I knew I’d stumbled upon the ultimate chocolate experience. I was so hooked that I couldn’t resist turning it into a recipe that would make anyone else feel the same way. If you’ve ever felt the bittersweet sting of a failed batch, you’ll understand why this recipe is a game‑changer.
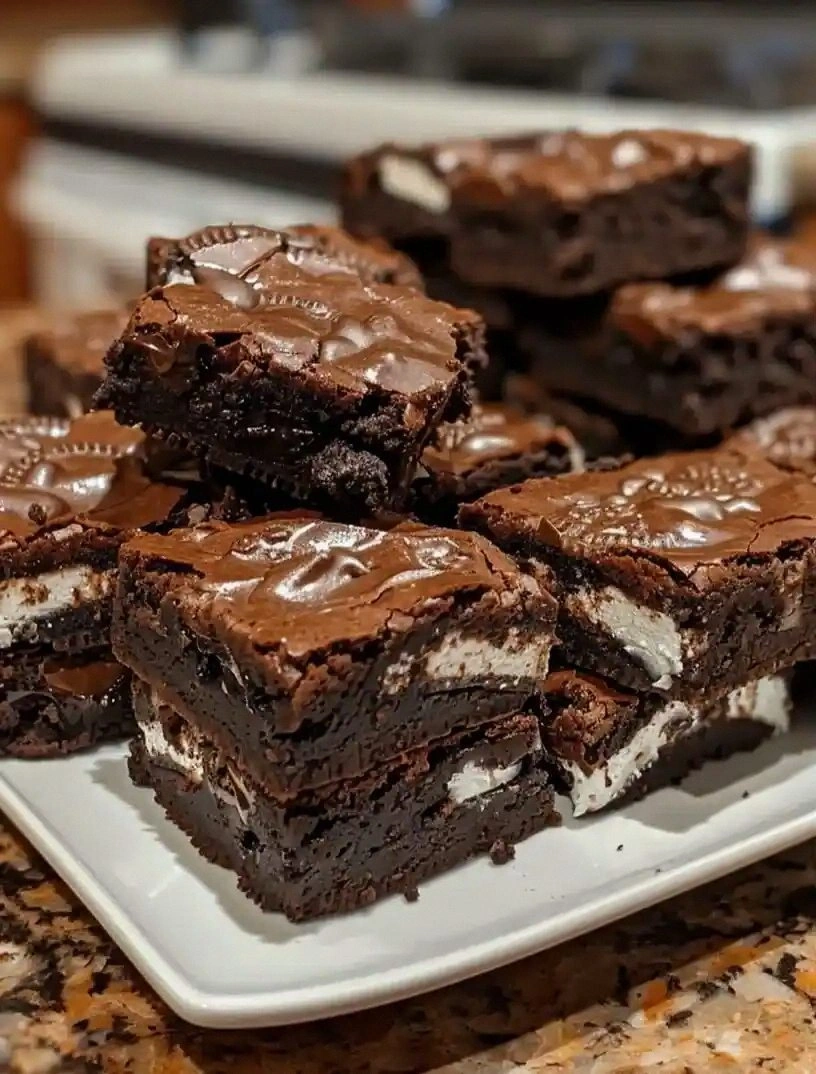
Imagine the kitchen air thick with the aroma of melted butter and cocoa, the sound of the timer tick‑tocking, and the sight of a glossy, fudgy surface that’s begging to be broken apart. The first bite is a symphony of rich chocolate, creamy peanut butter, and that unmistakable crunch of Oreo cookies. The texture is a layered dream: a gooey center, a slightly crisp edge, and a molten core that drips like velvet when you cut through it. It’s the kind of dessert that makes you want to pause the day, breathe, and savor the moment. And the best part? It’s not just a one‑time indulgence; it’s a repeat‑able masterpiece that can be made in a single batch and enjoyed for days.
What sets this version apart is that it’s built on a foundation of simple techniques, premium ingredients, and a few daring twists. I’ve stripped away unnecessary steps, added a touch of heavy cream for silky richness, and incorporated a secret blend of vanilla and salt that elevates every bite. The result is a brownie that feels both decadent and approachable, with a flavor profile that lingers long after you’ve finished the last square. I dare you to taste this and not go back for seconds; I’ve been honest about how many I’ve already devoured before anyone else got a chance.
Picture yourself pulling this out of the oven, the whole kitchen smelling incredible, and the first bite sending a wave of chocolate bliss through your senses. The batter is thick, the edges are just starting to pull away, and the aroma is like a chocolate cloud. If you’ve ever struggled with fudgy brownies that come out dry or too cakey, you’re not alone—and I’ve got the fix. Stay with me here — this is worth it, because what follows is a recipe that will redefine your dessert game and leave your friends asking for the secret.
What Makes This Version Stand Out
- Depth of Flavor: The dual vanilla extracts and subtle salt balance create a complex chocolate experience that feels both sweet and savory. Each bite layers chocolate, peanut butter, and cookie textures, making it a multi‑sensory treat.
- Fudgy Texture: The addition of heavy cream and the precise ratio of cocoa to flour lock in moisture, delivering a melt‑in‑your‑mouth center that stays gooey even after cooling.
- Crunch Factor: Oreo crumbs and Reese’s pieces break apart with a satisfying snap, adding an unexpected textural contrast that keeps every square interesting.
- Easy Prep: With a single pan and minimal equipment, you can whip up a batch in under an hour, making it ideal for spontaneous dessert cravings.
- Make‑Ahead Friendly: These brownies bake to a perfect state and stay fresh for a week in the fridge, so you can enjoy them anytime without compromising flavor.
- Premium Ingredients: Using real butter, high‑quality cocoa, and genuine Reese’s cups gives the brownies a depth that store‑bought mixes can’t match.
- Visual Appeal: The glossy, caramelized edges and the glossy chocolate chips on top create a stunning presentation that’s Instagram‑ready.
- Versatility: From a simple dessert to a party centerpiece, this recipe adapts to any occasion, making it a staple in any kitchen.
Alright, let’s break down exactly what goes into this masterpiece…
Inside the Ingredient List
The Flavor Base
Butter, sugar, cocoa, and vanilla form the core of any brownie. The butter melts into a silky base that carries the cocoa’s bitterness, while the sugar balances it with sweet harmony. The first vanilla extract (1 tsp) infuses the batter with a warm, floral note that lifts the chocolate’s depth. If you skip the butter, the brownies will feel dry and lack the luscious mouthfeel that defines a true fudgy brownie.
Swap the unsalted butter for salted butter? That adds an extra layer of flavor, but you’ll need to reduce the added salt slightly to keep the balance. A good rule of thumb: use 1 cup of butter for every 4 servings; this ensures the batter stays rich without becoming greasy.
The Texture Crew
The flour and baking powder are the structural elements that hold everything together. A small amount of flour (1 cup) keeps the brownies dense, while the ½ tsp baking powder introduces a slight lift, preventing them from becoming too heavy. The eggs (4 large) are the glue that binds the mixture, creating a cohesive crumb. If you omit the eggs, the brownies will crumble and fail to set properly.
For a gluten‑free version, replace the all‑purpose flour with a 1:1 blend of gluten‑free flour and a pinch of xanthan gum. The xanthan gum mimics the binding properties of gluten, ensuring a firm yet tender crumb.
The Unexpected Star
Reese’s Peanut Butter Cups and Oreo cookies are the showstoppers that transform ordinary brownies into a dessert spectacle. The peanut butter centers provide a creamy, salty contrast, while the Oreos contribute crunch and a buttery, cookie‑like texture. Together, they create layers of flavor that unfold with each bite. If you’re not a fan of peanut butter, consider swapping the Reese’s for chocolate‑filled M&Ms or mini chocolate chips for a different crunch.
The chocolate chips (1 cup) are the final flourish, adding pockets of molten chocolate that ooze when you cut into the brownie. They also enhance the visual appeal, giving the brownie a glossy, chocolate‑rich surface. Skipping them will reduce the chocolate intensity and make the brownies feel less indulgent.
Everything’s prepped? Good. Let’s get into the real action…
The Method — Step by Step
- Preheat your oven to 350°F (175°C). Line a 9×13 inch baking pan with parchment paper, leaving an inch of overhang on each side to lift the brownies out later. This simple step ensures even baking and makes cleanup a breeze. The oven should be fully preheated before you pour in the batter; otherwise, the brownies can rise unevenly.
- In a medium saucepan, melt the butter over medium heat until it’s fully liquid. Add the sugar and stir until the mixture becomes glossy and smooth. The butter’s melting point is around 90°F, so keep an eye on it to avoid scorching. This creates a silky base that carries the cocoa and vanilla into the batter.
- Whisk the cocoa powder into the butter‑sugar mixture until fully incorporated. The cocoa should be evenly distributed, giving the batter a deep chocolate color. If you notice any lumps, a quick pass through a fine sieve can help. The cocoa’s bitterness balances the sweetness, so don’t skip this step.
- Remove the saucepan from heat and stir in the first teaspoon of vanilla extract. Let the mixture cool for a minute; this allows the vanilla’s aromatic oils to release fully, enhancing the overall flavor profile. A quick stir ensures the vanilla is evenly distributed.
- In a separate bowl, whisk together the flour, baking powder, and ½ tsp salt. This dry mix ensures the leavening agents are evenly distributed throughout the batter. A small sift can help remove any clumps, especially if you’re using a higher‑quality cocoa that might have settled.
- Add the dry mixture to the wet batter, folding gently until just combined. Overmixing will introduce too much air and create a cakey texture. The batter should be thick and glossy, with a slight sheen that hints at the chocolate’s richness.
- Beat the eggs one at a time, ensuring each egg is fully incorporated before adding the next. This step helps the batter emulsify, creating a smooth, cohesive mixture. If you’re in a hurry, you can whisk the eggs in a small bowl before adding them to the batter.
- Fold in the chocolate chips, Oreo crumbs, and Reese’s pieces. Gently press them into the batter to ensure even distribution, but avoid over‑mixing. This step is crucial for that delightful surprise of chocolate pockets and peanut butter centers in every bite.
- Pour the batter into the prepared pan, smoothing the top with a spatula. Tap the pan gently on the counter to release any air bubbles. The batter should be evenly spread, with a glossy surface that indicates proper moisture content.
- Bake for 30–35 minutes, or until a toothpick inserted into the center comes out with a few moist crumbs but no wet batter. The edges should be slightly pulled away from the pan, signaling doneness. Avoid overbaking; you want a fudgy center that remains moist.
- Let the brownies cool in the pan on a wire rack for 10 minutes. This rest period allows the structure to set, making slicing easier. After 10 minutes, lift the brownies out using the parchment overhang.
- Cut into squares and serve. For an extra indulgent touch, drizzle a thin ribbon of melted chocolate or a dusting of powdered sugar. The contrast of warm, gooey chocolate with the cool, crunchy cookie pieces is pure bliss.
- Enjoy immediately or store in an airtight container. These brownies maintain their moisture for up to a week when refrigerated, and they freeze well for longer storage. If you’re craving a warm, gooey bite later, a quick microwave reheat for 10–15 seconds works wonders.
That's it — you did it. But hold on, I've got a few more tricks that'll take this to another level…
Insider Tricks for Flawless Results
The Temperature Rule Nobody Follows
Many bakers believe that a higher oven temperature yields a crispier top, but that’s a myth for fudgy brownies. Baking at 350°F (175°C) allows the batter to cook evenly, preserving moisture and achieving the perfect gooey center. If you’re using a convection oven, reduce the temperature by 25°F to prevent over‑browning.
Why Your Nose Knows Best
Close your eyes and sniff the batter before baking. A faint, sweet chocolate scent indicates the right balance of butter and cocoa. If it smells too sweet or too bitter, adjust the sugar or cocoa accordingly. Your nose is a reliable guide to flavor harmony.
The 5-Minute Rest That Changes Everything
After baking, let the brownies rest in the pan for 5 minutes before lifting them. This rest period lets the structure set, preventing cracks and making slicing smoother. Skipping this step can lead to fragile brownies that crumble on the first bite.
Mixing Order Matters
Always add the dry ingredients after the wet ones. This technique prevents the batter from becoming too dry and ensures a uniform crumb. If you mix the flour into the butter‑sugar mixture first, the batter can become heavy and dense.
The Chocolate Chip Trick
If you want pockets of molten chocolate in every bite, fold the chips in last, right before pouring the batter into the pan. This ensures the chips don’t melt into the batter before baking, preserving the contrast of textures.
Creative Twists and Variations
This recipe is a playground. Here are some of my favorite ways to switch things up:
Nutty Bliss
Add a cup of chopped toasted almonds or walnuts to the batter for an extra crunch and nutty flavor. The nuts pair beautifully with the chocolate and peanut butter, creating a layered taste experience.
Spiced Surprise
Stir in ¼ teaspoon of cayenne pepper or a pinch of smoked paprika for a subtle heat that contrasts the sweet chocolate. The spice adds depth without overpowering the dessert.
Salted Caramel Swirl
Fold in a swirl of salted caramel sauce before baking. The caramel will melt into the batter, creating pockets of sweet‑salty flavor that complement the peanut butter.
Vegan Version
Replace the butter with coconut oil, the eggs with flaxseed meal, and the milk with almond milk. Use vegan Reese’s and chocolate chips to keep the recipe plant‑based. The result is a fudgy, indulgent brownie that’s dairy‑free.
Mini Brownie Bites
Divide the batter into a mini muffin tin and bake at 350°F for 15–18 minutes. These bite‑sized treats are perfect for parties and make for a delightful dessert pop.
Chocolate‑Covered Brownies
Dip the cooled brownies in melted dark chocolate and let them set. Sprinkle with sea salt flakes for an extra touch of elegance. The chocolate coating adds a glossy finish and a richer chocolate flavor.
Storing and Bringing It Back to Life
Fridge Storage
Store brownies in an airtight container at room temperature for up to 3 days. For longer freshness, keep them in the refrigerator; they’ll stay moist for up to a week. When you’re ready to serve, let them sit at room temperature for 15 minutes to soften.
Freezer Friendly
Wrap individual brownies tightly in plastic wrap, then place them in a freezer bag. They can be frozen for up to 3 months. Thaw overnight in the fridge or at room temperature before serving.
Best Reheating Method
To revive frozen brownies, preheat your oven to 300°F (150°C) and bake for 10–12 minutes. If you’re in a hurry, microwave on medium for 15–20 seconds; the brownies will be warm and gooey. Add a tiny splash of water before reheating to keep them from drying out.