I’ll be honest — I ate half the batch before anyone else got to try it. It all started on a rainy Thursday when my teenage son dared me to turn our leftover fast‑food night into something that would actually make his friends jealous. I tossed a few wilted lettuce leaves, a stale bun, and a sad slab of cheese into a pot, and the kitchen erupted with a sizzle that sounded like applause. The air filled with that unmistakable aroma of caramelized onions, browned beef, and toasted breadcrumbs, and I thought, “Why not trap this chaos in a casserole?” That moment sparked the birth of the ultimate comfort dish, a cheeseburger casserole that feels like a hug from the inside out.
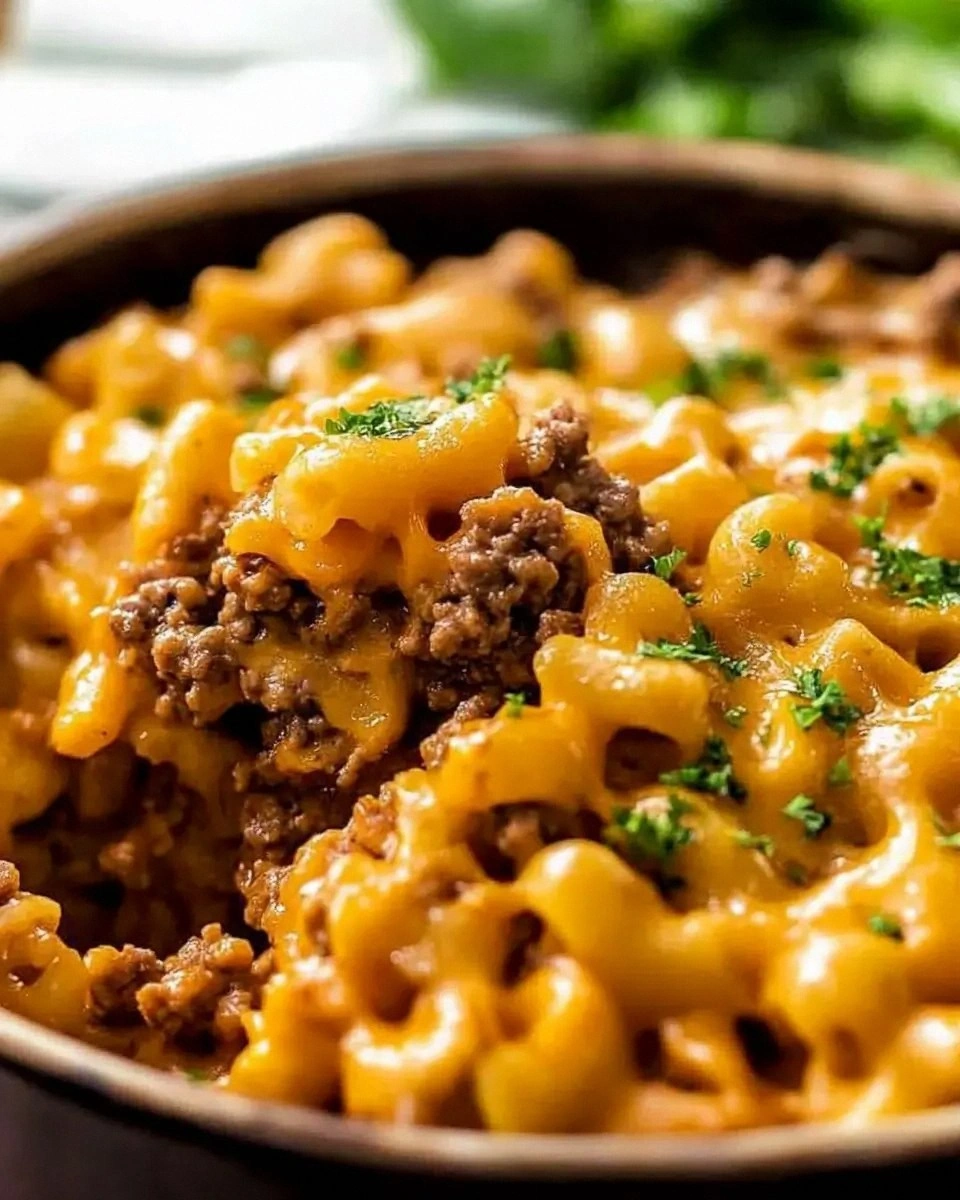
Picture yourself pulling this out of the oven, the whole kitchen smelling incredible, the cheese bubbling like a golden lake that refuses to stay still. The crust is crisped to perfection, cracking under the fork with a sound that reminds you of thin ice shattering on a winter pond. Inside, the layers of seasoned ground beef, creamy sauce, and that glorious mountain of cheddar create a texture symphony that’s simultaneously creamy, crunchy, and downright addictive. I dare you to taste this and not go back for seconds; the flavor combo is so spot‑on it practically rewrites the rules of what a casserole can be.
Most recipes get this completely wrong. They either drown the beef in a swamp of sauce or leave the cheese as a bland garnish. Here’s what actually works: a carefully balanced ratio of cheese to meat, a secret splash of Worcestershire that lifts the whole thing, and a topping that turns the top layer into a caramelized masterpiece. I’m not just talking about any cheddar; we’re using a sharp, aged cheddar that melts like velvet and then snaps back with a satisfying bite. And yes, there’s a little trick with the pasta that keeps it from turning mushy – a quick par‑boil and a cold water shock that locks in the bite.
Okay, ready for the game‑changer? I’m about to walk you through every single step — by the end, you’ll wonder how you ever made it any other way. This isn’t just a recipe; it’s a culinary adventure that will become the new family favorite, the dish you pull out for holidays, game nights, and those “I’m too lazy to cook” evenings. Let’s dive in and make some magic happen.
What Makes This Version Stand Out
- Flavor Explosion: The combination of seasoned beef, Worcestershire, and a splash of ketchup creates a depth that rivals any fast‑food joint, but with a homemade heart.
- Texture Harmony: A crunchy breadcrumb topping meets a creamy, cheese‑laden interior, delivering contrast that keeps every bite interesting.
- Simplicity: Fewer than ten ingredients, most of which you already have in your pantry, mean you can throw this together on a Tuesday night without a grocery run.
- Unique Twist: A dash of smoked paprika adds a subtle smokiness that makes the casserole taste like it’s been slow‑cooked for hours.
- Crowd Reaction: Kids call it “cheesy goodness,” adults call it “comfort food redefined,” and everyone leaves the table asking for the recipe.
- Ingredient Quality: Using sharp, aged cheddar instead of mild cheddar gives a richer flavor and a melt that’s both silky and slightly stringy.
- Cooking Method: Baking at a high temperature first, then lowering it for a gentle finish, ensures a perfectly browned top without drying out the interior.
- Make‑Ahead Potential: Assemble the night before, refrigerate, and bake fresh the next day – perfect for busy weekdays.
Inside the Ingredient List
The Flavor Base
Ground beef is the backbone of this casserole, providing that meaty richness we all crave. I recommend an 80/20 blend; the little extra fat renders into a buttery sauce that carries the seasonings beautifully. If you skip the beef, the dish loses its hearty core and becomes a cheesy pasta bake, which, while tasty, isn’t the cheeseburger experience we’re aiming for.
Onion and garlic are the silent heroes, releasing sweet aromatics that mingle with the meat. Dice the onion finely so it melts into the sauce, and sauté until translucent – that’s the moment you’ll hear the sizzle that promises flavor depth. A pinch of salt at this stage helps draw out moisture, preventing a soggy casserole later.
Worcestershire sauce, ketchup, and a splash of beef broth create a tangy‑sweet glaze that mimics the classic cheeseburger sauce. If you’re out of Worcestershire, a teaspoon of soy sauce plus a dash of liquid smoke can stand in, but the authenticity drops a notch.
The Texture Crew
Elbow macaroni, shells, or even penne work wonders, but I stick with elbow for its pocket‑like shape that cradles the cheese. Cook it al dente – you want a slight bite because the oven will finish the cooking. Overcooking here leads to a mushy, unappealing texture that no amount of cheese can rescue.
Breadcrumbs mixed with melted butter create a golden topping that crackles like a fresh‑baked biscuit. For an extra flavor boost, toss in a teaspoon of smoked paprika; it adds a subtle earthiness that elevates the whole dish.
The Unexpected Star
Shredded cheddar cheese isn’t just a topping; it’s the soul of this casserole. I use 3 ½ cups of sharp cheddar, grated just before you add it to ensure it melts evenly. If you substitute with a milder cheese, you’ll miss the tangy bite that cuts through the richness of the beef.
A secret addition is a handful of grated Parmesan mixed into the cheese blend. It adds a nutty undertone and helps the cheese form a slightly crispy crust as it bakes. Skipping the Parmesan means losing that subtle crunch that makes the top layer irresistible.
The Final Flourish
A drizzle of heavy cream just before baking transforms the sauce into a silky blanket that clings to every noodle and morsel of meat. It’s the difference between “cheesy” and “cheese‑kissed.” If you’re dairy‑free, coconut cream can substitute, but expect a faint coconut flavor.
Finally, a sprinkle of fresh chives or green onions adds a bright, herbaceous finish that cuts through the richness and gives the dish a pop of color. Forgetting this step makes the casserole look dull and taste one‑dim.
Everything's prepped? Good. Let's get into the real action...

The Method — Step by Step
Preheat your oven to 425°F (220°C). This high heat will give the top a rapid rise, creating those coveted crispy edges that shatter like thin ice. While the oven warms, grease a 9‑by‑13‑inch casserole dish with a thin layer of butter so nothing sticks.
In a large skillet, heat a tablespoon of olive oil over medium‑high heat. Add the diced onion and sauté until it turns translucent and starts to caramelize – that’s the sweet scent that tells you you’re on the right track. Then toss in the garlic, cooking just 30 seconds more to avoid bitterness.
Add the ground beef, breaking it up with a wooden spoon. Brown it until no pink remains, letting the juices render fully. Sprinkle in the smoked paprika, salt, and pepper, then stir in Worcestershire sauce, ketchup, and beef broth. Let the mixture simmer for five minutes, allowing the flavors to meld.
Watch Out: If you turn the heat too high now, the sauce will scorch and give a bitter note. Keep it at a gentle simmer.While the meat sauce simmers, bring a large pot of salted water to a boil. Add the elbow macaroni and cook for 6‑7 minutes, just shy of al dente. Drain, then rinse under cold water for a few seconds – this stops the cooking process and keeps the pasta firm.
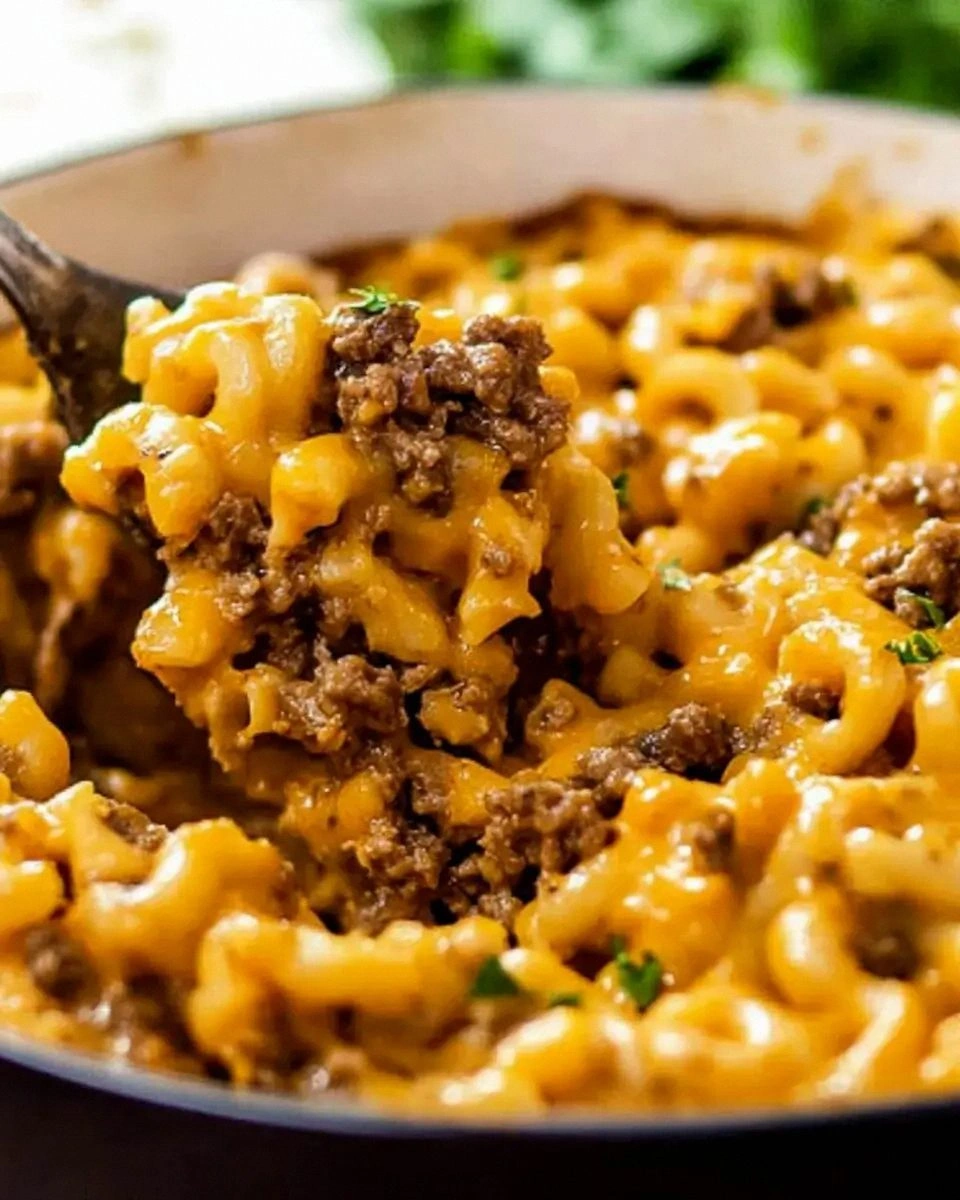
In a large mixing bowl, combine the cooked pasta, beef sauce, and a splash of heavy cream. Toss everything together until the noodles are evenly coated. This is the moment of truth: the sauce should cling to the pasta like a silky veil, not pool at the bottom.
Transfer the mixture into the prepared casserole dish, spreading it out in an even layer. Sprinkle the shredded cheddar cheese (3 ½ cups) over the top, then add the Parmesan blend for extra crunch. Finally, scatter the buttered breadcrumb mixture evenly across the surface.
Place the casserole in the oven and bake at 425°F for 12‑15 minutes, or until the cheese bubbles and the breadcrumbs turn a deep golden brown.
Kitchen Hack: For an extra‑crispy top, switch the oven to broil for the last 2 minutes, but watch closely to avoid burning.Reduce the oven temperature to 350°F (175°C) and let the casserole continue baking for another 10‑12 minutes. This lower heat allows the interior to set without drying out, ensuring each bite is moist and cheesy. When the edges start pulling away from the dish, you know it’s ready.
Remove the casserole from the oven and let it rest for 5‑7 minutes. This rest period lets the sauce thicken slightly, making it easier to cut clean slices. Garnish with fresh chives, slice, and serve while the cheese is still stretchy.
That's it — you did it. But hold on, I've got a few more tricks that'll take this to another level. Trust me, these little secrets will make your next round even more unforgettable.
Insider Tricks for Flawless Results
The Temperature Rule Nobody Follows
Most home cooks bake casseroles at a single temperature, but the two‑stage heat approach we used creates a perfect crust while keeping the interior juicy. The initial blast at 425°F gives that rapid browning; the subsequent drop to 350°F ensures the middle stays moist. I once tried skipping the second stage and ended up with a burnt top and soggy center – a culinary disaster I’ll never repeat.
Why Your Nose Knows Best
Your sense of smell is the ultimate timer. When the cheese starts to caramelize, you’ll notice a nutty, buttery aroma that signals the perfect moment to pull the dish out. If you rely solely on the clock, you might over‑bake and lose that magical gooey stretch.
The 5‑Minute Rest That Changes Everything
Letting the casserole sit after baking allows the sauce to thicken and the flavors to meld. Those five minutes are crucial; they prevent the dish from sliding off the plate like a slip‑n‑slide. A friend once tried to serve it hot off the tray and the cheese strands flew everywhere – not the Instagram moment we want.
Breadcrumb Butter Boost
Melt the butter and toast the breadcrumbs on a separate pan for two minutes before sprinkling them on top. This extra step adds a toasty depth that plain melted butter can’t achieve. If you skip it, the topping will be buttery but lack that signature crunch.
Cheese Layering Magic
Instead of dumping all the cheddar at once, I like to do a 70/30 split: 70% under the pasta, 30% on top. The lower layer melts into the sauce, while the top layer creates that beautiful golden crust.
Creative Twists and Variations
This recipe is a playground. Here are some of my favorite ways to switch things up:
BBQ Bacon Blast
Swap half the ketchup for smoky BBQ sauce and fold in crisp‑fried bacon bits. The result is a sweet‑smoky profile that makes the casserole taste like a backyard grill.
Spicy Jalapeño Kick
Add finely diced jalapeños to the meat sauce and sprinkle a pinch of cayenne into the breadcrumb topping. This gives a subtle heat that wakes up the palate without overwhelming the cheese.
Veggie‑Loaded Version
Mix in roasted red peppers, zucchini cubes, and corn kernels. The veggies add color, texture, and a burst of freshness that balances the richness.
Tex‑Mex Fusion
Replace Worcestershire with taco seasoning, add black beans, and top with a blend of Monterey Jack and cheddar. Serve with a side of salsa and sour cream for a southwestern spin.
Breakfast Casserole Remix
Stir in scrambled eggs and crumble cooked breakfast sausage into the mix. Finish with a sprinkle of shredded mozzarella and bake as usual – perfect for a weekend brunch.
Storing and Bringing It Back to Life
Fridge Storage
Allow the casserole to cool to room temperature, then cover tightly with foil or a plastic lid. It will keep fresh for up to three days. When reheating, add a splash of water (about two tablespoons) to the edges before covering with foil – the steam will revive the creamy interior.
Freezer Friendly
Portion the casserole into freezer‑safe containers, leaving a little headspace for expansion. Freeze for up to two months. Thaw overnight in the refrigerator, then bake at 350°F for 20‑25 minutes, again adding a splash of water to keep it moist.
Best Reheating Method
The oven is your best friend for reheating. Preheat to 325°F, cover with foil for the first 10 minutes, then uncover to let the top crisp up. Microwaving works in a pinch, but you’ll lose that glorious crust.