A tangy, creamy slice of sunshine that never needs an oven.
The first time I tasted a key lime pie, I was on a sun‑drenched porch in Key West, the ocean breeze teasing my senses while the tart lime filling danced against a buttery crust. I remember the way the lime’s sharp citrus notes cut through the sweet, creamy texture, creating a perfect balance that felt like a mini‑vacation in every bite. That memory stayed with me, and over the years I’ve tried countless variations—some baked, some chilled, some with unconventional crusts—yet none captured the pure, effortless elegance of the classic no‑bake version.
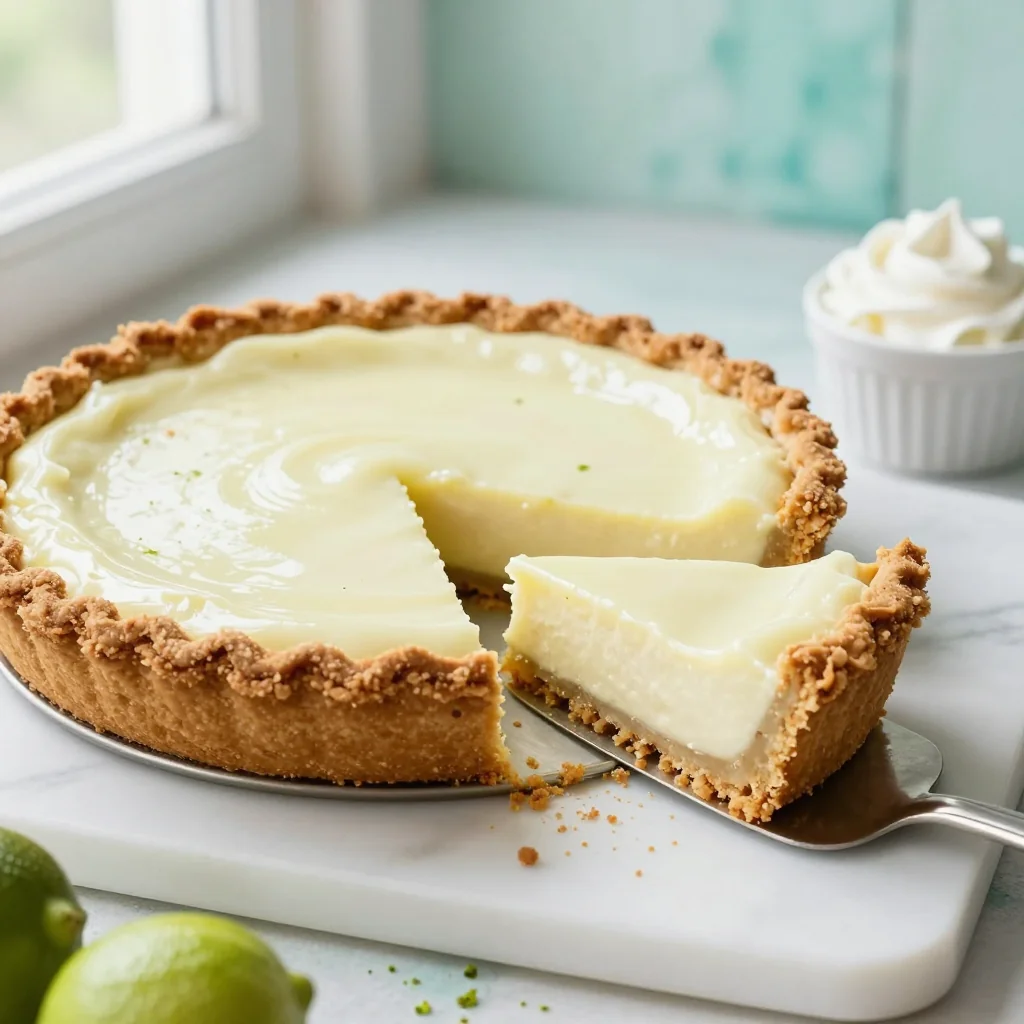
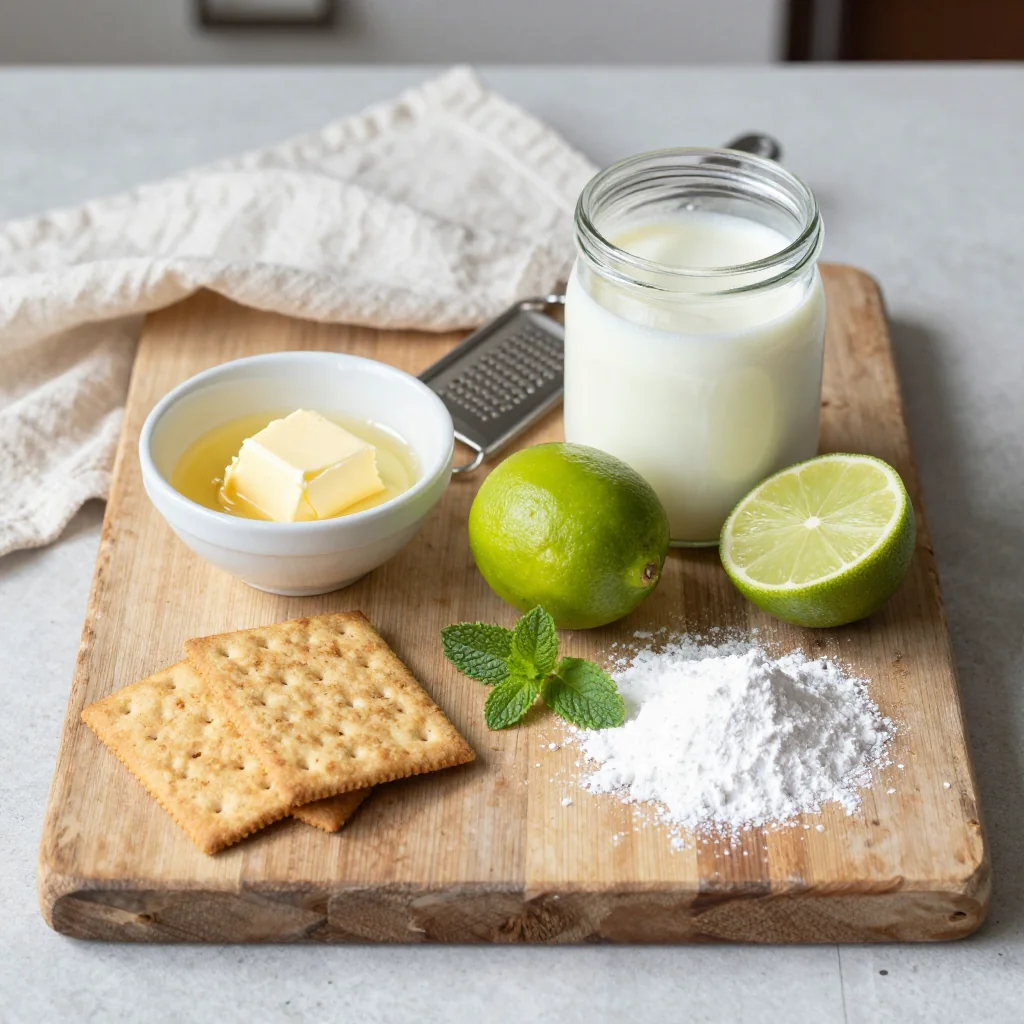
Originating from the Florida Keys, the key lime pie is a beloved American dessert that celebrates the region’s signature fruit. Traditionally, the crust is made from crushed graham crackers, butter, and a touch of sugar, while the filling combines sweetened condensed milk with freshly squeezed lime juice and zest. The magic lies in the chemical reaction between the acidic lime and the dairy, which thickens the mixture without any heat. This makes the pie not only quick to assemble but also a perfect make‑ahead treat for any occasion.
In this article, I’ll walk you through every step—from creating a perfectly crumbly graham crust to achieving a silky, tangy filling that sets beautifully in the refrigerator. You’ll learn the science behind the no‑bake texture, discover tips for selecting the freshest key limes, and see how a few simple tweaks can elevate the dessert from ordinary to unforgettable.
I’m thrilled to share this recipe with you, and I hope it becomes a staple in your dessert repertoire. Let’s dive in and create a slice of sunshine together!
🌟 Why This Recipe Will Win Your Heart
Whether you’re a seasoned baker or a kitchen novice, this no‑bake key lime pie offers something special for every palate.
- ✨ Effortless Preparation: No oven, no mess—just mix, press, chill, and serve. Perfect for hot summer days or when you simply don’t want to heat up the kitchen.
- ✨ Fresh, Bright Flavor: Real key lime juice provides an authentic, aromatic tang that bottled alternatives can’t match.
- ✨ Versatile Crust Options: The homemade graham crust can be swapped for gluten‑free or even almond‑based bases without compromising texture.
- ✨ Crowd‑Pleasing Appeal: Its vibrant green hue and glossy finish make it a visual centerpiece at parties, picnics, and holiday tables.
- ✨ Nutritional Balance: While indulgent, the pie offers a good dose of calcium from the dairy and vitamin C from the lime.
- ✨ Customizable Sweetness: Adjust the sugar level in the crust or the amount of condensed milk to suit your personal sweetness preference.
🥗 Ingredients
📝 Complete Ingredient List
For the Graham Crust:
For the Lime Filling:
For the Topping:
🔍 Focus on Key Ingredients
Key Limes
Key limes are smaller and more aromatic than regular Persian limes, delivering a sharper, more floral acidity that defines the pie’s signature bite. When selecting limes, look for thin, smooth skins and a fragrant scent; avoid any that feel soft or have blemishes. Their juice should be bright green and slightly cloudy—signs of freshness. If you can’t find true key limes, a mix of Persian lime juice and a dash of orange zest mimics the complex flavor profile.
Sweetened Condensed Milk
This pantry staple provides the creamy body and sweetness needed to balance the tart lime. The high sugar concentration also aids the thickening process when combined with the acidic juice, creating a custard‑like consistency without heat. For a lower‑fat version, you can substitute with a reduced‑fat condensed milk, though the texture will be slightly less velvety.
Heavy Cream
Whipping the heavy cream introduces air, lightening the filling and giving it a luscious mouthfeel. When folded gently into the lime‑condensed milk mixture, it prevents the filling from becoming overly dense. Be sure to chill the bowl and whisk before whipping to achieve stiff peaks quickly.
🔄 Quick Substitutions
| If you don’t have... | Use instead... |
|---|---|
| Graham crackers | Gluten‑free graham‑style crackers or crushed digestive biscuits |
| Key limes | Persian limes + 1 tsp orange zest |
| Heavy cream | Chilled coconut cream (for dairy‑free) or whipped Greek yogurt |
👨🍳 Step‑by‑Step Instructions
Follow these detailed steps to create a flawless no‑bake key lime pie that will impress every guest.
📋 Phase 1: Preparation & Mise en Place
Gather your tools, measure ingredients, and pre‑chill the crust pan.
Prepare the Crust Base
In a large mixing bowl, combine the graham cracker crumbs, melted butter, and granulated sugar. Stir until the mixture resembles wet sand, with each crumb lightly coated in butter. This ensures the crust will bind together once pressed.
Press the Crust into the Pan
Transfer the crumb mixture into a 9‑inch (23 cm) springform pan. Press firmly with the back of a spoon or the bottom of a glass, creating an even layer about ½ cm thick. Chill the crust in the freezer for 10 minutes to set it before adding the filling.
🔥 Phase 2: Filling & Assembly
Create the silky lime filling and combine it with the chilled crust.
Whip the Heavy Cream
In a chilled bowl, whisk the heavy cream until soft peaks form. This should take about 2‑3 minutes with an electric mixer on medium speed. Be careful not to over‑whip; you want a light, airy texture.
Blend Lime Juice, Zest, and Condensed Milk
In a separate bowl, whisk together the sweetened condensed milk, fresh key lime juice, and lime zest. The mixture will appear thin at first but will thicken as the acid reacts with the milk proteins.
Fold Whipped Cream into the Lime Mixture
Gently fold the whipped cream into the lime‑condensed milk blend using a spatula. Perform a few gentle strokes until the mixture is uniform, airy, and glossy. This step creates the characteristic lightness of a no‑bake pie.
Pour Filling onto the Chilled Crust
Remove the crust from the freezer. Pour the lime filling over the crust, spreading it evenly with a spatula. Tap the pan lightly on the counter to release any air bubbles.
✨ Phase 3: Finishing & Serving
Chill, garnish, and present your masterpiece.
Refrigerate the Pie
Cover the pie loosely with plastic wrap and refrigerate for at least 4 hours, preferably overnight. This allows the filling to set firmly and the flavors to meld.
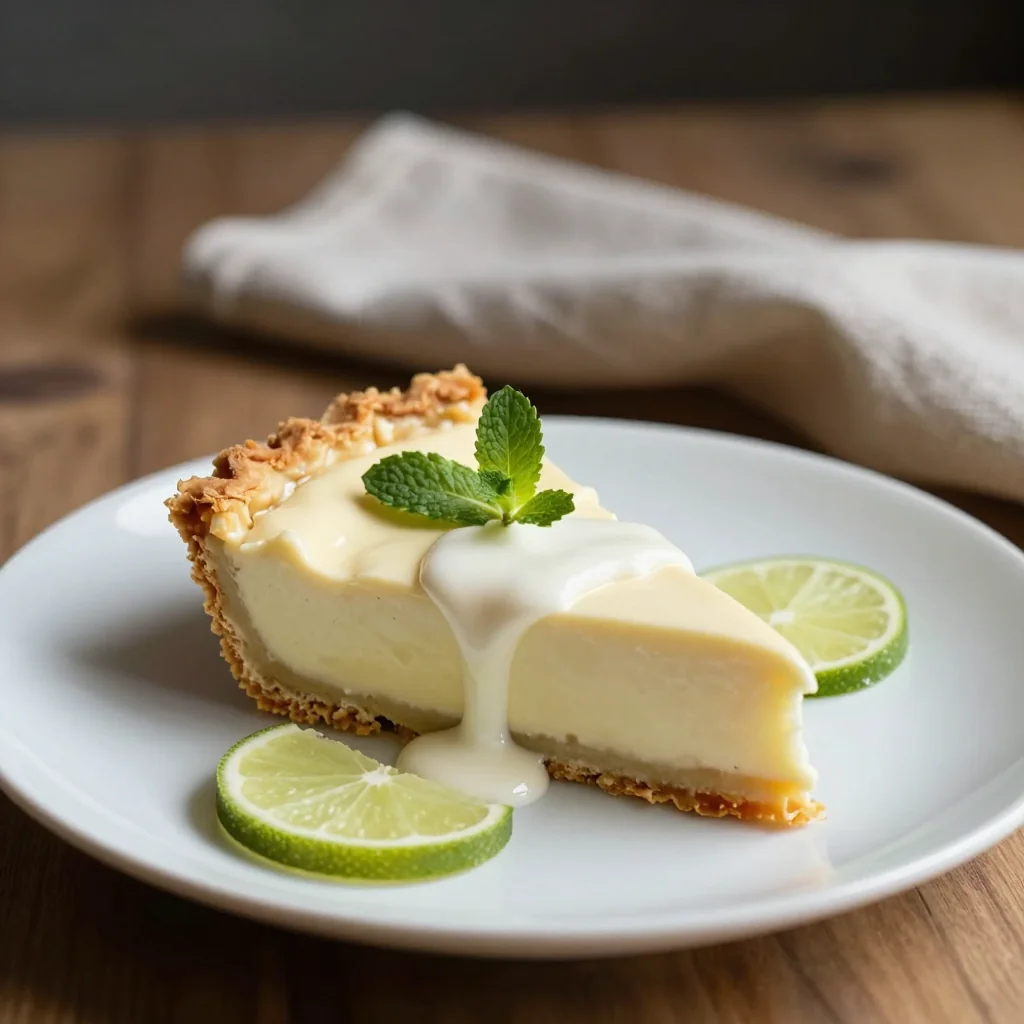
Garnish Before Serving
Just before serving, dollop a generous spoonful of whipped cream on top and sprinkle with fresh lime zest. For extra visual flair, add a few thin lime wheels around the edge.
Slice and Enjoy
Release the springform pan, slice the pie with a hot, wet knife for clean cuts, and serve chilled. Pair with a light, citrus‑forward white wine or a sparkling water with a splash of lime.
💡 Expert Tips & Tricks
🛒 Choosing the Right Ingredients
Freshness is paramount. Opt for organic graham crackers without added flavors, as they provide a neutral canvas for the lime. When buying limes, select those that are heavy for their size, indicating higher juice content. If you’re using a canned condensed milk, check the expiration date; older cans can develop off‑flavors that will affect the final taste.
🔪 Preparation Techniques
For a perfectly uniform crust, press the crumb mixture with the back of a flat measuring cup. This distributes pressure evenly and prevents cracks. When zesting limes, avoid the white pith—it’s bitter. Use a microplane for fine zest that incorporates seamlessly into the filling.
🌡️ Mastering the No‑Bake Set
The key to a firm yet creamy texture is the acid‑protein reaction. Ensure the lime juice is at room temperature before mixing; cold juice can cause the mixture to seize. Refrigerate the pie for a minimum of four hours; shorter chilling times may result in a runny center.
🍽️ Presentation & Service
Serve the pie on a chilled platter to keep it cool longer. Garnish with a thin lime wheel and a sprig of mint for a pop of color. If you’re serving guests with dietary restrictions, offer a small side of fresh berries to add a burst of sweetness without compromising the pie’s flavor.
🏆 Pro Tips
Professional chefs rely on precision and science to turn a simple dessert into a show‑stopping masterpiece.
- 🎯 Control the Acid Ratio: The ideal lime‑to‑condensed‑milk ratio is roughly 1:3 by volume. Too much acid can cause the mixture to become grainy; too little leaves the filling flat. Use a digital scale for exact measurements.
- 🎯 Use a Silicone Mold: For a flawless edge, press the crust into a silicone springform pan. The flexibility makes unmolding effortless and preserves the pie’s shape.
- 🎯 Whip Cream to Soft Peaks: Soft peaks incorporate more air, yielding a lighter texture. Over‑whipping reduces the ability of the cream to blend smoothly, resulting in a dense filling.
- 🎯 Chill the Mixing Bowls: Cold bowls slow down the thickening reaction, giving you more time to fold the cream without the mixture setting prematurely.
- 🎯 Add a Pinch of Salt: A tiny pinch (≈0.5 g) of fine sea salt enhances the lime’s brightness and balances the sweetness of the condensed milk.
- 🎯 Finish with a Torched Garnish: Lightly torch the lime zest on top for a subtle caramelized aroma that adds depth without altering the core flavor.
"A perfect key lime pie is the epitome of balance—tart, sweet, creamy, and crisp all at once." — Thomas Keller
🔄 Variations & Adaptations
This recipe is a canvas—feel free to paint it with your favorite flavors and dietary tweaks.
🥬 Vegetarian / Vegan Version
Replace the dairy components with plant‑based alternatives. Use coconut cream (well‑chilled) instead of heavy cream, and opt for a vegan sweetened condensed milk made from coconut milk and cane sugar. The graham crust can be made with vegan butter or coconut oil.
- Vegan condensed milk: 400 ml (same volume)
- Coconut cream: 240 ml, whipped to soft peaks
🌶️ Flavor Variations
Play with complementary flavors to keep the pie exciting. The citrus base pairs beautifully with tropical, spicy, or herbaceous notes.
Spicy Version:
Add ½ teaspoon of finely ground cayenne pepper to the filling for a gentle heat that accentuates the lime’s brightness.
Mediterranean Version:
Infuse the crust with a teaspoon of finely chopped rosemary and replace lime zest with a hint of orange zest for a fragrant twist.
Asian Fusion Version:
Incorporate 1 teaspoon of toasted sesame oil into the crust and garnish with a drizzle of yuzu‑infused honey for an exotic finish.
⚠️ Dietary Adaptations
Gluten‑Free:
Use certified gluten‑free graham crackers or substitute with almond flour mixed with a tablespoon of honey for binding.
Lactose‑Free:
Swap heavy cream for lactose‑free whipping cream and ensure the condensed milk is dairy‑free.
Low‑Calorie:
Reduce the sugar in the crust to 10 g, use light condensed milk (reduced sugar), and replace half of the heavy cream with low‑fat Greek yogurt for a tangy, lighter texture.
👶 Kid‑Friendly Version
Kids love the bright color! Omit the lime zest garnish if it’s too strong, and serve with a side of fresh berries to add natural sweetness. You can also drizzle a thin layer of chocolate ganache for an extra treat.
📦 Storage & Reheating
🧊 Conservation
Refrigerator:
- Duration: 4 days
- Recommended container: airtight glass or plastic dome
- Tip: Place a sheet of parchment between the pie and the lid to prevent condensation.
Freezer:
- Duration: 1 month
- Method: Wrap tightly in plastic wrap, then a foil layer.
- Defrosting: Transfer to refrigerator overnight; avoid microwave to preserve texture.
💡 For best flavor, consume within a week; the lime aroma diminishes over time.
♨️ Reheating
Oven (Recommended):
- Preheat to 150 °C (300 °F).
- Cover the pie loosely with aluminum foil.
- Heat for 8‑10 minutes to soften the filling slightly.
- Remove foil and heat an additional 2 minutes for a gentle surface warmth.
Microwave (Quick):
- Cover with a microwave‑safe lid.
- Heat on medium power for 30‑45 seconds.
- Stir gently if needed and repeat in 15‑second bursts.
Stovetop:
Place a slice in a non‑stick skillet over low heat, cover, and warm for 2‑3 minutes. This method keeps the crust crisp while gently warming the filling.
🍷 Perfect Pairings
🥗 Side Dishes
- Fresh Fruit Salad: A mix of mango, pineapple, and berries adds tropical brightness that echoes the lime.
- Light Green Salad: Arugula with citrus vinaigrette provides a peppery contrast.
- Caramelized Banana Slices: Their sweet caramel notes balance the tartness of the pie.
🍷 Wine & Beverage Pairings
- Riesling (off‑dry): Its subtle sweetness mirrors the condensed milk while its acidity matches the lime.
- Prosecco: Bubbles cleanse the palate between bites.
- Non‑Alcoholic: Sparkling lime‑infused water with a sprig of mint.
🍰 Completing the Meal
Begin with a light citrus‑based appetizer such as shrimp ceviche, follow with the key lime pie for dessert, and finish with a small serving of espresso‑infused dark chocolate truffles to round out the flavor journey.
❓ Frequently Asked Questions
Q: Can I use regular limes instead of key limes?
Yes, regular Persian limes work well, but they are less aromatic and slightly larger. To mimic the unique flavor of key limes, add a teaspoon of orange zest and a pinch of sea salt. The added zest brings a subtle floral note that bridges the flavor gap.
Q: How do I prevent the crust from becoming soggy?
The key is to keep the crust dry before adding the filling. Press the crumb mixture tightly and chill it for at least 10 minutes. The butter solidifies, creating a moisture‑proof barrier. Also, avoid over‑mixing the filling; excess liquid can seep into the crust.
Q: What if I don’t have a springform pan?
A regular 9‑inch pie dish works fine; just line the bottom with parchment paper before pressing the crust. When removing the pie, gently loosen the edges with a thin knife. The crust may be slightly less uniform but still delicious.
Q: My filling stayed runny after chilling. What went wrong?
A common issue is using cold lime juice, which slows the thickening reaction. Ensure the juice is at room temperature and measure accurately. Also, verify that the condensed milk is not low‑fat, as reduced‑fat versions may need extra lime juice or a short whisking period to set.
Q: Can I add a different garnish besides lime zest?
Absolutely! Fresh mint leaves, toasted coconut flakes, or a drizzle of raspberry coulis add color and complementary flavors. Choose garnishes that won’t overpower the delicate lime taste.
Q: Is it safe to make this pie ahead of time for a party?
Yes, the pie can be prepared up to 24 hours in advance. Keep it covered and refrigerated. If you need to transport it, place the pan in a cooler with ice packs to maintain a consistent temperature.
🎉 Let’s Get Baking!
This No‑Bake Key Lime Pie combines the tang of fresh limes with a buttery graham crust, delivering a dessert that feels both luxurious and effortlessly simple. Its bright flavor profile makes it a perfect centerpiece for summer gatherings, while its no‑bake nature keeps your kitchen cool. By following the detailed steps, you’ll achieve a silky, set filling that holds its shape beautifully, and the optional variations let you tailor the pie to any dietary need or flavor craving.
I can’t wait to see how you make this recipe your own. Share your photos, tell us about any twists you tried, and leave a rating so we can keep improving. Happy cooking, and enjoy every citrus‑kissed bite!
Have you tried this recipe?
Leave a comment and rating below! Share your photos on Instagram with #KeyLimeJoy to be featured.
No Bake Key Lime Pie with Homemade Graham Crust
A tangy, creamy slice of sunshine that never needs an oven.
📝 Ingredients
Graham Crust
Lime Filling
Topping
👨🍳 Instructions
- 1 Mix graham crumbs, melted butter, and sugar until evenly coated.
- 2 Press mixture into a 9‑inch springform pan and chill 10 minutes.
- 3 Whip heavy cream to soft peaks.
- 4 Whisk condensed milk, lime juice, and zest together.
- 5 Fold whipped cream into lime mixture gently.
- 6 Pour filling onto chilled crust, smooth top.
- 7 Refrigerate at least 4 hours (overnight ideal).
- 8 Top with whipped cream and lime zest before serving.
- 9 Slice with a hot, wet knife for clean cuts.
- 10 Enjoy with your favorite beverage and share!
🥗 Nutrition (per serving)
*Values are estimates based on standard ingredients.
📚 You Might Also Like
Passion Fruit No‑Bake Pie
Mango Cheesecake
Coconut Lime Tart


💬 Comments & Reviews
Leave a Comment
Comments will appear here once readers share their thoughts.