I was halfway through a frantic Monday night when my roommate dared me to create a dessert that could stop the world’s most stubborn pumpkin‑hater in its tracks. I laughed, grabbed a can of pumpkin puree, and set the oven to a toasty 350°F, only to discover that the kitchen smelled like a cozy autumn cabin before the batter even hit the bowl. The moment the spices hit the air, I felt a rush of nostalgia—like the first leaf‑crunch underfoot on a crisp October morning, but with a sweet, buttery whisper that made my heart race. I’ll be honest — I ate half the batch before anyone else got a chance to try it, and that’s a confession I’m not ashamed to make because those who’ve tasted my version never look back.
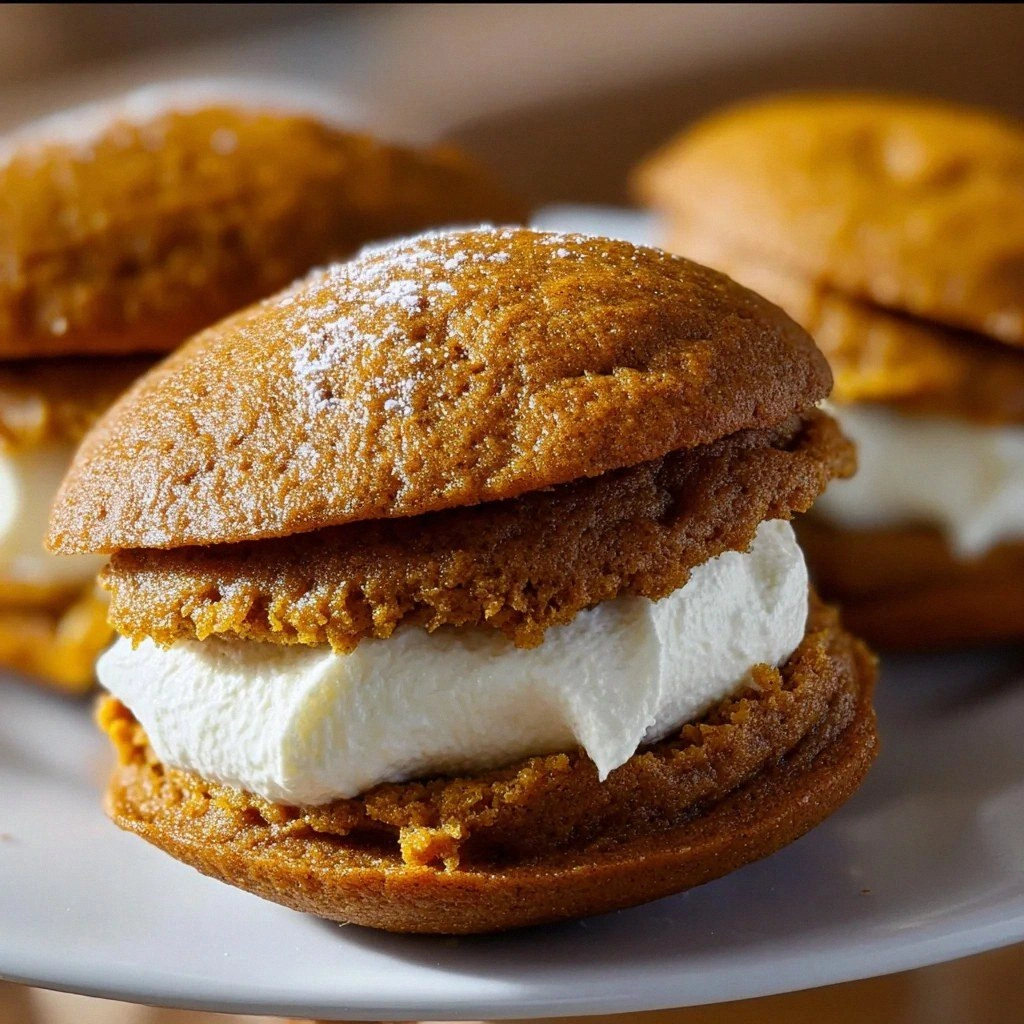
What makes a whoopie pie truly unforgettable is the balance between a fluffy, cake‑like cookie and a luscious, melt‑in‑your‑mouth filling. Most recipes get the texture wrong, producing a dry outer shell that feels more like a stale biscuit than a pillow of pumpkin goodness. I’ve spent weeks tweaking ratios, testing different fats, and even experimenting with the type of pumpkin puree (canned vs. fresh) until I nailed a version that is simultaneously airy, moist, and rich—like biting into a cloud that’s been kissed by cinnamon. This is hands down the best version you’ll ever make at home, and I’m about to prove it with every step.
Picture yourself pulling these golden‑brown gems from the oven, the kitchen filled with the scent of nutmeg, ginger, and caramelized sugar, and a slight steam rising from the soft centers. The first bite delivers a crackle on the outside, then the cake gives way to a velvety interior that’s studded with tiny pockets of pumpkin‑spice perfume. I dare you to taste this and not go back for seconds—trust me, your taste buds will file a formal complaint if you try.
Okay, ready for the game‑changer? I’m about to reveal a secret ingredient that most bakers overlook: a splash of vegetable oil that keeps the cookies tender without weighing them down. This tiny addition, combined with a precise balance of leavening agents, is the reason these whoopie pies rise like a perfect autumn sunrise. Let me walk you through every single step — by the end, you’ll wonder how you ever made it any other way.
What Makes This Version Stand Out
- Flavor Explosion: The blend of cinnamon, nutmeg, ginger, and cloves creates a pumpkin‑pie spice mix that sings louder than a choir of falling leaves.
- Texture Harmony: A light, cake‑like crumb meets a creamy, tangy cream‑cheese filling that melts on your tongue like butter on warm toast.
- Simplicity: Only pantry staples are required, so you won’t need a trip to a specialty store to achieve gourmet results.
- Unique Twist: The addition of vegetable oil keeps the cookies moist without the heaviness of butter, a trick most recipes miss.
- Crowd‑Pleaser: Even the most skeptical eaters confess they’re hooked after the first bite, making these the perfect party centerpiece.
- Ingredient Quality: Using real pumpkin puree (or fresh pumpkin if you’re feeling adventurous) guarantees an authentic, vibrant flavor.
- Cooking Method: Baking on a parchment‑lined sheet ensures even browning and prevents sticking, a detail that elevates the final product.
- Make‑Ahead Potential: The cookies store beautifully, and the filling can be prepared a day ahead, allowing you to assemble just before serving.
Inside the Ingredient List
The Flavor Base
Ground cinnamon, nutmeg, ginger, and cloves are the heart of any pumpkin dessert, delivering that unmistakable autumnal aroma. Cinnamon provides warmth, while nutmeg adds a sweet, earthy depth that feels like a hug from a grandparent. Ginger brings a subtle zing that cuts through the sweetness, and cloves lend a whisper of spice that lingers on the palate. If you’re missing any of these, a pre‑made pumpkin pie spice works in a pinch, but nothing beats the fresh, individual spices for a layered flavor profile.
The Texture Crew
All‑purpose flour, baking powder, and baking soda form the structural trio that gives the cookies their lift and airy crumb. The flour provides the backbone, while the leaveners create tiny air pockets that expand during baking, resulting in a cloud‑like texture. Skipping the baking soda would leave you with dense, heavy cookies, and omitting the baking powder would rob them of that gentle rise. For a gluten‑free version, swap the flour for an equal‑weight blend of rice flour and tapioca starch, but expect a slightly different bite.
The Unexpected Star
Vegetable oil is the unsung hero that keeps the cookies moist without making them greasy. Unlike butter, oil stays liquid at room temperature, ensuring the batter spreads just enough to form a tender crumb. If you prefer a richer flavor, you can replace half the oil with melted coconut oil, but be aware it will add a faint coconut note. A splash of oil also helps the sugar caramelize on the surface, giving those coveted golden edges.
The Final Flourish
Cream cheese, unsalted butter, and powdered sugar combine to create the dreamy filling that defines a whoopie pie. The cream cheese offers a tangy counterpoint to the sweet cookie, while butter adds richness, and powdered sugar sweetens without gritty texture. For a dairy‑free alternative, use a high‑quality vegan cream cheese and coconut oil, but the classic version is unbeatable for that perfect melt‑in‑your‑mouth experience. When buying cream cheese, choose a block rather than a spread to avoid excess water content.
Everything's prepped? Good. Let's get into the real action—this is where the magic happens, and I promise you’ll be amazed at how simple it feels when you follow each step closely.
The Method — Step by Step
In a large mixing bowl, whisk together the all‑purpose flour, baking powder, baking soda, and salt until the dry ingredients are fully combined. This aerates the flour, ensuring a lighter texture later on. Once mixed, set the bowl aside and give yourself a quick victory dance because you’ve just laid the foundation for perfect rise.
Now, stir in the ground cinnamon, nutmeg, ginger, and cloves, letting the spices bloom in the dry mixture. You’ll notice a faint perfume rising—if you can smell it now, you’re already ahead of the game. This is the moment where the flavor base starts to sing.
In a separate bowl, combine the granulated sugar, brown sugar, and vegetable oil. Whisk until the mixture is glossy and the sugars have dissolved into a smooth, amber‑colored syrup. Add the eggs one at a time, beating well after each addition to incorporate air and create a silky batter.
Stir in the vanilla extract and canned pumpkin puree, scraping the sides of the bowl to ensure no streaks remain. The batter should look thick yet pourable, with a deep orange hue that promises pumpkin perfection.
Gradually fold the dry ingredient mixture into the wet mixture, using a spatula and a gentle hand. Over‑mixing at this stage can develop gluten, leading to tough cookies, so stop as soon as you no longer see flour streaks.
At this point, the batter should be fluffy, with tiny pockets of air visible—this is the sign that your leavening agents are doing their job.
Line a baking sheet with parchment paper and lightly spray it with non‑stick spray. Drop the batter onto the sheet, spacing each mound about 2 inches apart—they will spread slightly.
Bake in the preheated oven for 10‑12 minutes, or until the tops are set and the edges begin to turn a light golden brown. The cookies should still be soft in the center; they’ll firm up as they cool.
While the cookies cool on a wire rack, prepare the filling. Beat the softened cream cheese and unsalted butter together until light and fluffy, about 2‑3 minutes on medium speed.
Gradually add powdered sugar, a cup at a time, beating after each addition until the mixture is smooth and glossy. Finish with the vanilla extract, giving the filling a final whisk to incorporate everything fully.
Once the cookies are completely cooled (they should feel firm to the touch), pair them up by size. Spread a generous dollop of the cream‑cheese filling onto the flat side of one cookie, then sandwich it with its partner, pressing gently to spread the filling to the edges.
The filling should ooze slightly, creating a creamy bridge that holds the two cookies together. If the filling seems too stiff, let it sit at room temperature for a few minutes before finishing the assembly.
Place the assembled whoopie pies on a serving platter, and let them rest for at least 10 minutes. This short rest allows the cookies to absorb a hint of the filling, creating a harmonious meld of flavors.
Now, take a step back, inhale the intoxicating aroma, and admire your creation. That moment when you realize you’ve just made the ultimate fall treat? Pure magic. That's it — you did it. But hold on, I've got a few more tricks that'll take this to another level...
Insider Tricks for Flawless Results
The Temperature Rule Nobody Follows
Never bake whoopie pies straight from a cold refrigerator; let the batter sit at room temperature for 10‑15 minutes. This small pause equalizes the temperature of the batter, ensuring an even rise and preventing one side from cooking faster than the other. I once baked a batch straight from the fridge and ended up with a half‑sunken, half‑puffed pie—lesson learned. Trust the rule, and your pies will rise like sunrise over a pumpkin patch.
Why Your Nose Knows Best
The moment the cookies start to smell toasty is your cue to check them. The aroma intensifies just before the edges turn golden, signaling that the interior is set but not overcooked. Relying on a timer alone can be misleading because ovens vary; your nose is the most reliable sensor. If you catch that scent early, you’ll achieve that perfect, slightly crisp edge we all crave.
The 5‑Minute Rest That Changes Everything
After baking, allow the cookies to rest on the rack for exactly five minutes before moving them to a cooling sheet. This brief pause lets the steam escape, preventing the cookies from becoming soggy on the bottom. I once tried to speed things up by transferring them immediately, and the result was a gummy base that ruined the texture. Patience at this stage makes all the difference.
The Cream Cheese Softening Shortcut
If you forget to soften the cream cheese ahead of time, place the block in a zip‑top bag and submerge it in warm (not hot) water for five minutes. This quick method brings the cheese to the perfect consistency without melting it, allowing you to whip a smooth filling on the spot. A friend once tried to microwave the cheese and ended up with a grainy mess—don’t be that friend.
Watch Out for Over‑Mixing
When combining the wet and dry ingredients, mix just until you no longer see flour. Over‑mixing develops gluten, which makes the cookies tough and dense. A good visual cue is when the batter looks slightly lumpy but uniform; that’s the sweet spot. Remember, the batter should be fluffy, not a batter‑ball of dough.
Creative Twists and Variations
This recipe is a playground. Here are some of my favorite ways to switch things up:
Maple‑Glazed Whoopie Pies
Swap half of the granulated sugar for pure maple syrup and add a tablespoon of maple extract to the batter. The resulting pies have a caramel‑like depth that pairs beautifully with the pumpkin spice. Drizzle a thin glaze of maple syrup over the assembled pies for an extra glossy finish.
Chocolate‑Swirl Surprise
Add 1/4 cup of cocoa powder to the dry ingredients and fold in mini chocolate chips. The chocolate adds a rich counterpoint to the pumpkin, creating a mocha‑pumpkin experience. Top each pie with a dusting of cocoa powder for an elegant look.
Spiced Chai Infusion
Replace the vanilla extract with 1 teaspoon of chai tea concentrate and add a pinch of cardamom to the spice mix. This gives the pies an exotic, tea‑like flavor that’s perfect for a cozy afternoon. Serve with a side of chai latte for a coordinated flavor profile.
Nutty Crunch Variation
Fold 1/2 cup of finely chopped toasted pecans into the batter just before baking. The nuts add a pleasant crunch that contrasts the soft cookie. For an extra nutty filling, mix a tablespoon of pecan butter into the cream‑cheese mixture.
Vegan Dream
Swap the cream cheese for a vegan cream cheese alternative, use coconut oil in place of vegetable oil, and replace the eggs with a flax‑egg mixture (1 tablespoon ground flaxseed + 3 tablespoons water per egg). The texture remains creamy, and the flavor stays true to the original. Just be sure to chill the batter longer to help it hold shape.
Storing and Bringing It Back to Life
Fridge Storage
Place the assembled whoopie pies in an airtight container lined with parchment paper. They’ll stay fresh for up to five days, with the filling staying firm and the cookies maintaining their softness. If you notice a slight drying of the outer edges, lightly brush them with a bit of melted butter before resealing.
Freezer Friendly
For longer storage, freeze the unfilled cookies first on a baking sheet, then transfer them to a zip‑top freezer bag. They keep for up to three months. When ready to serve, thaw overnight in the fridge, then assemble with fresh filling. A tiny splash of milk added to the filling before spreading helps revive its creamy texture.
Best Reheating Method
To enjoy warm whoopie pies, place them on a microwave‑safe plate, sprinkle a few drops of water around the edges, and microwave on medium for 15‑20 seconds. The water creates steam that revives the softness without making the cookies soggy. Alternatively, a quick 5‑minute pass through a preheated 300°F oven restores the crisp exterior while keeping the interior melt‑in‑your‑mouth.