Picture this: a kitchen that smells like burnt toast and disappointment, and there I was, staring at a bag of trail mix that had seen better days. I had just opened a new batch of oats, nuts, and dried fruit, and the temptation to turn them into something edible was almost unbearable. My friend dared me to create a snack that would make even the most seasoned snack enthusiast swoon, and I said, “Why not?” That dare turned into a mission to craft the ultimate trail mix energy bite, and I’m here to spill every secret. By the end of this post, you’ll wonder how you ever made a snack without this recipe.
First, I tossed the oats, nuts, and seeds into a bowl, letting the rhythm of the clink and clatter remind me of a drum solo. The honey drizzled over them like a golden syrup, and the vanilla whispered promises of subtle sweetness. As I mixed, the kitchen filled with the warm, nutty aroma that makes your mouth water before the first bite. I could almost taste the crunch, the chew, and the burst of dried fruit popping in the middle. The moment the mixture reached a sticky, cohesive consistency, I felt the adrenaline of creation surge through me.
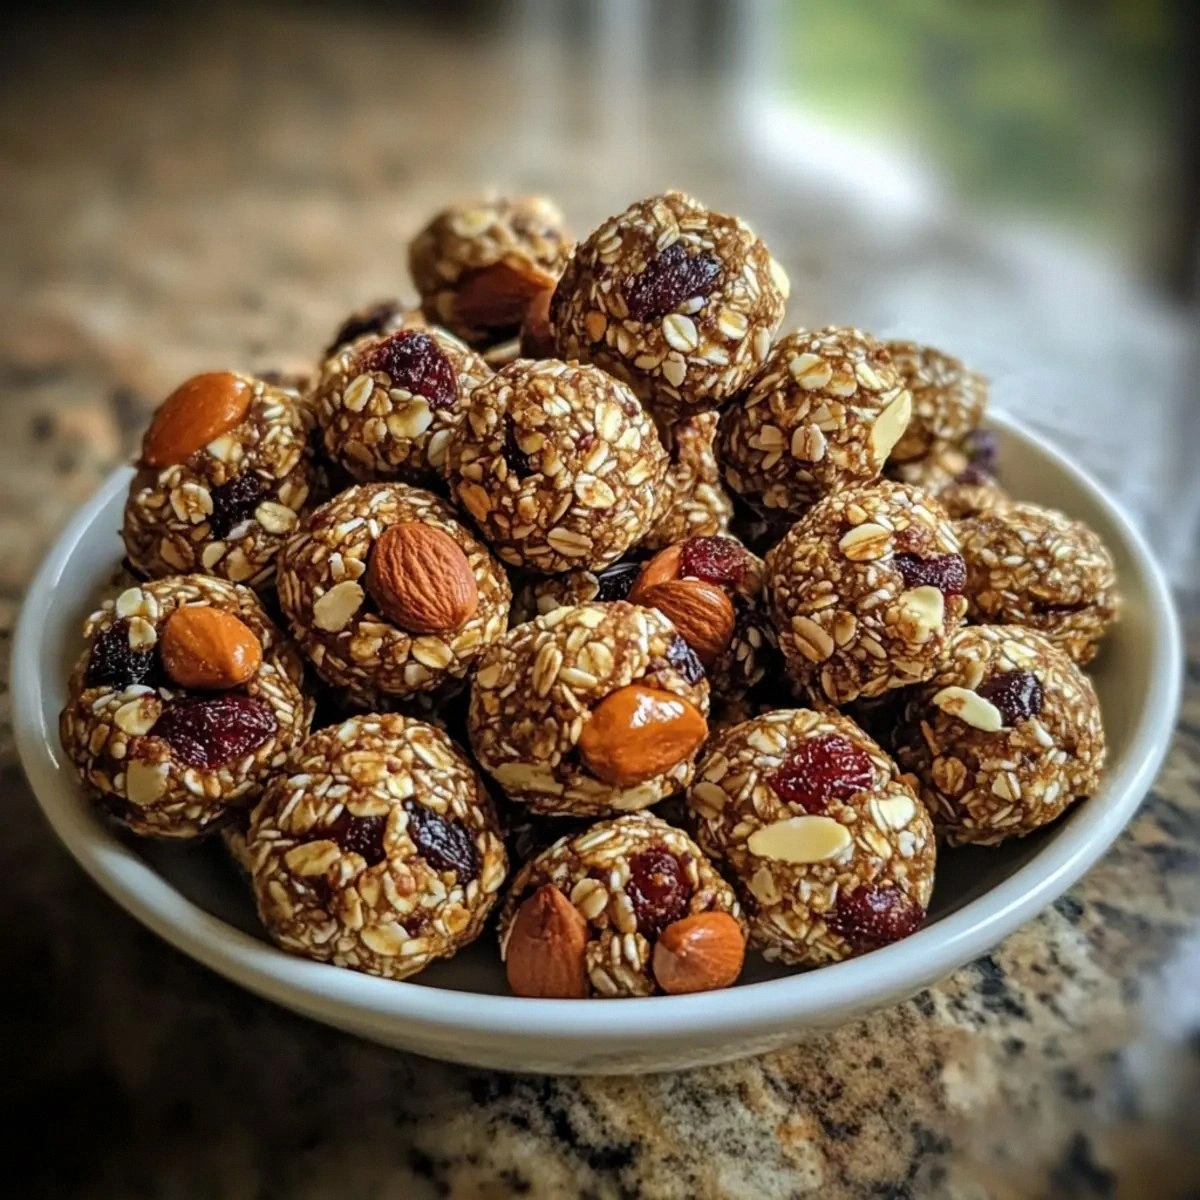
Next, I rolled the mixture into bite‑sized balls, each one a miniature work of edible art. I pressed them into a silicone mold to keep them perfectly round and to avoid the dreaded uneven bite that ruins the experience. The chocolate chips were folded in at the last minute, ensuring they were evenly distributed but not melted. I set the bites on parchment and let them chill, watching them firm up like tiny jewels. When I tasted the first one, I was instantly transported to a childhood memory of summer picnics and sticky fingers.
That bite was a revelation: the crunchy nuts, the chewy dried fruit, the creamy peanut butter, and the dark chocolate chips all danced together in perfect harmony. I dared you to taste this and not go back for seconds, but I confess I ate half the batch before anyone else could even get a taste. The result is a snack that satisfies sweet cravings while providing sustained energy, making it ideal for hikes, study sessions, or a quick pick‑up after a long day. It’s hands down the best version you’ll ever make at home, and it’s surprisingly simple to prepare. Let me walk you through every single step — by the end, you’ll wonder how you ever made it any other way.
What Makes This Version Stand Out
- Flavor Explosion: The honey and vanilla create a silky base that coats each bite like velvet, turning ordinary oats into a caramelized dream. The dark chocolate chips add a rich, bittersweet finish that balances the natural sweetness of the dried fruit. When you bite, the flavors mingle in a way that feels like a secret party in your mouth.
- Texture Perfection: Oats provide a chewy backbone, while nuts deliver a satisfying crunch that snaps like thin ice. Chia and flax seeds add a subtle grainy feel that keeps the bites from becoming mushy. The mixture holds together firmly, yet each bite still yields a delightful bite‑through.
- No‑Sugar‑Added Sweetness: Honey is the only sweetener, offering a natural sweetness that’s far kinder to your blood sugar spikes. The dried fruit contributes just the right amount of chew and a touch of tartness, keeping the snack balanced and refreshing.
- All‑Natural Ingredients: Every component is free from artificial colors, flavors, or preservatives. The recipe relies on wholesome, nutrient‑dense foods that your body will thank you for.
- Convenient Make‑Ahead: The energy bites can be prepared in under 30 minutes and stored for up to a week in the fridge. They’re perfect for busy mornings, road trips, or a quick post‑workout boost.
- Kid‑Friendly: The sweet, chocolatey flavor profile makes these bites a hit with kids, while the nutrition profile satisfies parents’ desire for healthy snacks.
- Gluten‑Free Friendly: All ingredients are naturally gluten‑free, making these bites a safe choice for those with sensitivities or celiac disease.
- Eco‑Friendly Packaging: The recipe requires only a silicone mold and parchment paper, reducing waste and keeping your kitchen tidy.
Inside the Ingredient List
The Flavor Base
Honey is the sweet anchor that glues the mixture together while adding a natural, floral note that brightens every bite. Vanilla extract deepens the honey’s sweetness, creating a subtle aroma that lingers on the palate. Peanut butter or almond butter provides creamy richness and a dose of healthy fats; swapping between the two simply changes the nutty undertone without compromising texture.
The Texture Crew
Rolled oats form the chewy foundation, delivering a hearty bite that keeps the energy sustained. Mixed nuts contribute a satisfying crunch and a protein boost that keeps you full longer. Chia seeds, though tiny, absorb moisture and give the mixture a slight gel-like consistency, preventing it from crumbling. Flaxseeds add a mild nutty flavor and a touch of omega‑3 fatty acids, enhancing the overall nutritional profile.
The Unexpected Star
Dried fruit, whether cranberries, raisins, or apricots, offers natural sweetness and chewiness that contrasts the crunchy nuts. The fruit’s natural sugars caramelize slightly during chilling, adding a subtle depth of flavor. Dark chocolate chips bring a bold, bittersweet finish that balances the sweetness of the fruit and honey. Their semi‑melting properties keep the bites from becoming too hard while adding a glossy sheen.
The Final Flourish
When everything is combined, the mixture should feel like a dough that’s just on the edge of spilling. The final touch is a gentle press that ensures each bite holds its shape during chilling. This step is crucial; too loose, and the bites will fall apart; too tight, and they’ll become dense. The result is a perfectly balanced snack that’s ready to be enjoyed or stored for later.
Everything’s prepped? Good. Let’s get into the real action…
The Method — Step by Step
- Gather all ingredients and set up two large bowls: one for dry components, one for wet. Measure each ingredient precisely, as the balance between sweet and crunchy is key to a cohesive bite. Keep your utensils clean, as any residue can affect the texture. This prep stage is quick but essential, so take a breath and enjoy the aroma of fresh nuts.
- In the dry bowl, combine rolled oats, mixed nuts, chia seeds, and flaxseeds. Stir them together until the mixture is uniform, ensuring each bite will have a consistent texture. The seeds will start to absorb moisture later, but for now, they’re just part of the base. Think of this as building the skeleton of your bite.
- In the wet bowl, whisk honey, peanut butter or almond butter, and vanilla extract until smooth. The mixture should be glossy and pourable; if it’s too thick, add a teaspoon of warm water to loosen it. This step is the glue that holds everything together, so give it a good stir. The vanilla’s aroma will hint at the final flavor profile.
- Pour the wet mixture over the dry mixture and fold with a spatula until every grain is coated. The dough should be sticky but manageable; it should hold together when pressed. If it feels too dry, add a splash of honey; if too wet, a pinch more oats. This is the moment of truth where the flavors begin to marry.
- Fold in dried fruit and dark chocolate chips, distributing them evenly. The fruit will add chewiness, while the chocolate offers a burst of richness. Be gentle; overmixing can break the fruit into smaller pieces. This step should feel like a gentle dance between sweet and crunchy.
- Using a melon baller or a small cookie scoop, form the mixture into bite‑sized balls. Press them firmly so they hold their shape. If you’re using a silicone mold, press each ball into a compartment, then flip the mold to release them. This step ensures uniformity and makes them easier to store.
- Place the formed bites on a parchment-lined tray and refrigerate for at least 30 minutes to set. The chilling process firms the dough, making each bite bite‑through without falling apart. Once chilled, transfer them to an airtight container or zip‑lock bag for storage. They’ll stay fresh for up to a week in the fridge.
- When you’re ready to enjoy, grab a bite and savor the layered flavors: the nutty crunch, the sweet honey, the chewy fruit, and the chocolatey finish. If you prefer a slightly softer bite, let them sit at room temperature for 10 minutes before eating. For an extra indulgence, drizzle a little honey on top before serving.
That’s it — you did it. But hold on, I’ve got a few more tricks that’ll take this to another level…
Insider Tricks for Flawless Results
The Temperature Rule Nobody Follows
Keep the honey and peanut butter at room temperature before mixing; if they’re too cold, they’ll separate and make the dough clumpy. A warm bowl of water can quickly bring them to the right consistency. Once combined, the mixture should be warm enough to feel like a soft dough but not hot enough to melt the chocolate. This subtle temperature dance ensures a smooth, cohesive bite.
Why Your Nose Knows Best
Before you start rolling, inhale deeply. The aroma of toasted oats and caramelized honey will guide you toward the right texture. If the mixture smells undercooked, give it a minute more to let the honey set. Your nose is a reliable indicator of flavor readiness.
The 5‑Minute Rest That Changes Everything
After folding in the dried fruit and chocolate, let the mixture rest for five minutes. This pause allows the oats and seeds to absorb moisture, improving the bite’s chewiness. It also lets the chocolate set slightly, preventing it from sinking to the bottom of the bowl. A short rest is a game‑changer.
The Secret of Even Chocolate Distribution
When adding chocolate chips, use a spoon to distribute them evenly rather than pouring them in at once. This technique ensures each bite receives a balanced amount of chocolate, avoiding pockets of pure chocolate that can overwhelm the other flavors. It also keeps the chips from melting into the dough.
The Quick Chill Trick
For a faster set, place the tray in a pre‑cooled fridge for 15 minutes, then finish chilling for another 15. The rapid cooling locks in the texture and prevents the mixture from becoming too sticky. This trick is perfect when you’re short on time but still want a firm bite.
Creative Twists and Variations
Tropical Twist
Swap dried fruit for shredded coconut and add a splash of coconut milk to the wet mixture. The coconut adds a beach‑y flavor that pairs wonderfully with the nuts. This version is perfect for a sunny afternoon or a beach day. The texture remains firm, but the tropical aroma lifts the whole experience.
Spicy Cinnamon Surprise
Introduce a pinch of cayenne pepper and a teaspoon of cinnamon to the dry mix. The heat and spice create a surprising kick that balances the sweetness. This variant is ideal for those who love a little warmth in their snack. The cinnamon also adds a fragrant aroma that’s hard to resist.
Berry Blast
Replace dried apricots with freeze‑dried strawberries and add a handful of blueberries. The berries give a juicy burst that contrasts the chewy texture. This version is great for spring and summer when berries are in season. The vibrant color also makes the bites look festive.
Almond Joy Edition
Use almond butter instead of peanut butter, and add shredded coconut to the mix. The coconut and almond create a flavor profile reminiscent of the classic candy bar. This variant is perfect for those who love the nostalgic taste. The texture is slightly softer due to the coconut’s moisture.
Pumpkin Spice Delight
Incorporate pumpkin puree and a dash of pumpkin pie spice into the wet mixture. The pumpkin adds a subtle sweetness and a creamy texture, while the spices give a cozy, fall feel. This version is a must‑try during the autumn months. The warm spices pair beautifully with the nuts.
Minty Fresh
Add a few drops of peppermint extract to the wet mixture and sprinkle crushed peppermint candy on top before chilling. The mint provides a refreshing aftertaste that cleanses the palate. This variation is perfect for a post‑lunch pick‑up. The mint also gives a cool, crisp finish.
Storing and Bringing It Back to Life
Fridge Storage
Place the chilled bites in an airtight container or a zip‑lock bag. They will stay fresh for up to a week in the refrigerator. Keep them away from strong odors, as the nuts can absorb them. When you’re ready to eat, let them sit at room temperature for a few minutes for optimal flavor.
Freezer Friendly
For longer storage, freeze the bites on a parchment-lined tray before transferring them to a freezer bag. They’ll keep their texture and taste for up to three months. Thaw them in the fridge overnight for the best results. Avoid refreezing after thawing to preserve quality.
Best Reheating Method
To revive a bite, place it on a microwave‑safe plate and heat for 10‑15 seconds. The heat will soften the chocolate and release the aroma without melting the entire bite. Alternatively, a quick 30‑second burst in the oven at 300°F will warm the bite evenly. Adding a tiny splash of water before reheating creates steam that restores the bite’s natural moisture.