I was halfway through a disastrous soufflé when I discovered the secret to this matcha panna cotta. The kitchen was a chaotic mess of flour clouds and a pot that had boiled over, yet the aroma of green tea powder was already dancing in the air. I laughed at the absurdity, because who would think a sweet, silky dessert could be born from a matcha mishap? That moment of culinary chaos became the spark that ignited a recipe I swear will change your dessert game forever.
Picture the scene: a bright, sunlit kitchen where the scent of fresh milk mingles with the earthy fragrance of finely ground matcha. The gentle hum of the stove and the rhythmic stir of a whisk create a symphony of ordinary sounds turned extraordinary. When the creamy mixture starts to thicken, a faint caramelized aroma wafts, promising a delicate sweetness that will coat your palate like velvet. The texture feels like a soft cloud, yet the matcha gives it a vibrant, almost metallic green hue that catches the eye. You can almost taste the subtle bitterness of the tea balanced by the mellow sweetness of sugar, a harmony that lingers on the tongue.
What makes this version stand out is that it refuses to be a copy of the generic “matcha dessert” you see in glossy magazines. I’ve stripped away the fluff and added a technique that locks in the matcha’s bright color while keeping the panna cotta silky smooth. The result is a dessert that is not only visually stunning but also incredibly easy to make, even for the kitchen novices who have never worked with gelatin. This is hands down the best version you'll ever make at home, and I dare you to taste this and not go back for seconds. If you've ever struggled with matcha’s bitterness, this recipe will show you how to tame it with the right balance of sweet and creamy.
Let me walk you through every single step — by the end, you'll wonder how you ever made it any other way. I promise you, the process is as satisfying as the final product, and the subtle nuances of matcha will leave you craving that green glow again and again. So grab your whisk, your measuring spoons, and let’s dive into this green‑golden adventure together.
What Makes This Version Stand Out
- Flavor: The matcha is finely sifted into the cream, creating a flawless infusion that avoids clumps and delivers a pure, grassy taste that is both refreshing and indulgent.
- Texture: Gelatin is activated in cold water, ensuring a silky, almost translucent set that melts in your mouth like a dream.
- Simplicity: Only seven ingredients, no fancy equipment, and a single pot of heated cream; you can make this in under 45 minutes.
- Versatility: The base can be paired with fruit compotes, citrus zest, or a drizzle of honey, making it a canvas for endless flavor experiments.
- Make‑ahead: It sets beautifully in the fridge and stays fresh for up to five days, ideal for meal prepping or entertaining guests.
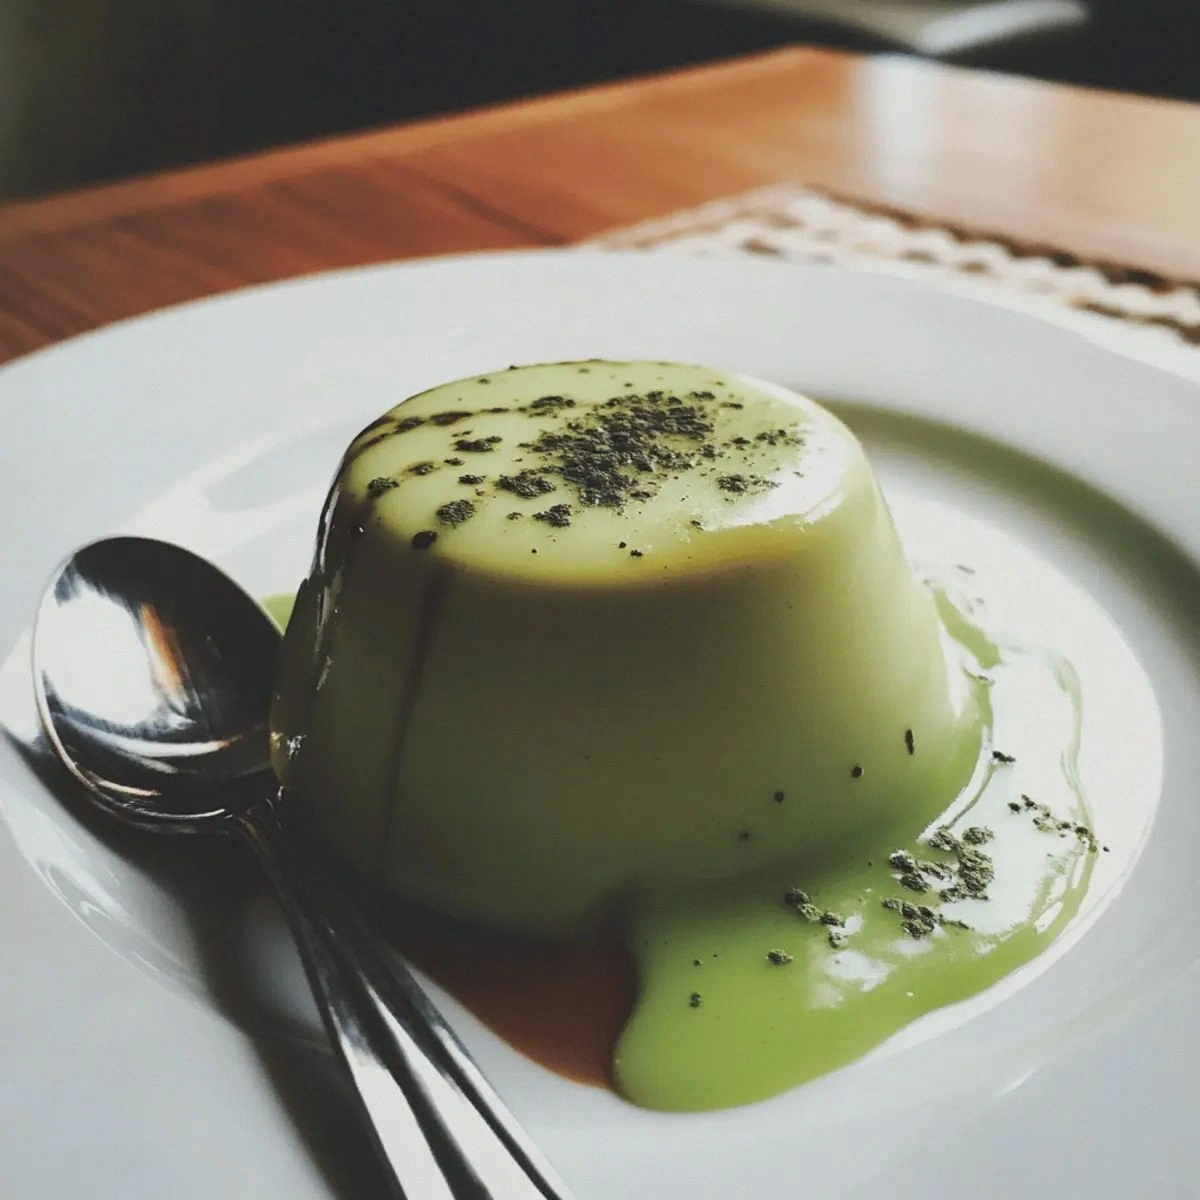
- Visual Appeal: The vibrant green hue is achieved with a pure, bright matcha powder, not a splash of food coloring, so the dessert looks as good as it tastes.
- Healthful Twist: Using whole milk and heavy cream keeps the richness, while the matcha provides antioxidants that give this dessert a subtle health boost.
- Kid‑Friendly: The gelatin is safe for most children (no gelatin allergies), and the sweet, creamy texture is a hit with even picky eaters.
Alright, let's break down exactly what goes into this masterpiece. I’ll give you the lowdown on each ingredient and why it matters.
Inside the Ingredient List
The Flavor Base
Heavy cream is the backbone of this dessert, providing a rich, velvety mouthfeel that balances the earthy matcha. Whole milk adds a subtle dairy note and helps the mixture stay light. Together, they create a creamy canvas that lets the green tea shine without overpowering the palate.
If you skip the milk, the panna cotta will be too thick and heavy, losing that airy quality that makes it so pleasant to eat. On the other hand, using skim milk instead of whole milk will reduce the richness, but it can work if you’re watching calories.
When buying heavy cream, look for one with a fat content of 36% or higher; this ensures a luxurious mouthfeel. Whole milk should be fresh and not ultra‑pasteurized, as that can alter the flavor profile slightly.
The Sweetener
Granulated sugar is used in a modest amount to sweeten the cream without masking the matcha’s subtle bitterness. The sugar dissolves completely into the hot mixture, creating a silky smooth texture.
If you prefer a lower sugar content, you can substitute a natural sweetener like honey or maple syrup, but note that these will introduce their own flavors. A sugar substitute like erythritol can work if you’re on a keto diet, but it may not dissolve as smoothly.
The Matcha Powder
Matcha powder is the star of this recipe, delivering antioxidants and a vibrant green color that’s impossible to ignore. Use high‑quality ceremonial grade matcha for the best flavor; cheaper varieties tend to be bitter and lack depth.
The key to a flawless green hue is to whisk the matcha with a small amount of cold water before adding it to the cream. This technique prevents clumps and ensures the pigment spreads evenly.
The Final Flourish
Vanilla extract adds a warm, aromatic undertone that complements the green tea’s earthiness. Gelatin powder is the secret agent that gives the panna cotta its firm yet silky set.
The gelatin is first bloomed in cold water to avoid clumping, then heated until fully dissolved. This ensures the dessert will set smoothly and hold its shape when unmolded.
If you’re vegan or gelatin‑averse, you can substitute agar‑agar, but the texture will be slightly different—firmer and more gelatinous.
Everything's prepped? Good. Let's get into the real action...
The Method — Step by Step
- Step 1: Bloom the Gelatin. In a small bowl, pour the 1 tablespoon of gelatin powder over 1/4 cup of cold water. Let it sit for 5 minutes, allowing the gelatin to absorb the water and expand. This step is crucial because it prevents clumping later. If you skip it, the gelatin might not dissolve evenly, leading to an uneven set. While waiting, you can start prepping the matcha.
- Step 2: Whisk the Matcha. In a separate bowl, add the 2 tablespoons of matcha powder. Whisk it with a splash of cold water (about 1 tablespoon) to create a smooth, lump‑free paste. This technique locks in the bright green color and ensures the matcha is fully incorporated. If you see clumps, simply pass the mixture through a fine mesh sieve. The result should look like a glossy, emerald liquid.
- Step 3: Heat the Cream Mixture. In a medium saucepan, combine 2 cups of heavy cream, 1 cup of whole milk, and 1/2 cup of granulated sugar. Cook over medium heat, stirring frequently, until the sugar has completely dissolved and the mixture is hot but not boiling. The temperature should reach about 190°F (88°C). This is the moment of truth; the aroma of caramelized milk will fill the kitchen.
- Step 4: Add the Matcha. Remove the saucepan from the heat and stir in the matcha paste. Mix vigorously until the green color is evenly distributed. The mixture should look like a bright, glossy liquid. This step ensures the matcha’s flavor is fully integrated without any gritty texture.
- Step 5: Dissolve the Gelatin. Return the saucepan to low heat and add the bloomed gelatin. Stir until the gelatin has completely melted into the hot cream. The mixture should be smooth and glossy, with no visible lumps. Let it sit for a minute to cool slightly, but keep it warm enough so the gelatin stays dissolved.
- Step 6: Add Vanilla. Stir in 1 teaspoon of vanilla extract. Vanilla adds a warm, aromatic undertone that balances the matcha’s earthiness. The vanilla should be evenly distributed; otherwise, you’ll end up with pockets of intense flavor.
- Step 7: Pour Into Molds. Carefully pour the mixture into individual ramekins or silicone molds. Leave a small space at the top for expansion. The mixture should look silky and slightly glossy. If the mixture is too thick, let it cool for a few minutes before pouring.
- Step 8: Chill. Place the molds in the refrigerator for at least 4 hours, or until set. The ideal setting time is 6-8 hours for a firm yet creamy texture. If you’re in a hurry, a quick 2‑hour chill will still give you a decent set, but the texture will be looser.
- Step 9: Serve. To unmold, run a thin knife around the edges and dip the mold briefly in warm water. The panna cotta should slide out smoothly. Arrange on plates, add a drizzle of honey, fresh berries, or a sprinkle of toasted coconut for extra flair.
- Step 10: Enjoy. Take a spoonful and let the creamy, green goodness melt in your mouth. The matcha’s subtle bitterness balances the sweet cream, creating a harmonious finish that will have you reaching for seconds. This is the moment you’ll remember for weeks.
That's it — you did it. But hold on, I've got a few more tricks that'll take this to another level.
Insider Tricks for Flawless Results
The Temperature Rule Nobody Follows
Many people think any hot liquid will do, but the key is to reach just below boiling, around 190°F. This ensures the gelatin dissolves fully without compromising the creamy texture. If you go too hot, the milk proteins denature, causing a grainy mouthfeel.
Why Your Nose Knows Best
Before pouring, sniff the mixture. A faint caramelized scent indicates the sugars are properly dissolved. If it smells raw or too sweet, let it simmer a bit longer. Your nose is a reliable indicator of flavor balance.
The 5‑Minute Rest That Changes Everything
After adding gelatin, let the mixture rest for exactly 5 minutes before adding vanilla. This brief pause allows the gelatin to fully integrate, resulting in a smoother set. Skipping this step often leads to a slightly grainy texture.
The Right Molds for the Right Shape
Silicone molds are forgiving, but glass ramekins give a classic look. For a fun twist, use a hollowed‑out chocolate bar as a mold for a chocolate‑matcha fusion. The choice of mold affects the final presentation and ease of unmolding.
The Garnish Game Changer
A drizzle of honey or a dusting of matcha powder can elevate the dessert instantly. Adding a splash of citrus zest or fresh berries introduces a bright contrast that cuts through the richness.
The Chill‑Time Trick
If you’re short on time, place the molds on a cold plate and let them chill in the fridge for 2 hours. The result will still be creamy, but the setting will be looser. For a firmer texture, chill for 6–8 hours.
Creative Twists and Variations
This recipe is a playground. Here are some of my favorite ways to switch things up:
Matcha & Citrus Fusion
Add a tablespoon of freshly grated lemon zest to the cream mixture for a zesty kick. The citrus brightens the green and adds a subtle tartness that balances the sweetness. This variation is perfect for spring or summer gatherings.
Matcha & Berry Burst
Fold in a handful of fresh raspberries or blueberries before chilling. The berries release their juices, creating a natural berry sauce that pairs beautifully with the creamy base. The color contrast is Instagram‑worthy.
Matcha & Chocolate Layer
Create a layered dessert by pouring half of the matcha mixture into a mold, chilling until set, then adding a layer of dark chocolate ganache. The chocolate adds richness, while the matcha provides a refreshing counterpoint.
Matcha & Coconut Cream
Swap the heavy cream for coconut cream to give the panna cotta a tropical twist. The coconut flavor complements the matcha’s earthiness, and the result is a silky, exotic dessert.
Matcha & Honey Drizzle
Drizzle a small amount of honey over the set panna cotta right before serving. Honey adds a natural sweetness that enhances the matcha’s subtle bitterness. It’s a simple yet effective way to elevate the flavor profile.
Matcha & Espresso Shot
Add a shot of espresso to the cream mixture for a mocha‑matcha fusion. The espresso deepens the flavor and introduces a robust coffee note that pairs wonderfully with the green tea.
Storing and Bringing It Back to Life
Fridge Storage
Store the set panna cotta in an airtight container in the refrigerator for up to five days. Keep the molds sealed to prevent moisture absorption, which can affect the texture. When ready to serve, let it sit at room temperature for 10 minutes to soften slightly.
Freezer Friendly
For longer storage, place the molds in a freezer bag and freeze for up to two months. Thaw overnight in the refrigerator before serving. The texture may be slightly firmer, but the flavor remains intact.
Best Reheating Method
If the panna cotta has become too firm, gently reheat it in a double boiler or microwave at 30-second intervals, stirring until silky again. Add a tiny splash of water before reheating — it steams back to perfection and restores the creamy texture.