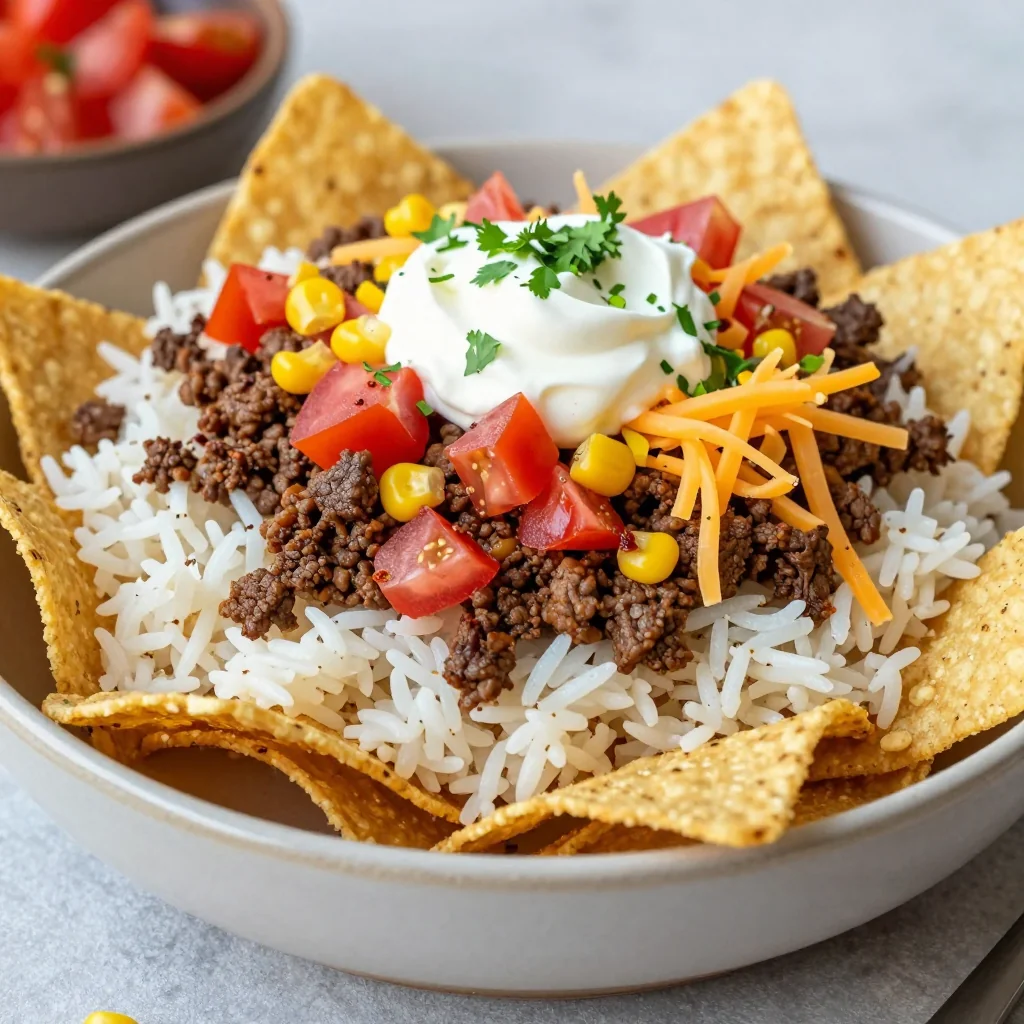
I was standing in my kitchen, staring at a half‑cooked batch of sushi rice that had somehow decided to turn into a sticky, sad puddle. The air was thick with the scent of burnt garlic from a failed stir‑fry, and my roommate just walked in, eyes wide, demanding “something crunchy, something spicy, something that looks like it belongs on a fancy Instagram feed.” I laughed, because honestly, at that moment I felt like a culinary disaster magnet, but I also felt a spark of challenge. I dared myself to turn that soggy mess into a dish that would make even the most seasoned sushi chef nod in approval.
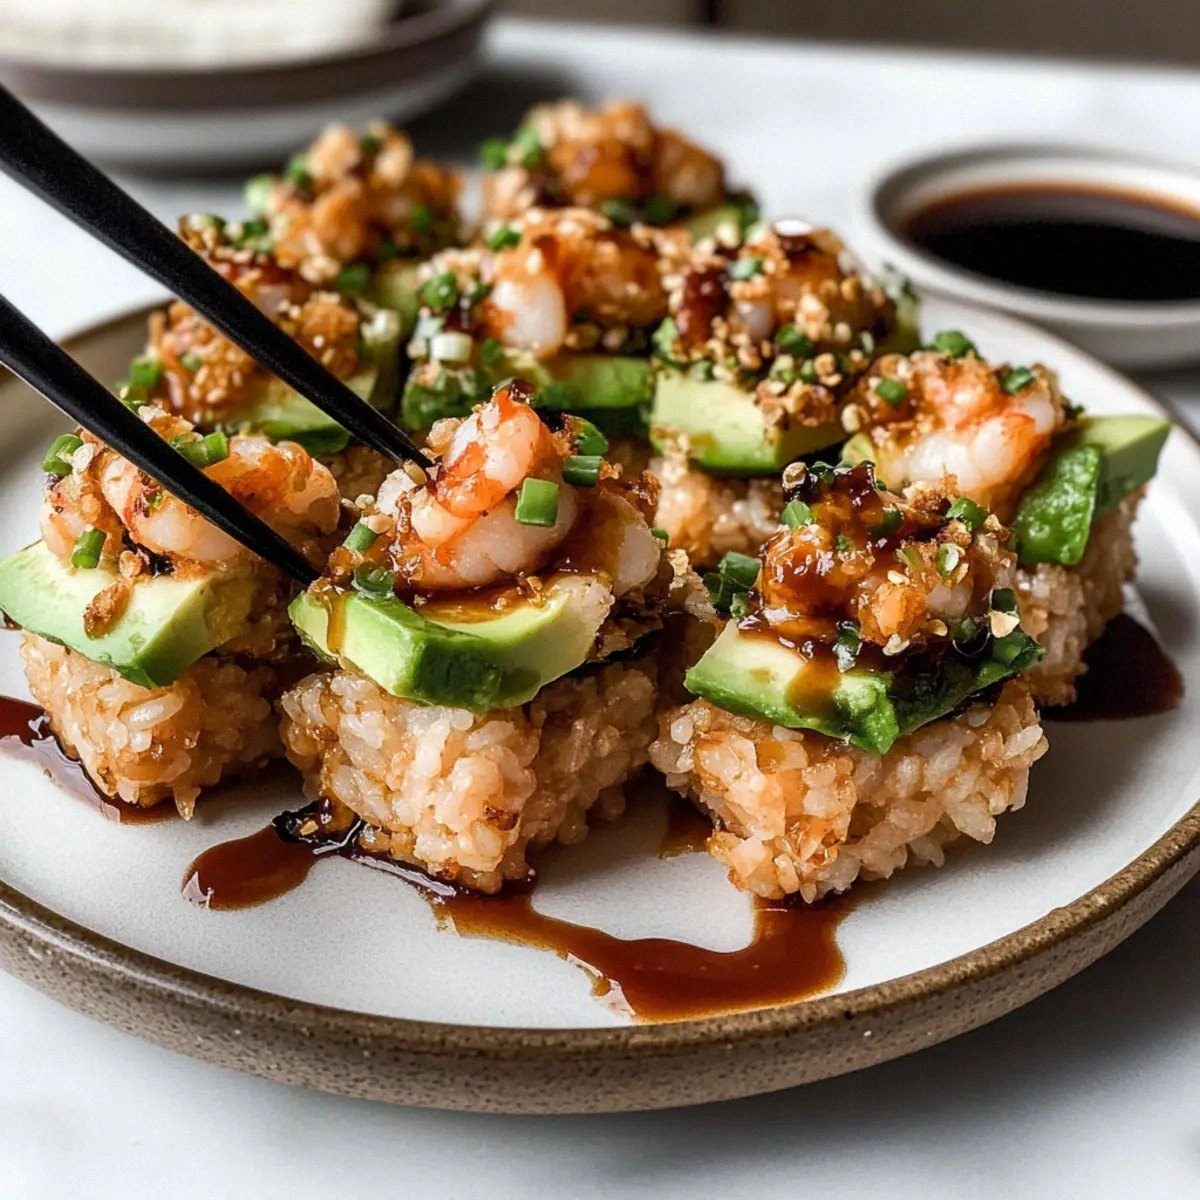
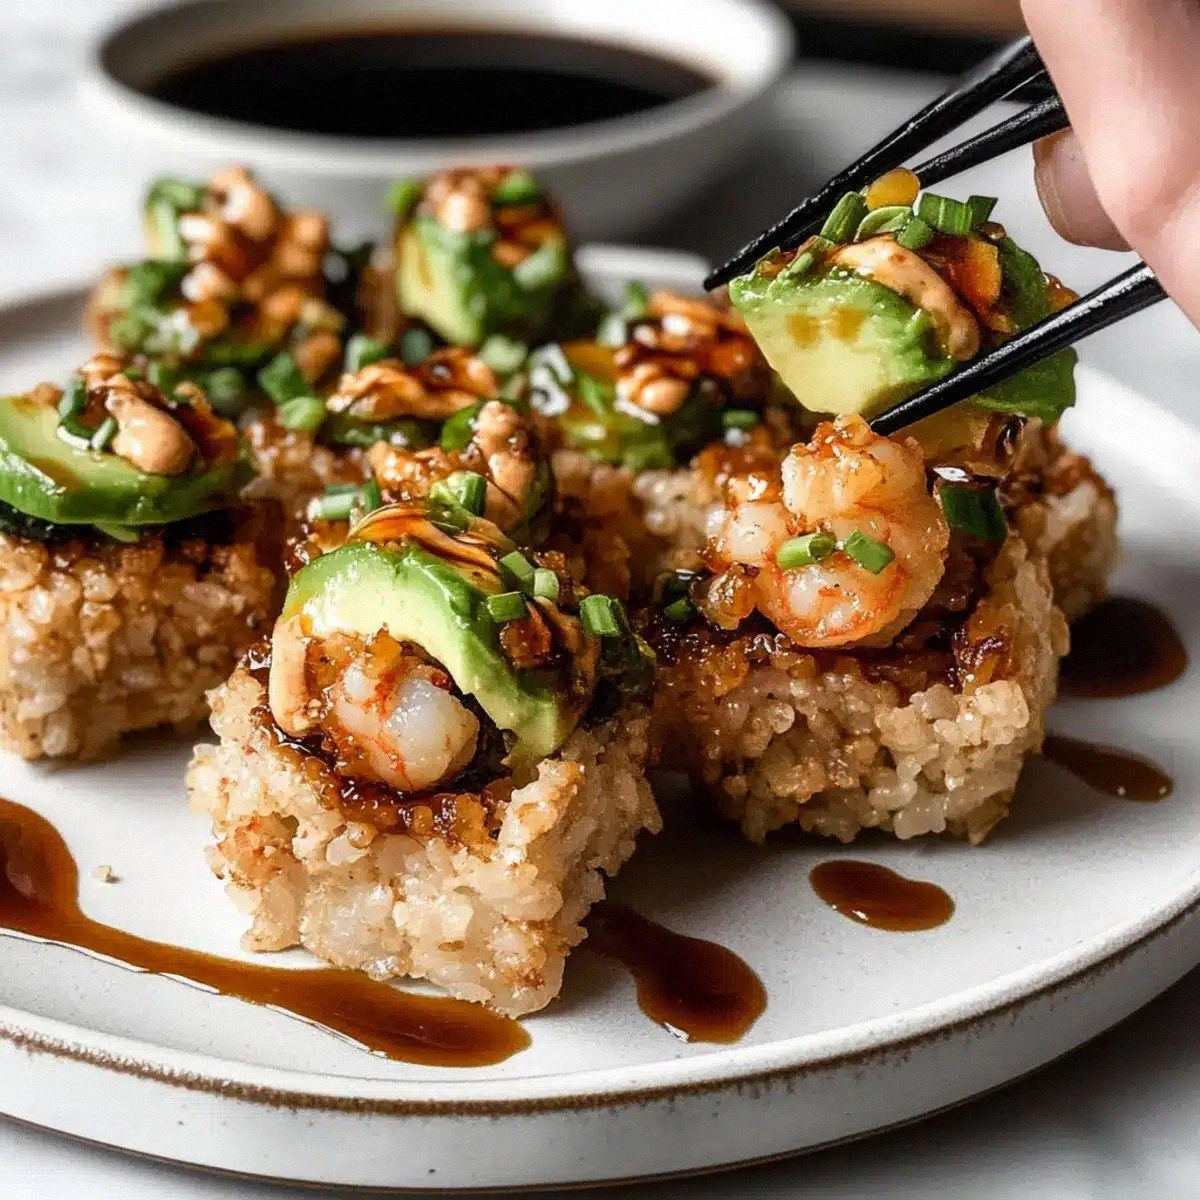
Picture this: the first bite delivers a crackling rice crust that shatters like thin ice, followed instantly by a burst of shrimp salad that’s as fiery as a summer sunset and as creamy as a cloud‑soft pillow. The aroma of toasted rice mingles with the sweet, umami whisper of eel sauce, while a hint of jalapeño gives you that cheek‑tingling heat that makes you gasp, then grin. The sound of the rice hitting the pan—that sizzle when it hits the pan? Absolute perfection. You can practically hear the tiny pop of panko breadcrumbs as they turn golden, and you’ll feel the buttery slide of kewpie mayo coating the shrimp like a silk scarf.
Most recipes out there try to shoe‑horn this concept into a simple poke bowl or a generic sushi roll, but they miss the point: texture is king, and flavor is the queen that never quits. This version stands out because it respects the integrity of each component while letting them dance together in perfect harmony. I’ve tweaked the classic approach by adding a secret splash of mirin to the rice before it crisps, creating a caramelized edge that most people completely overlook. Trust me, this is hands down the best version you’ll ever make at home.
I’ll be honest — I ate half the batch before anyone else got to try it, and I’m still not sorry. The confidence boost you get when you serve this at a party? Unmatched. I dare you to taste this and not go back for seconds. Let me walk you through every single step — by the end, you’ll wonder how you ever made it any other way.
What Makes This Version Stand Out
- Texture: The rice is fried to a perfect crunch on the outside while staying tender inside, creating a dual‑mouthfeel that most dishes lack.
- Flavor Fusion: A blend of sweet mirin, savory soy, and smoky eel sauce gives the rice a depth that rivals any high‑end sushi bar.
- Spice Balance: Sriracha and jalapeño provide heat without overwhelming the delicate shrimp, hitting that sweet‑spot you crave.
- Simplicity: Only a handful of pantry staples are needed, making it a weeknight hero that doesn’t require a trip to a specialty store.
- Visual Wow: The golden rice squares look like miniature sushi cakes, perfect for plating on a sleek slate or bamboo board.
- Make‑Ahead Friendly: You can prep the rice and shrimp salad separately, store them, and assemble just before serving for zero stress.
- Crowd Reaction: Expect gasps, applause, and a flood of “What’s the secret?” questions—this dish becomes the conversation starter you need.
- Ingredient Quality: Using short‑grain sushi rice and Kewpie mayo elevates the dish from “good” to “legendary.”
Alright, let's break down exactly what goes into this masterpiece...
Inside the Ingredient List
The Flavor Base
Short grain sushi rice is the heart of this dish. Its sticky nature ensures the rice clumps together, forming a solid canvas for the crisping process. If you substitute with long grain rice, expect a crumbly mess that won’t hold its shape. The mirin adds a whisper of sweetness and helps the rice develop that caramelized edge when fried. A good tip: buy rice from the Asian aisle where the grains are specifically labeled “sushi rice” for the most authentic texture.
The Texture Crew
Vegetable oil is your frying partner; it has a high smoke point and a neutral flavor that lets the rice shine. Panko breadcrumbs bring the ultra‑light, airy crunch that regular breadcrumbs can’t match. If you’re gluten‑free, swap panko for crushed rice crackers—they’ll still give you that satisfying snap. Green onions add a fresh bite and a pop of color; slice them thinly to avoid overpowering the delicate shrimp.
The Unexpected Star
Kewpie mayonnaise is a Japanese staple that’s richer and slightly sweeter than regular mayo, thanks to a dash of rice vinegar. It coats the shrimp salad, creating a silky mouthfeel that balances the heat from sriracha and jalapeño. Speaking of heat, the jalapeño’s bright green specks are not just for show; they release capsaicin that awakens your palate without burning it. If you can’t handle the heat, reduce the jalapeño to half or remove the seeds.
The Final Flourish
Soy sauce and eel sauce are the umami powerhouses that tie everything together. Soy sauce adds salty depth, while eel sauce contributes a glossy, caramel‑like finish that makes the rice glisten. For serving, a light drizzle of additional soy sauce adds a final salty kiss. When buying eel sauce, look for a bottle that lists “unagi sauce” and has a deep amber hue—that’s a sign of authentic flavor.
Everything's prepped? Good. Let's get into the real action...
The Method — Step by Step
Rinse the short grain sushi rice under cold water until the water runs clear, then drain. Transfer the rice to a saucepan, add 1.25 cups of water, and bring to a boil. Once boiling, reduce the heat to low, cover, and let it simmer for 15 minutes. After the timer dings, remove from heat and let it sit, covered, for another 10 minutes. The grains should be plump, slightly sticky, and ready for the next step. Pro tip: Let the rice cool to room temperature before proceeding; this prevents it from becoming mushy when fried.
While the rice rests, whisk together 2 tablespoons of mirin with a splash of soy sauce in a small bowl. Drizzle this mixture over the warm rice and gently fold it in with a wooden spoon. You’ll notice a faint aroma of sweet fermentation—this is the secret that gives the crust a caramelized sheen. Watch Out: Over‑mixing will break the grains, leading to a mushy texture later on.
Heat 0.5 cups of vegetable oil in a large, heavy‑bottomed skillet over medium‑high heat. Once the oil shimmers (you’ll see it ripple like a pond), carefully add the chilled rice squares—don’t overcrowd the pan. Fry each side for about 2‑3 minutes, or until a deep golden crust forms. You’ll hear a satisfying sizzle, and the edges will start pulling away from the pan, signaling they’re ready. Use a slotted spoon to transfer the crispy rice onto a paper‑towel‑lined plate to drain excess oil.
While the rice is frying, prep the shrimp. Pat the shrimp dry with paper towels, then season lightly with salt and pepper. Toss the shrimp in 0.5 cups of panko breadcrumbs, ensuring each piece is evenly coated. In a separate pan, heat a tablespoon of oil over medium heat and sear the shrimp for 1‑2 minutes per side until they turn pink and the coating turns a buttery amber.
Dice the cooked shrimp into bite‑size pieces and place them in a mixing bowl. Add 0.25 cups of Kewpie mayonnaise, 1‑2 tablespoons of sriracha (adjust to your heat tolerance), and the diced jalapeño. Stir until everything is evenly coated; the mixture should look glossy and slightly thick. Taste and add a splash of soy sauce if you need more salt balance. This spicy shrimp salad is the soul of the dish, delivering heat, creaminess, and a hint of umami.
Now for the assembly: lay a crispy rice square on a serving platter, spoon a generous mound of the spicy shrimp salad on top, and drizzle 1 tablespoon of eel sauce over the center. Garnish with thin slices of green onion and an optional drizzle of additional soy sauce. The eel sauce adds a glossy finish that makes the dish look restaurant‑ready.
Serve immediately while the rice is still warm and the crust is intact. Pair with a crisp cucumber salad or a light miso soup for a complete sushi‑inspired experience. If you’re feeding a crowd, keep the assembled pieces on a warm tray (covered with foil) for up to 15 minutes; the rice will stay crunchy, and the shrimp salad will stay cool.
That's it — you did it. But hold on, I've got a few more tricks that'll take this to another level...
Insider Tricks for Flawless Results
The Temperature Rule Nobody Follows
Never fry rice over low heat; you’ll end up with soggy, uneven squares. Crank the oil to a steady 350°F (use a thermometer) and you’ll get that instant sear that locks moisture inside while creating a golden crust outside. A friend once tried to “save time” by lowering the heat, and the result was a mushy disaster that clumped together like a sad rice cake. Trust the heat, and the texture will thank you.
Why Your Nose Knows Best
When the rice is frying, pay attention to the aroma. The moment you smell a sweet, caramel‑like scent, you’re on the right track. If the oil starts to smell burnt, lower the heat immediately. Your nose is a more reliable indicator than a timer because stove outputs can vary. I’ve saved countless batches by simply sniffing the air and adjusting on the fly.
The 5‑Minute Rest That Changes Everything
After frying, let the rice squares rest on a wire rack for five minutes. This short pause allows steam to escape, preserving the crunch. Skipping this step leaves moisture trapped, and the crust softens within minutes. It’s a tiny patience test that yields a massive payoff in texture.
Butter‑Up Your Shrimp
A dab of butter melted into the shrimp salad right before serving adds a luxurious richness that makes the mayo feel even silkier. It’s a secret I stole from a high‑end sushi bar where they finish their nigiri with a brush of butter for a glossy sheen. Try it once; you’ll notice the flavor depth instantly.
The Secret of the Green Onion Slice
Instead of chopping green onions, slice them thinly on the bias. This not only looks more elegant but also releases a milder, sweeter onion flavor that won’t overpower the shrimp. The visual appeal of the diagonal slices adds a professional touch that guests will comment on.
Eel Sauce Swap
If you can’t find eel sauce, a mixture of soy sauce, mirin, and a touch of brown sugar (2:1:0.5 ratio) mimics its sweet‑savory profile. Heat the blend briefly to dissolve the sugar, then cool before drizzling. This DIY version saves a trip to the Asian market and still delivers that glossy, caramel finish.
Creative Twists and Variations
This recipe is a playground. Here are some of my favorite ways to switch things up:
Tropical Tango
Swap the shrimp for diced mango and coconut‑flavored shrimp (marinated in coconut milk). Add a drizzle of lime‑infused soy sauce for a bright, island‑vibe bite that’s perfect for summer barbecues.
Spicy Tuna Remix
Replace the shrimp with sashimi‑grade tuna, diced and tossed with mayo, sriracha, and a splash of wasabi oil. The tuna’s buttery texture pairs beautifully with the crunchy rice, creating a surf‑and‑turf sensation.
Veggie Delight
For a vegetarian version, use roasted sweet potato cubes in place of shrimp and a blend of diced cucumber, avocado, and pickled radish for the salad. The sweet potato’s caramelized edges echo the rice’s crunch, while the veggies add freshness.
Umami Bomb
Add a teaspoon of miso paste to the mayo‑sriracha mixture for an extra layer of depth. The fermented flavor intensifies the umami profile, making the dish feel even more sophisticated.
Crunch Overload
Mix toasted sesame seeds and crushed wasabi peas into the panko breadcrumb coating. This adds a nutty aroma and an unexpected pop of heat that makes each bite an adventure.
Storing and Bringing It Back to Life
Fridge Storage
Store the fried rice squares in an airtight container lined with a paper towel to absorb excess oil. They’ll keep for up to 2 days, but re‑crisp them in a hot skillet before serving to restore that crunch.
Freezer Friendly
Separate the rice squares and shrimp salad before freezing. Place the rice in a single layer on a parchment sheet, freeze solid, then transfer to a zip‑top bag. The shrimp salad can be frozen in a sealed container for up to 1 month. Thaw overnight in the fridge and reheat as directed.
Best Reheating Method
To revive the rice, add a tiny splash of water (about a teaspoon per square) to the pan, cover, and heat on medium for 2‑3 minutes. The steam will loosen the crust just enough to become crunchy again without drying out. Avoid microwaving; it turns the rice soggy in seconds.