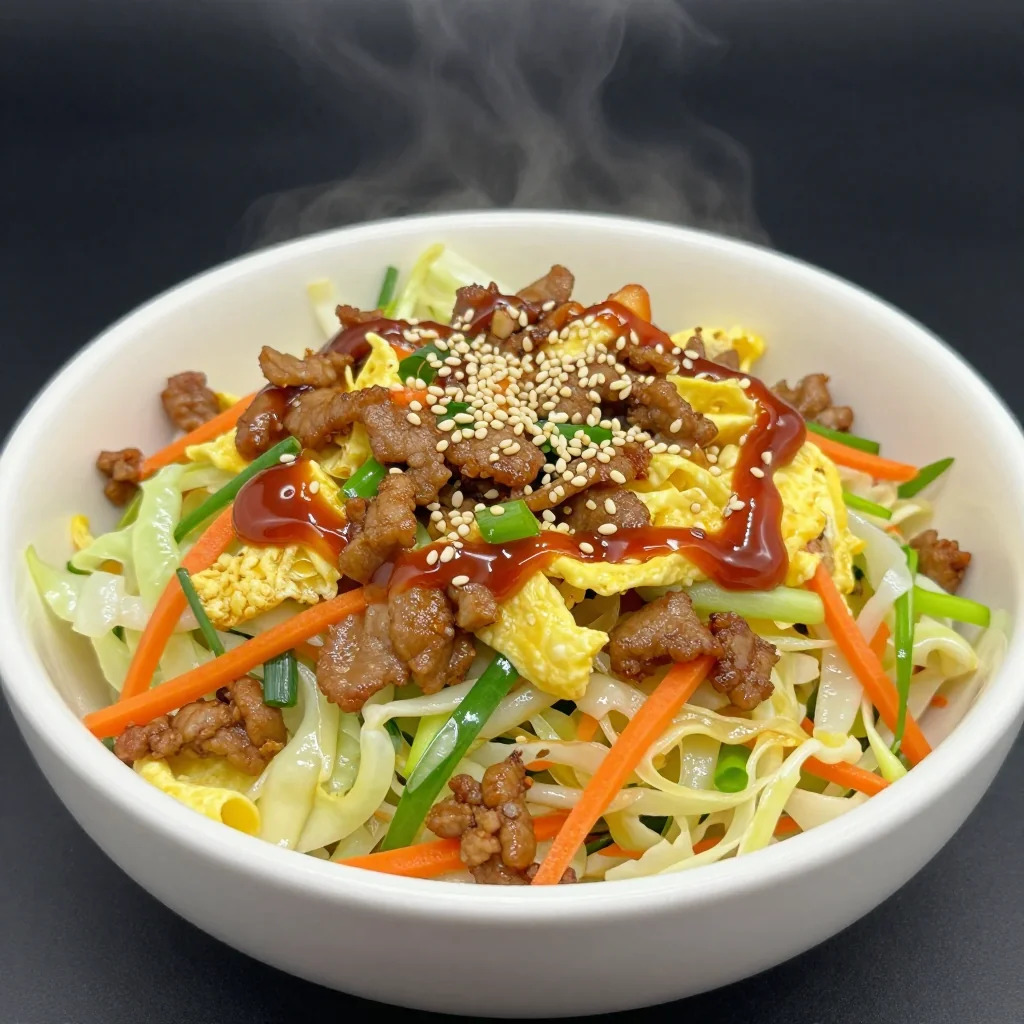
Crispy chicken, tangy marinara, and perfectly al dente penne—an Italian‑American classic that never disappoints.
When I was a teenager, my Italian grandmother would pull a golden, bubbling tray of chicken Parmesan out of the oven every Sunday. The aroma of melted mozzarella, fresh basil, and simmering marinara would drift through the house, turning a simple family dinner into a celebration. I still remember the first time I tasted the crisp, seasoned coating on the chicken—its satisfying crunch paired with the creamy, tangy sauce was pure comfort.
Chicken Parmesan, originally a humble Italian dish, traveled across the Atlantic and found a new home in American kitchens, where it merged with the beloved penne pasta to become a hearty, family‑friendly entrée. Its versatility makes it perfect for weeknight meals or special gatherings, and the combination of textures—crispy chicken, silky sauce, and al dente pasta—creates a symphony of flavors that never gets old.
In this guide, I’ll walk you through every step, from seasoning the chicken to perfecting the sauce, and show you how to balance the dish so each bite is harmonious. You’ll learn why a brief brine, a double‑dip coating technique, and a quick finish under the broiler make all the difference.
Grab your apron, preheat the oven, and let’s bring a taste of Italy to your table together.
🌟 Why This Recipe Will Win You Over
This Chicken Parmesan with Penne Pasta blends classic comfort with smart cooking tricks, ensuring a restaurant‑quality result at home.
- ✨ Perfectly Crispy Chicken: A two‑step coating (flour, egg, panko‑Parmesan) creates a golden crust that stays crunchy even after baking.
- ✨ Balanced Flavor Profile: Sweet tomatoes, aromatic garlic, and fresh basil lift the richness of the cheese for a well‑rounded taste.
- ✨ One‑Pan Efficiency: By baking the chicken on a sheet pan and tossing the pasta directly with the sauce, cleanup is minimal.
- ✨ Adjustable Heat: The broiler finish adds a caramelized top without overcooking the interior, giving you control over the final texture.
- ✨ Family‑Friendly Appeal: The dish is familiar enough for kids yet sophisticated enough for adult palates, making it a crowd‑pleaser.
- ✨ Easy Portion Scaling: Built‑in portion adjuster lets you serve 2 to 12 people without recalculating each ingredient manually.
🥗 Ingredients
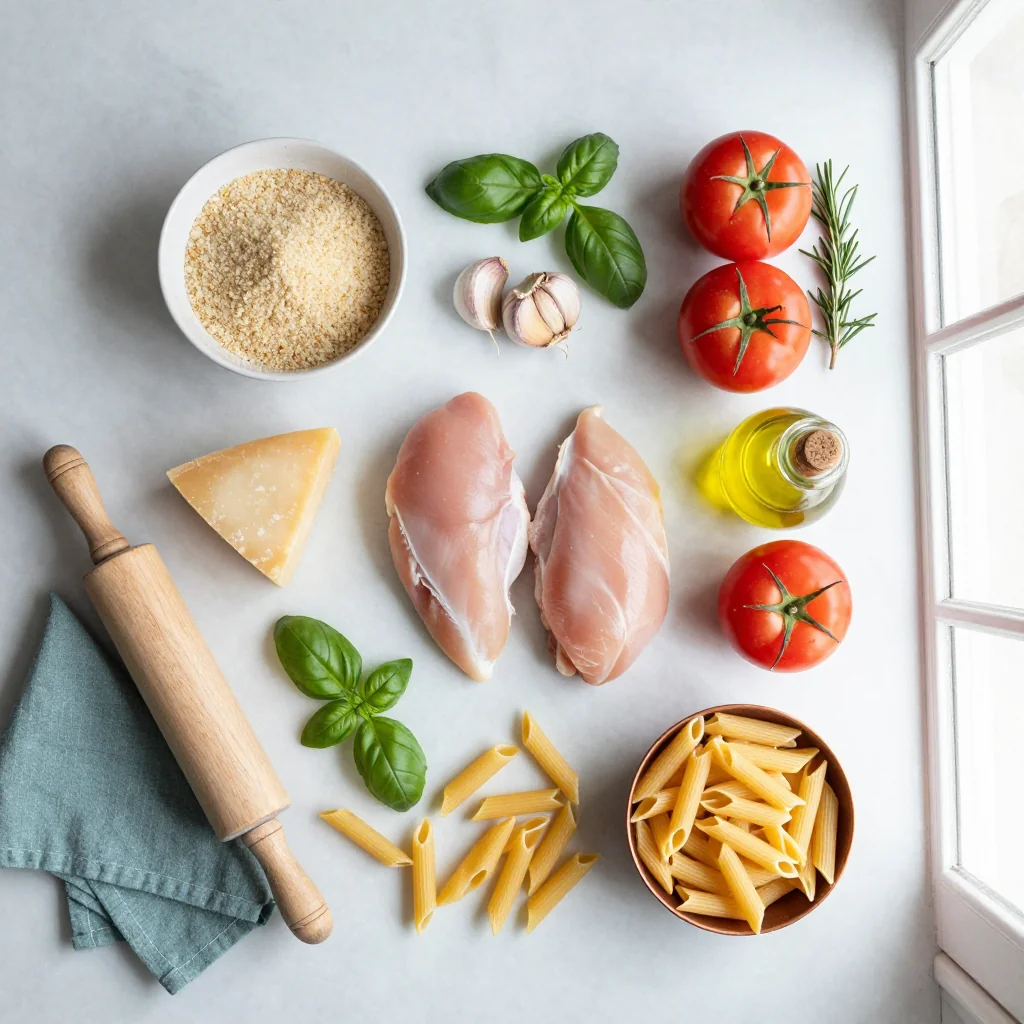
📝 Complete Ingredient List
For the Chicken:
For the Sauce:
For the Pasta:
🔍 Focus on Key Ingredients
Chicken Breasts
Choosing boneless, skinless chicken breasts ensures even cooking and quick preparation. For extra juiciness, lightly pound them to an even thickness of about 1 cm; this also helps the coating adhere uniformly.
Panko Breadcrumbs
Panko provides a light, airy crunch that traditional breadcrumbs lack. Toast them briefly in a dry pan before mixing with Parmesan to amplify their golden hue and flavor.
Marinara Sauce
A high‑quality marinara with ripe tomatoes, garlic, and a hint of oregano forms the backbone of the dish. If you prefer a spicier profile, add a pinch of red‑pepper flakes during the simmer.
🔄 Quick Substitutions
| If you don’t have… | Use instead… |
|---|---|
| Panko breadcrumbs | Regular breadcrumbs toasted lightly |
| Parmesan cheese | Grana Padano or Pecorino Romano |
| Marinara sauce | Crushed tomatoes with garlic and basil |
👨🍳 Step‑by‑Step Instructions
Follow these detailed phases to achieve a perfectly balanced Chicken Parmesan with Penne Pasta, from prep to plating.
📋 Phase 1: Preparation & Mise en Place
Gather, measure, and prep all components before you start cooking.
Prepare the Chicken
Pat the chicken breasts dry with paper towels. Lightly season each side with salt and pepper, then place them between two sheets of plastic wrap. Using a meat mallet or rolling pin, pound each breast to an even 1 cm thickness; this ensures uniform cooking and a tender interior.
Set Up Breading Stations
Arrange three shallow bowls: one with flour, one with beaten eggs, and the third with a mixture of panko breadcrumbs, grated Parmesan, a pinch of salt, and a dash of pepper. The double‑dip method—flour → egg → breadcrumb—creates a seal that locks in moisture.
Coat the Chicken
Dredge each chicken piece in flour, shaking off excess, then dip into the egg, allowing any surplus to drip back into the bowl. Finally, press the chicken into the breadcrumb mixture, ensuring an even coating on all sides. Place the coated pieces on a parchment‑lined baking sheet.
🔥 Phase 2: Cooking & Assembly
Cook the components and bring them together into a harmonious dish.
Bake the Chicken
Preheat the oven to 200 °C (390 °F). Drizzle the olive oil over the coated chicken or spray lightly with cooking spray. Bake for 20 minutes, then flip and bake another 5 minutes. The crust should be golden and the internal temperature should reach 74 °C (165 °F).
Cook the Penne
While the chicken bakes, bring a large pot of salted water to a boil. Add the penne and cook al dente according to package instructions (usually 11‑12 minutes). Drain, reserving ½ cup of pasta water, then toss the pasta with butter and a splash of the reserved water.
Simmer the Sauce
In a saucepan over medium heat, sauté the minced garlic in a drizzle of olive oil until fragrant (about 30 seconds). Add the marinara sauce, dried oregano, and the extra 25 g of grated Parmesan. Simmer gently for 8‑10 minutes, stirring occasionally. Adjust salt and pepper to taste.
✨ Phase 3: Finishing & Plating
Combine, melt, and serve your masterpiece.
Layer the Dish
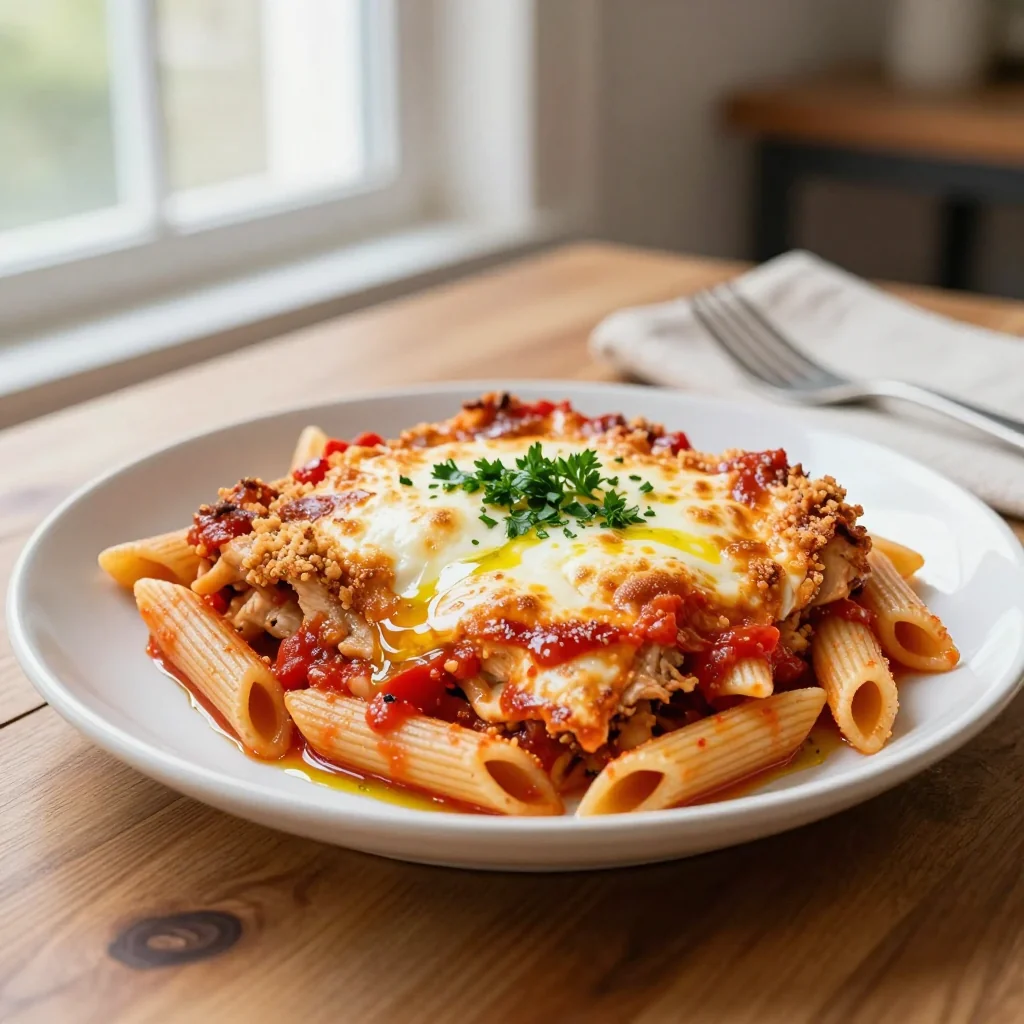
Remove the chicken from the oven. Spoon a thin layer of sauce onto each piece, then sprinkle a generous amount of shredded mozzarella on top. Return the chicken to the oven and broil for 2‑3 minutes, watching closely until the cheese bubbles and turns a light golden brown.
Combine Pasta and Sauce
In a large serving bowl, toss the cooked penne with the remaining marinara sauce, ensuring every noodle is coated. Add a handful of torn fresh basil leaves for a pop of color and fresh flavor.
Plate the Dish
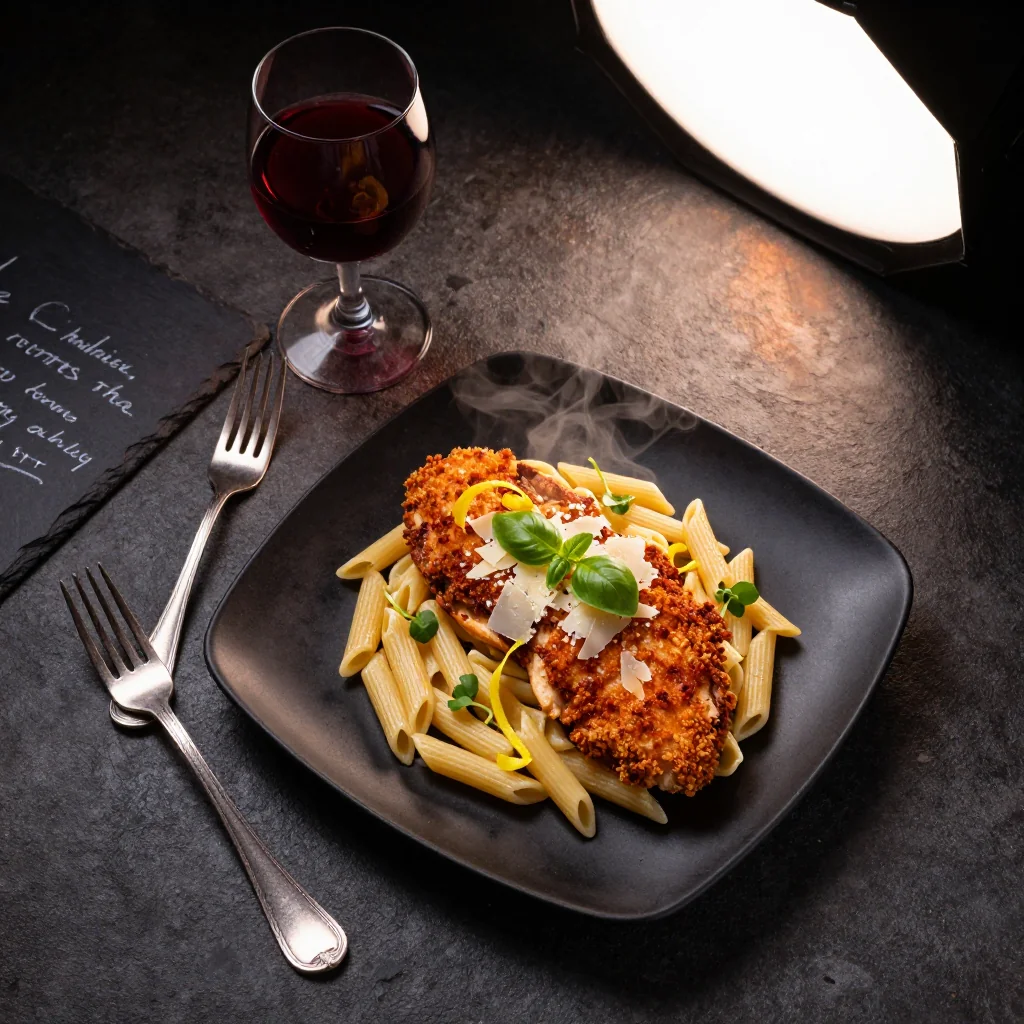
Divide the sauced penne among four plates. Place a cheese‑browned chicken breast on top of each serving. Garnish with extra Parmesan shavings and a drizzle of olive oil if desired.
Serve Immediately
Serve hot, accompanied by a crisp green salad or garlic bread. The contrast between the crunchy chicken and the silky pasta makes each bite unforgettable.
💡 Expert Tips & Tricks
🛒 Choosing the Right Ingredients
Look for chicken breasts that are firm and pink with no discoloration. Fresh basil should have bright green leaves and a strong aroma; avoid wilting or yellowing leaves. Opt for Italian‑style panko, which is larger and flakier than standard Japanese panko, giving a superior crunch.
🔪 Preparation Techniques
Season the flour with a pinch of garlic powder and paprika for an extra flavor boost. When beating the eggs, add a splash of milk to create a silkier coating. Use a wire rack over the baking sheet to allow air circulation, keeping the crust from becoming soggy.
🌡️ Mastering the Cooking Process
Always preheat the oven fully before inserting the chicken; a hot oven creates the initial burst of steam that helps the crust set quickly. Use a meat thermometer to avoid undercooking. For the sauce, simmer gently—high heat can cause the tomatoes to become bitter.
🍽️ Presentation & Service
Plate the pasta in a shallow bowl, creating a nest for the chicken to sit atop. Finish with a sprinkle of fresh basil and a light drizzle of high‑quality extra‑virgin olive oil. Serve with a wedge of lemon on the side for a bright, acidic contrast.
🏆 Pro-Level Secrets
Elevate your home cooking to restaurant standards with these refined techniques.
- 🎯 Brining the Chicken: Submerge the breasts in a light brine (½ tsp salt per cup of water) for 15 minutes before coating. The brine enhances moisture retention, resulting in juicier meat after baking.
- 🎯 Double‑Layer Breadcrumbs: After the first coating, let the chicken rest, then repeat the egg‑dip and breadcrumb step. This creates an ultra‑crisp shell that stays crunchy even after the cheese melts.
- 🎯 High‑Heat Broiling: Position the oven rack close to the broiler and watch the cheese closely. A rapid, high‑heat blast caramelizes the cheese without overcooking the chicken underneath.
- 🎯 Pasta Water Emulsion: Adding a splash of starchy pasta water to the sauce creates a silky emulsion that clings to the penne, giving each bite a cohesive mouthfeel.
- 🎯 Flavor Layering: Sprinkle a pinch of smoked paprika into the breadcrumb mixture for subtle smokiness that complements the tomato base.
- 🎯 Rest Before Serving: Let the assembled plates rest for 2‑3 minutes after plating; this allows the flavors to meld and the cheese to set slightly, making for cleaner slicing.
"Cooking is about balance—texture, flavor, and timing. When you master those, the dish sings." — Chef Massimo Bottura
🔄 Variations & Adaptations
This recipe is a flexible canvas; feel free to explore these creative twists.
🥬 Vegetarian/Vegan Version
Replace the chicken with thick slices of eggplant or portobello mushrooms. Marinate them in olive oil, lemon juice, and herbs, then follow the same breading process using vegan panko and plant‑based Parmesan. Use a vegan mozzarella alternative for the topping.
- Eggplant slices (1 cm thick) – 2 large eggplants
- Vegan mozzarella – 150 g
🌶️ Flavor Variations
Adjust the flavor profile to match your cravings or the season.
Spicy Kick
Add ½ tsp red‑pepper flakes to the marinara and a dash of hot sauce to the breadcrumb mixture. Finish with a sprinkle of crushed chili for extra heat.
Mediterranean Twist
Stir chopped sun‑dried tomatoes, Kalamata olives, and capers into the sauce. Replace mozzarella with feta crumbles for a tangy finish.
Asian‑Inspired
Swap marinara for a sweet‑chili garlic sauce, use panko mixed with toasted sesame seeds, and garnish with sliced scallions and a drizzle of soy‑ginger glaze.
⚠️ Dietary Adjustments
Gluten‑Free
Use gluten‑free panko or crushed gluten‑free cornflakes for the coating, and replace penne with gluten‑free pasta.
Lactose‑Free
Choose lactose‑free mozzarella and Parmesan alternatives made from almond or cashew bases.
Low‑Calorie
Reduce the amount of oil by baking the chicken on a wire rack without added oil, and use a reduced‑fat marinara. Increase the proportion of vegetables, such as adding roasted zucchini ribbons.
👶 Kid‑Friendly Version
Omit the garlic and oregano for milder flavor, use a sweeter tomato sauce, and serve with a side of steamed carrots. Cut the chicken into bite‑size strips for easy handling.
📦 Storage & Reheating
🧊 Storage
Refrigerator
- Duration: 3 days
- Container: Airtight glass or BPA‑free plastic
- Tip: Store sauce and pasta separately to keep the pasta from becoming soggy.
Freezer
- Duration: 2 months
- Method: Cool completely, then wrap each chicken piece in parchment and place in a freezer‑safe bag.
- Defrost: Overnight in the refrigerator, then reheat as described below.
💡 For best texture, reheat the chicken on a baking sheet rather than in a microwave.
♨️ Reheating
🔥 Oven (Recommended)
- Preheat to 180 °C (350 °F).
- Cover the dish with aluminum foil to retain moisture.
- Heat for 15‑20 minutes.
- Remove foil, add a thin layer of extra cheese if desired, and bake another 5 minutes to re‑crisp the crust.
⚡ Microwave (Quick)
- Place a slice on a microwave‑safe plate, cover with a microwave‑safe lid.
- Heat on medium power for 1‑2 minutes, checking halfway.
- Stir the pasta gently to distribute heat evenly.
🍳 Stovetop
Reheat the sauce and pasta together in a skillet over low heat, adding a splash of broth. For the chicken, sear briefly in a hot non‑stick pan with a drizzle of oil to restore crispness.
🍷 Perfect Pairings
🥗 Side Dishes
- Arugula Salad with Lemon Vinaigrette: The peppery arugula cuts through the richness of the cheese.
- Garlic‑Roasted Broccoli: Adds a crunchy, slightly bitter contrast.
- Classic Caesar Salad: The creamy dressing complements the tomato sauce beautifully.
🍷 Wine & Beverage Pairings
- Chianti Classico: Its bright acidity balances the tomato sauce and cheese.
- Barbera d'Asti: Offers soft tannins and fruit notes that echo the marinara.
- Non‑Alcoholic: Sparkling Italian soda with a hint of blood orange.
🍰 To Complete the Meal
Start with a light bruschetta appetizer, follow with the Chicken Parmesan main course, and finish with a refreshing lemon sorbet or a classic tiramisu for a sweet, creamy conclusion.
❓ Frequently Asked Questions
Q: Can I use chicken thighs instead of breasts?
Yes, boneless, skinless thighs work well and stay juicier. Because thighs are thicker, you may need to increase the baking time by 5‑7 minutes and ensure the internal temperature reaches 74 °C (165 °F).
Q: How do I prevent the breadcrumb coating from falling off?
Pat the chicken dry, season the flour, and let the coated pieces rest for a few minutes before baking. The rest period allows the coating to adhere firmly. Using a wire rack also promotes even airflow, reducing sogginess that can cause crumbs to detach.
Q: My sauce is too thin—what should I do?
Simmer the sauce uncovered for a few extra minutes to reduce it, or stir in a teaspoon of tomato paste. Adding a splash of the reserved pasta water helps create a smoother emulsion without making it watery.
Q: Is it possible to make this recipe gluten‑free?
Absolutely. Swap regular panko for gluten‑free breadcrumbs and use gluten‑free penne. Ensure all other ingredients (like soy sauce, if used in a variation) are also certified gluten‑free.
Q: Can I prepare the dish ahead of time?
Yes. You can coat and bake the chicken a day before, then store it in the refrigerator. Reheat in the oven with the cheese topping just before serving. Cook the pasta fresh to maintain texture.
Q: How do I make the dish lower in calories?
Reduce the amount of oil used for frying, opt for a light mozzarella, and increase the proportion of vegetables like zucchini ribbons mixed with the penne. Using whole‑wheat penne adds fiber, which helps with satiety.
🎉 Let’s Get Cooking!
This Chicken Parmesan with Penne Pasta brings together the best of comfort food and culinary technique. By following the step‑by‑step guide, you’ll achieve a dish that’s crispy on the outside, juicy inside, and drenched in a savory tomato‑cheese sauce—all while serving a perfectly al dente pasta. The built‑in portion adjuster makes it simple to scale the recipe for any gathering, from a cozy family dinner to a lively weekend party.
Give it a try, snap a photo of your masterpiece, and share your experience in the comments below. Your feedback helps us improve and inspires other home cooks to take on this classic with confidence.
Have you tried this recipe?
Leave a comment and a rating below! Share your photos on Instagram with #ParmesanPenne for a chance to be featured.
Chicken Parmesan with Penne Pasta
Crispy chicken smothered in marinara and mozzarella, served over al dente penne.
📝 Ingredients
Chicken
Sauce
Pasta
👨🍳 Instructions
- 1 Pat chicken dry, season, and pound to even thickness.
- 2 Set up flour, egg, and breadcrumb stations; coat chicken using the double‑dip method.
- 3 Bake coated chicken at 200 °C for 25 minutes, flipping halfway.
- 4 Cook penne al dente, drain, and toss with butter.
- 5 Simmer marinara with garlic, oregano, and extra Parmesan for 10 minutes.
- 6 Top baked chicken with sauce and mozzarella; broil 2‑3 minutes until bubbly.
- 7 Toss penne with remaining sauce and fresh basil.
- 8 Plate pasta, place chicken on top, garnish with Parmesan shavings.
- 9 Serve hot with optional side salad or garlic bread.
- 10 Enjoy and share your creation with friends!
🥗 Nutrition (per serving)
*Nutrition facts are estimates based on standard ingredients.
📚 You Might Also Like

Eggplant Parmesan with Spaghetti

Classic Lasagna

Shrimp Scampi Linguine


💬 Comments & Reviews
Leave a Comment
No comments yet. Be the first to share your thoughts!