I still remember the year I swore off holiday baking forever. My kitchen looked like a snowstorm had collided with a flour factory, my cookies were harder than the coal in my nephew's stocking, and my peppermint bark had the texture of roof shingles. My neighbor Carol took one polite bite, smiled through gritted teeth, and suggested I stick to store-bought treats. That stung worse than the peppermint oil I'd accidentally rubbed in my eye. But here's the thing about kitchen failures — they either break you or they make you obsessed. I chose obsession. I spent the next two months testing, tweaking, and practically living in my kitchen until I cracked the code to the most impossibly soft, melt-in-your-mouth Christmas peppermints that would make even the Grinch weep with joy.
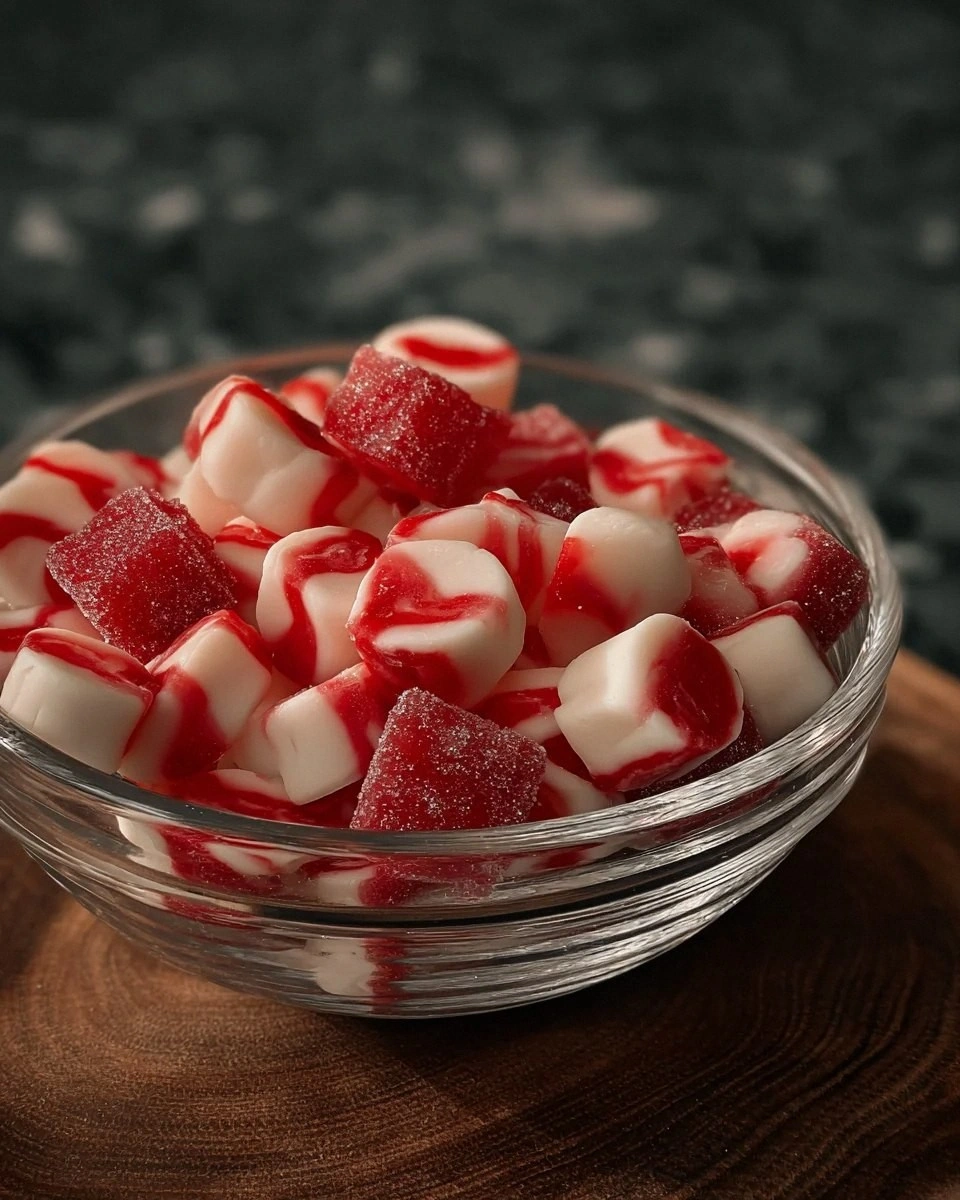
The first time I pulled these soft Christmas peppermints from the oven, the entire house smelled like I'd opened a candy cane factory inside a vanilla cloud. My daughter wandered downstairs in her pajamas, following her nose like a cartoon character floating toward the scent. When she bit into one, her eyes went wide and she did this little happy dance that made all the flour-dusted failures worth it. These aren't your grandmother's rock-hard peppermints that could chip a tooth. These are delicate, pillowy confections that dissolve on your tongue like sweet snowflakes, leaving behind the perfect whisper of peppermint that makes everything feel more magical.
What makes these different from every other peppermint candy recipe out there? It's all about the technique, baby. Most recipes get this completely wrong by using too much sugar and not enough fat, resulting in those jaw-breaking discs that taste like toothpaste tablets. My version uses a secret ingredient that keeps them lusciously soft even days later (spoiler: it's not what you think). The texture is so tender that when you bite into one, it practically collapses into a peppermint-scented dream. Picture yourself pulling these out of the oven, the whole kitchen smelling incredible, while your family gathers around like you're some kind of holiday wizard.
Let me walk you through every single step — by the end, you'll wonder how you ever made it any other way. Trust me, once you taste these, you'll understand why I hid a stash in my nightstand and told my family they were already gone. I dare you to taste this and not go back for seconds, thirds, and maybe the whole batch when nobody's looking.
What Makes This Version Stand Out
Cloud-Soft Texture: These aren't the jaw-breakers from grandma's candy dish. They melt like butter on a warm biscuit, with a texture so tender it practically dissolves the moment it hits your tongue. The secret lies in the perfect ratio of fat to sugar, creating a candy that's more pillow than peppermint.
Real Peppermint Power: Forget that artificial mint flavor that tastes like toothpaste. We're using pure peppermint oil that delivers a clean, bright flavor that actually tastes like Christmas morning. A few drops go a long way, creating that authentic candy cane experience without the chemical aftertaste.
Make-Ahead Magic: These beauties actually get better with age, developing a deeper flavor after 24 hours. You can whip up a batch on Sunday and still be enjoying them on Christmas Eve, making them perfect for holiday prep. They'll stay soft for up to two weeks if you store them properly (and that's a big if, because they disappear fast).
Kid-Friendly Fun: This is the recipe that turns your kitchen into the North Pole. Rolling the dough, cutting shapes, and dusting with powdered sugar becomes a holiday tradition your kids will beg to repeat. Even my teenager, who thinks he's too cool for everything, gets excited about making these.
Impressive Yet Easy: Despite looking like they came from a fancy candy shop, these require zero special equipment and about 20 minutes of actual work time. You'll look like a confectionery genius while barely breaking a sweat. Your guests will swear you bought them from some artisanal candy maker.
Customizable Canvas: Want to make them pink? Add food coloring. Feeling fancy? Dip them in chocolate. Want to be extra? Roll them in crushed candy canes. This recipe is your peppermint playground, ready for whatever holiday magic you want to create.
Alright, let's break down exactly what goes into this masterpiece...
Inside the Ingredient List
The Flavor Base
Every great peppermint starts with butter — but not just any butter. You need the good stuff, the European-style butter with 82% fat content that makes everything taste like you hired a French pastry chef. The higher fat content creates that luxurious mouthfeel that sets these apart from every other peppermint recipe you've tried. I learned this the hard way after using cheap butter once and ending up with candies that tasted like disappointment with a hint of mint. Don't be like me — splurge on the butter, because it's literally half the recipe and you can taste the difference in every single bite.
Pure peppermint oil is non-negotiable here. That little bottle might seem expensive, but we're talking about something that costs pennies per drop and lasts forever. Peppermint extract is watered-down imposter that'll leave you with bland, vaguely minty disappointment. The oil delivers that authentic candy cane punch that makes your whole face feel clean and your spirit feel bright. Buy it once and you'll find yourself adding it to hot chocolate, coffee, and pretty much anything that needs a holiday hug.
The Texture Crew
Powdered sugar isn't just for dusting — it's the structural backbone that gives these candies their tender crumb. Regular granulated sugar creates that familiar crunch, but we're after something softer, more yielding. The cornstarch in powdered sugar also helps absorb moisture, keeping your peppermints from turning sticky in humid conditions. I learned this trick from watching my grandmother make her famous wedding cookies, and it works just as beautifully here.
Cream cheese is my secret weapon for achieving that impossible softness. Just two tablespoons transform the texture from merely good to absolutely transcendent. It adds richness without overwhelming the peppermint, creating a candy that's almost cheesecake-like in its delicacy. The slight tang balances the sweetness perfectly, preventing that sugar-burn you get from one-dimensional candies.
The Unexpected Star
Here's where things get interesting — a tablespoon of honey. I know, I know, honey in peppermint sounds weird, but stay with me here. The honey adds complexity and depth that plain sugar just can't achieve, plus it helps maintain that soft texture we love. It creates these subtle floral notes that dance around the peppermint, making each bite more interesting than the last. Your guests won't be able to put their finger on what's different, but they'll know these aren't ordinary peppermints.
Corn syrup might seem like an odd addition, but it's the insurance policy against rock-hard candy. A small amount interferes with sugar crystallization, keeping your peppermints tender even after days in the tin. It's the same principle that keeps pecan pie from turning into a sugar brick, and it works beautifully here. If you're anti-corn-syrup, you can substitute with a tablespoon of golden syrup or even honey, but the results won't be quite as foolproof.
The Final Flourish
Vanilla extract might seem redundant when you're already using peppermint oil, but it rounds out the flavor profile like nothing else. It adds warmth and depth, preventing the peppermint from tasting sharp or medicinal. Just a few drops make the difference between amateur hour and professional results. I use Madagascar bourbon vanilla because it's what I have on hand, but any good quality vanilla will work beautifully.
Food coloring is optional but highly recommended for that classic peppermint look. I prefer gel colors because they don't add extra liquid to the dough, but regular liquid coloring works fine too. Start with just a tiny amount — you can always add more, but you can't take it out once it's in there. For a natural approach, beet powder creates a beautiful dusty pink that's surprisingly festive.
Everything's prepped? Good. Let's get into the real action...
The Method — Step by Step
- Start by beating your butter until it's lighter than fresh snow and twice as fluffy. This should take about 3-4 minutes on medium speed — don't rush it. You're incorporating air that will give your peppermints that tender, melt-away texture. The butter should be cool but pliable, not greasy or melted. If you've forgotten to take it out ahead of time, cut it into small cubes and let it sit for 15 minutes while you prep everything else.
- Now comes the fun part — adding the powdered sugar gradually, about half a cup at a time. Let each addition fully incorporate before adding the next, scraping down the bowl religiously. This prevents sugar clouds from enveloping your kitchen like a sweet blizzard. The mixture will go from sandy to creamy to downright luxurious. When it's ready, it should look like the world's most beautiful buttercream frosting, pale and pillowy and begging to be eaten with a spoon.
- Time for the flavor bomb — add your peppermint oil, vanilla, and cream cheese all at once. Beat just until combined, being careful not to overmix. The cream cheese should disappear completely, leaving behind nothing but richness and the promise of softness. Take a tiny taste here — it should be intensely pepperminty but not overwhelming, with a subtle tang from the cream cheese that keeps things interesting.
- Divide your dough in half if you want different colors, or leave it all natural for a sophisticated cream color. Add your food coloring a tiny drop at a time — you want a soft pink, not bubblegum explosion. Knead gently until the color is even, being careful not to overwork the dough. It should feel like play-dough that's been left out for a few minutes — pliable but not sticky.
- Roll the dough between two sheets of parchment paper to about 1/4-inch thickness. This prevents sticking without adding extra flour that could toughen your candies. The parchment trick is a game-changer — no more dough welded to your counter or rolling pin covered in goo. Aim for even thickness so your candies cook uniformly; nobody wants a tray of half-burnt, half-raw peppermints.
- Now comes the creative part — use small cookie cutters to punch out shapes, or simply slice into squares with a sharp knife. I like using tiny star cutters for the holidays, but hearts work year-round and circles are classic for a reason. Transfer carefully to a parchment-lined baking sheet, leaving a little space between each candy. They won't spread much, but you want room for air circulation.
- Bake at 275°F for about 25-30 minutes — low and slow is the key here. You're essentially drying them out rather than baking them, creating that tender, almost shortbread-like texture. They should look set but not browned, with a slightly matte surface. If you touch one gently, it should feel firm but give slightly under pressure. The house will smell like you've opened a candy cane factory, and your neighbors might start showing up with empty tins.
- Cool completely on the baking sheet — this is crucial for achieving the proper texture. While they're still warm, they're fragile and prone to breaking. As they cool, they firm up but stay tender. Once cool, dust generously with powdered sugar for that classic peppermint look. The sugar will absorb slightly into the surface, creating a soft, powdery coating that melts on your tongue.
- Store in an airtight container with layers separated by parchment paper. They actually improve after a day or two as the flavors meld and the texture settles into that perfect softness. Hide them well — I speak from experience when I say these have a way of disappearing faster than cookies left out for Santa. The batch that was supposed to last through New Year's barely made it to Christmas morning in my house.
That's it — you did it. But hold on, I've got a few more tricks that'll take this to another level...
Insider Tricks for Flawless Results
The Temperature Rule Nobody Follows
Here's the thing that separates amateur candy makers from the pros — room temperature ingredients aren't just a suggestion, they're the law. Cold cream cheese won't incorporate smoothly, leaving you with little white flecks that taste like tangy surprises. Warm butter melts too quickly, creating greasy, flat candies that spread into peppermint puddles. Your ingredients should feel cool to the touch but pliable, like clay that's been sitting in a comfortable room. I keep my butter on the counter for exactly 45 minutes before starting — set a timer, because too soft is just as bad as too cold.
Why Your Nose Knows Best
That moment when you open the bottle of peppermint oil? Take a tiny whiff — not a deep inhale or you'll clear your sinuses for a week. Good peppermint oil should smell bright and clean, like fresh snow with a hint of sweetness. If it smells medicinal or harsh, it's either old or poor quality, and your candies will taste like cough drops. I've made this mistake once, and my family still jokes about the year I served "Halls Helper" for dessert. Invest in quality oil from a reputable spice shop or online retailer; the difference is immediately obvious.
The 5-Minute Rest That Changes Everything
After mixing your dough, let it rest for five minutes before rolling. This brief pause allows the flour to fully hydrate and the butter to firm up slightly, making the dough much easier to work with. It's like giving your ingredients a chance to get to know each other before they commit to being candy together. I've skipped this step in a rush and ended up with sticky, frustrating dough that fought me every step of the way. Those five minutes feel like forever when you're excited to get rolling, but they're the difference between zen candy making and a kitchen meltdown.
The Powdered Sugar Secret
Don't dust your peppermints immediately after baking — wait until they're completely cool. Warm candies will absorb the sugar, creating a sticky glaze instead of that soft, powdery coating. When you do dust them, use a fine-mesh sieve for the most even coverage. Hold it about 6 inches above the candies and tap gently, creating a snowfall effect that looks professionally done. For extra flair, mix a little edible glitter with your powdered sugar — it catches the light and makes your peppermints look like they're covered in tiny diamonds.
Creative Twists and Variations
This recipe is a playground. Here are some of my favorite ways to switch things up:
Chocolate-Dipped Dreams
Dip half of each cooled peppermint in melted dark chocolate, then sprinkle with crushed candy canes before the chocolate sets. The contrast between cool mint and rich chocolate is absolutely divine, like a grown-up version of those chocolate mint cookies everyone pretends not to love. Use good quality chocolate — the kind you'd eat on its own — because life is too short for waxy chocolate coatings.
Cocoa Peppermint Clouds
Replace 2 tablespoons of flour with unsweetened cocoa powder for chocolate-mint peppermints that taste like the world's most sophisticated Thin Mint. The cocoa adds depth and richness without overwhelming the peppermint, creating a more complex flavor profile. Kids love the familiar chocolate-mint combo, while adults appreciate the grown-up twist on a classic.
Lemon-Peppermint Surprise
Add 1/4 teaspoon of lemon zest to the dough for citrus-mint peppermints that taste like Christmas morning in a Mediterranean garden. The lemon brightens the peppermint, creating a candy that's both familiar and excitingly different. It's like the flavor equivalent of twinkle lights — unexpected but absolutely perfect.
Salted Caramel Mint
Press a tiny piece of soft caramel into the center of each candy before baking, then sprinkle with a few grains of flaky sea salt. As they bake, the caramel melts into a gooey center that creates a salted caramel surprise. The sweet-salty-mint combination is ridiculously addictive — I'll be honest, I ate half the batch before anyone else got to try it.
Spiced Holiday Blend
Add a pinch of cinnamon, nutmeg, and ginger to create peppermints that taste like Christmas potpourri in the best possible way. The warm spices complement the cool mint, creating a candy that tastes like every happy holiday memory rolled into one. These are particularly good with hot apple cider or mulled wine.
Rainbow Peppermint Party
Divide the dough into four portions and color each a different shade — pink, green, blue, and yellow — then roll them together for marbled peppermints that look like edible ornaments. Kids go absolutely wild for these, and they're surprisingly sophisticated looking when arranged in a clear glass jar. It's like a candy kaleidoscope that tastes like Christmas.
Storing and Bringing It Back to Life
Fridge Storage
These peppermints are surprisingly resilient, but they do need proper storage to maintain their tender texture. An airtight container is non-negotiable — exposure to air is what turns soft candies into dental hazards. I layer mine in a tin with parchment paper between each layer, like a peppermint lasagna that gets better with time. Stored properly in the fridge, they'll keep for up to two weeks, though mine have never lasted more than three days. The cold actually helps them maintain their shape while keeping that soft interior we love.
Freezer Friendly
Here's where this recipe really shines — these freeze beautifully for up to three months. Flash freeze them on a baking sheet first, then transfer to a freezer bag with all the air pressed out. When you're ready to serve, let them thaw at room temperature for about 30 minutes. They'll taste exactly like fresh-baked, making this the perfect make-ahead holiday treat. I always double the recipe and freeze half, because nothing beats having homemade candy ready when unexpected guests drop by.
Best Reheating Method
While these are meant to be eaten at room temperature, if they've been refrigerated and you want that just-baked softness, here's the trick: place them on a paper towel and microwave for exactly 8 seconds. Not 7, not 9 — 8 seconds exactly. Any longer and you'll have peppermint puddles. The paper towel absorbs excess moisture while the brief warmth restores that tender texture. It's like hitting a reset button on freshness, bringing back that just-made magic.