Love this? Pin it for later! 📌
Every December, my kitchen transforms into a peppermint-scented wonderland. The moment I pull out my trusty red-and-white striped apron, my family knows that holiday baking season has officially begun. But among all the cookies, cakes, and confections that grace our countertops, these Rich Chocolate Peppermint Truffle Brownies hold a special place in our hearts—and on our dessert table. They're the love child of three legendary desserts: fudgy brownies, silky chocolate truffles, and that nostalgic peppermint bark that disappears faster than you can say "Secret Santa." After years of perfecting this recipe (and taste-testing more batches than I care to admit), I've created what I firmly believe is the ultimate holiday brownie. The base is intensely chocolatey with that perfect crackly top, but the real magic happens when you pour over the peppermint truffle layer. It sets into this glossy, melt-in-your-mouth layer that tastes exactly like biting into a gourmet chocolate truffle, kissed with just enough peppermint to make your taste buds sing carols. Whether you're hosting a cookie exchange, need a show-stopping dessert for Christmas dinner, or simply want to treat yourself to something worthy of Santa's plate, these brownies deliver pure holiday magic in every bite.
Why This Recipe Works
- Triple Chocolate Threat: Three types of chocolate create layers of complex flavor that develop as you chew
- Perfect Peppermint Balance: Just enough mint to refresh without overwhelming the chocolate
- Foolproof Truffle Layer: A simple ganache technique that always sets perfectly smooth
- Make-Ahead Friendly: Actually improves in flavor after 24-48 hours in the refrigerator
- Freezer Hero: Thaws beautifully for up to 3 months without losing texture
- Customizable Canvas: Easy to adapt for different dietary needs or flavor preferences
- Show-Stopping Presentation: The glossy truffle layer makes these look bakery-professional
- Texture Paradise: Crackly top, fudgy center, silky truffle layer, and crunchy candy pieces
Ingredients You'll Need
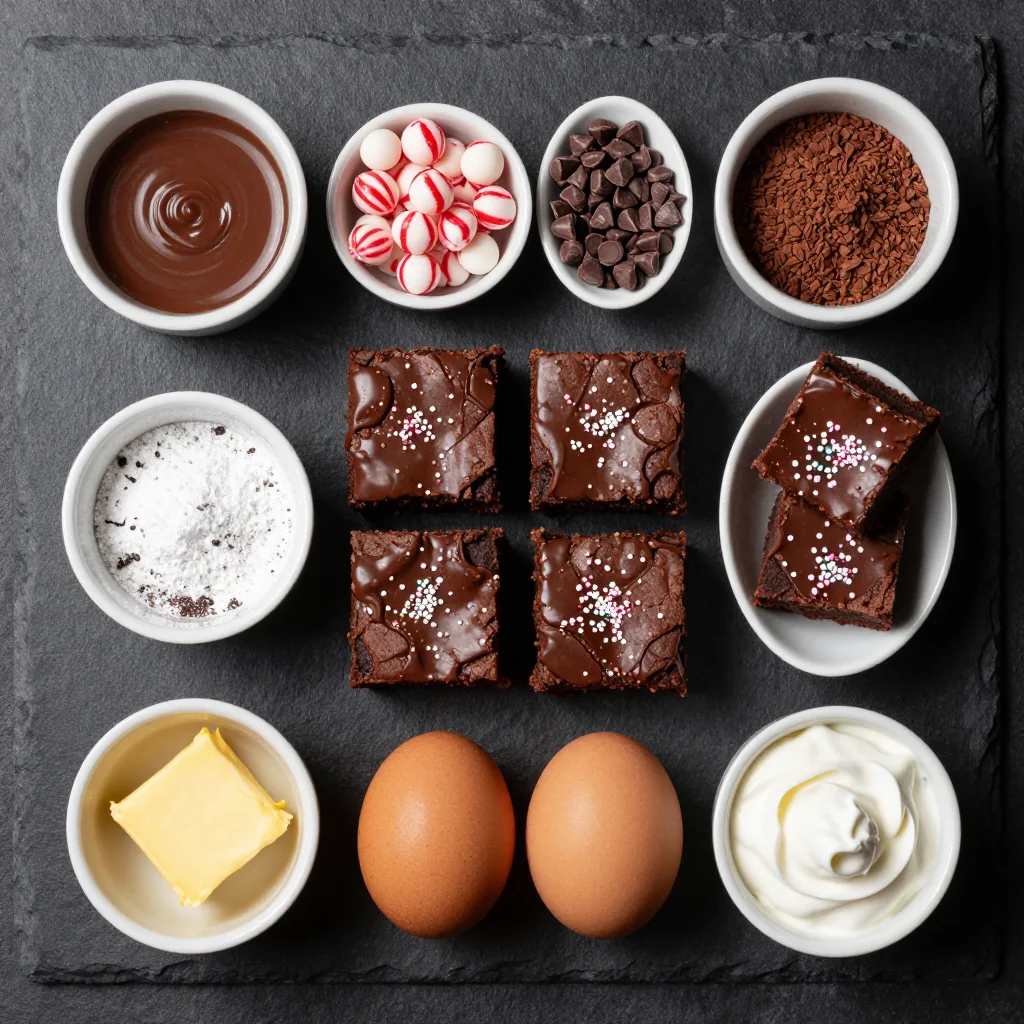
Let's talk chocolate—because in this recipe, it's the star of the show. For the brownie base, you'll need a combination of unsweetened chocolate and semisweet chocolate chips. I always reach for Ghirardelli or Scharffen Berger for the unsweetened chocolate because they melt smoothly without any graininess. The semisweet chips should be good quality too—avoid the generic store brands here because they contain more wax and less cocoa butter, which affects that fudgy texture we're after.
Butter matters more than you might think. I use European-style cultured butter (like Kerrygold or Plugra) because the higher butterfat content creates a more tender crumb and richer flavor. If you're in a pinch, regular American butter works, but the European style really elevates these brownies to special-occasion status.
For the sugar, we're using a combination of granulated and brown sugar. The brown sugar adds moisture and that subtle caramel note that pairs beautifully with peppermint. Dark brown sugar is my preference—it has more molasses and complements the chocolate better than light brown.
Now, the peppermint component. Please, please, please use pure peppermint extract, not mint extract. Mint extract is a blend of spearmint and peppermint and will give your brownies that toothpaste flavor we're trying to avoid. I like Nielsen-Massey or Simply Organic brands—they taste like real peppermint, not artificial candy.
The truffle layer is where we get fancy. Heavy cream (at least 36% butterfat) is non-negotiable here. Lower-fat cream won't emulsify properly with the chocolate, leaving you with a greasy, separated mess. For the chocolate in the truffle layer, I use bittersweet chocolate (60-70% cacao) to balance the sweetness of the brownie base.
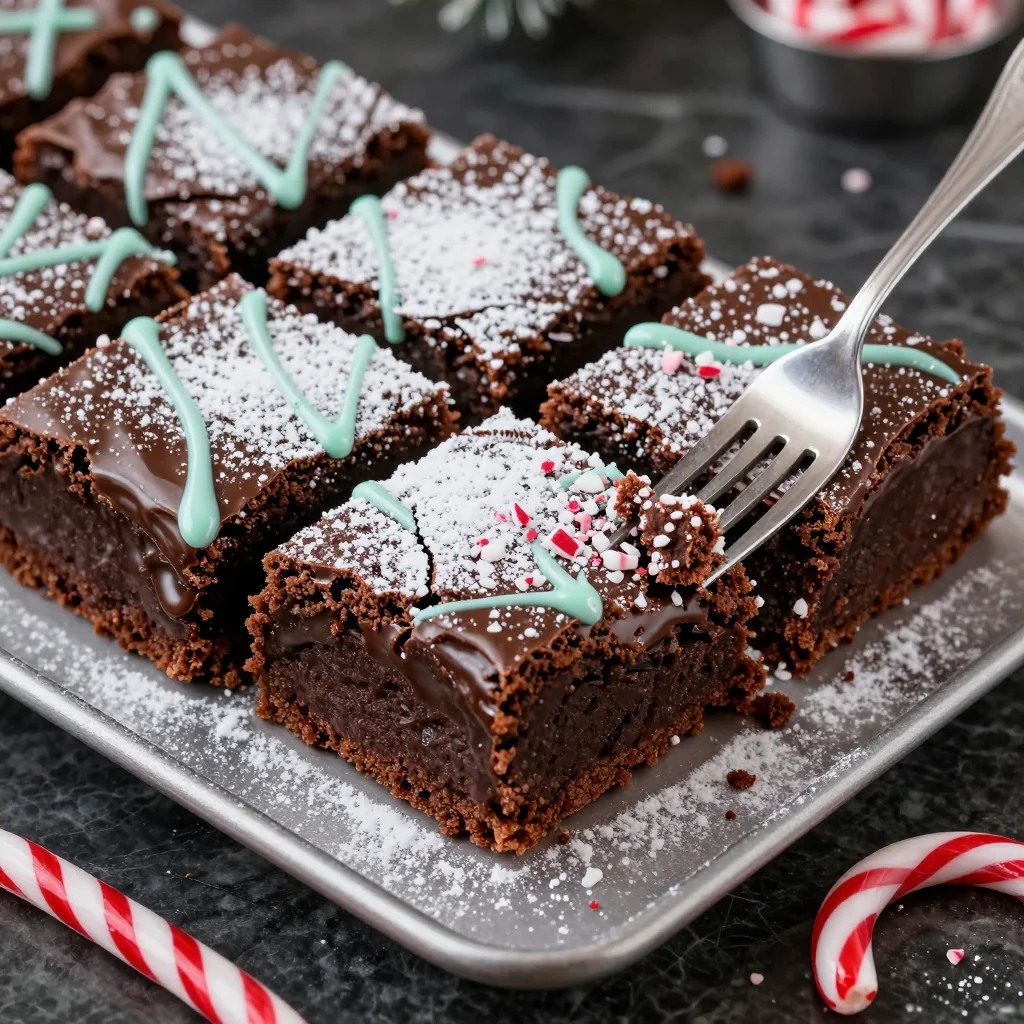
And let's not forget the finishing touches. Crushed candy canes add that festive crunch, but here's my trick—crush them just before sprinkling. Pre-crushed candy canes absorb moisture from the air and become sticky. A quick zip in a food processor or sealed in a bag with a rolling pin gives you perfect-sized pieces that won't bleed pink streaks into your beautiful truffle layer.
How to Make Rich Chocolate Peppermint Truffle Brownies for Holiday Dessert
Prepare Your Pan and Preheat
Start by positioning your oven rack in the lower third of the oven—this prevents the top from over-browning before the center is set. Line a 9×13-inch metal baking pan with parchment paper, leaving a 2-inch overhang on the long sides. This creates handles for easy removal later. Pro tip: Crumple the parchment paper first, then smooth it out. This helps it conform to the corners of the pan. Lightly butter the parchment and exposed sides of the pan, then dust with cocoa powder, tapping out the excess. This chocolate "flour" prevents sticking while maintaining the brownie's rich color.
Create the Chocolate Base
In a heavy-bottomed saucepan over low heat, melt 6 ounces of chopped unsweetened chocolate with 1½ cups of butter, stirring frequently with a heatproof spatula. Remove from heat when there are still a few small unmelted pieces—they'll finish melting from residual heat, preventing overheating which can cause chocolate to seize. Set aside to cool for 10 minutes. This cooling period is crucial; if the chocolate is too hot when you add the eggs, you'll end up with chocolate scrambled eggs, which is as unappetizing as it sounds.
Whip the Eggs and Sugars
In the bowl of a stand mixer fitted with the paddle attachment (or in a large bowl with a hand mixer), beat 4 large eggs plus 2 egg yolks with 1 cup granulated sugar and ¾ cup packed dark brown sugar on medium-high speed for 3 full minutes. This isn't just mixing—it's incorporating air that creates that coveted crackly top. The mixture should be thick, pale, and nearly doubled in volume. When you lift the paddle, the mixture should fall in a thick ribbon that sits on the surface for a few seconds before disappearing. This step is what separates good brownies from great ones.
Combine Wet Ingredients
With the mixer on low speed, stream in the cooled chocolate-butter mixture, mixing just until combined. Add 1 tablespoon vanilla extract and ½ teaspoon peppermint extract. Mix just until incorporated—overmixing here can lead to tough brownies. The batter should be glossy and smooth, with no visible streaks of chocolate or egg. Scrape down the bowl and paddle thoroughly; pockets of unmixed sugar or egg whites will create unpleasant textural surprises in your finished brownies.
Fold in Dry Ingredients
In a separate bowl, whisk together 1 cup all-purpose flour, ¼ cup Dutch-processed cocoa powder, 1 teaspoon kosher salt, and ½ teaspoon baking powder. Dutch-processed cocoa has been alkalized, giving it a smoother, less bitter flavor that complements the peppermint beautifully. Sift this mixture directly over the chocolate batter. Using a large rubber spatula, fold gently with a figure-8 motion, turning the bowl a quarter turn after each fold. Stop when you still see a few streaks of flour—this prevents overmixing, which develops gluten and creates cakey brownies. The final batter should be thick but pourable, like chocolate lava.
Add Chocolate Chips and Bake
Gently fold in 1 cup semisweet chocolate chips. These create pockets of molten chocolate throughout the brownies. Pour the batter into your prepared pan, using an offset spatula to spread it evenly into the corners. Drop the pan from a height of 2 inches onto the counter 2-3 times—this releases air bubbles that would otherwise create holes in your brownies. Bake at 350°F for 28-32 minutes. The brownies are done when the edges are firm and the center is just set but still slightly jiggly. A toothpick inserted 1 inch from the edge should come out with a few moist crumbs.
Cool Completely
This is the hardest part—waiting. Let the brownies cool in the pan on a wire rack for at least 2 hours. I know, I know, warm brownies are irresistible, but cutting them while warm will result in a gooey mess. The cooling process allows the chocolate to set properly, creating that perfect fudgy texture. For even cleaner cuts, refrigerate for 1 hour after cooling to room temperature. This step is crucial before adding the truffle layer.
Make the Peppermint Truffle Layer
In a small saucepan, heat 1 cup heavy cream until it just begins to simmer around the edges—you should see tiny bubbles forming, but it shouldn't reach a full boil. Remove from heat immediately. Pour 8 ounces of finely chopped bittersweet chocolate into a heatproof bowl. The finer you chop the chocolate, the easier it will melt. Pour the hot cream over the chocolate and let stand for 2 minutes without stirring—this allows the chocolate to melt gently. Add ¼ teaspoon peppermint extract and a pinch of salt. Using a whisk, start stirring from the center in small circles, gradually working outward as the chocolate melts. Continue stirring until the mixture is smooth, glossy, and thick enough to coat the back of a spoon. This should take about 2 minutes total.
Assemble and Chill
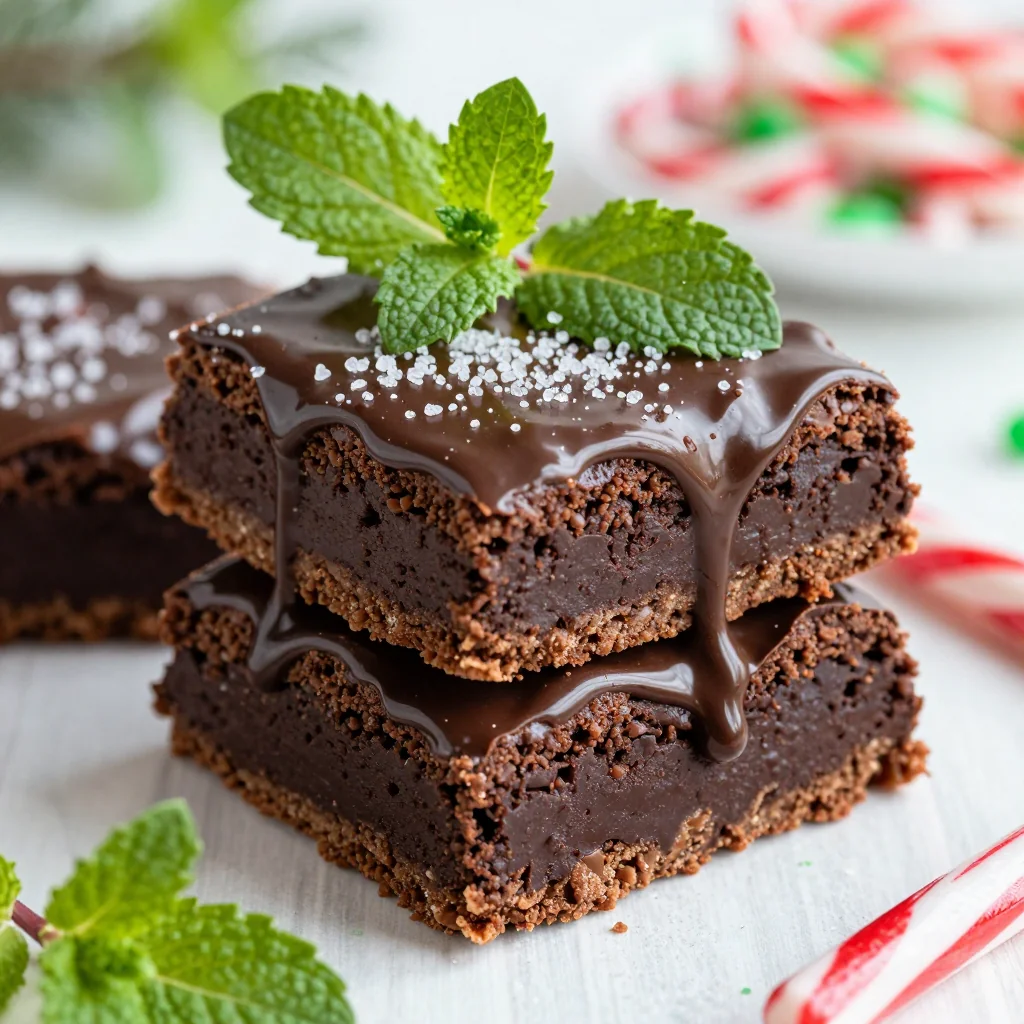
Pour the peppermint truffle mixture over the cooled brownies, using an offset spatula to spread it evenly to the edges. Work quickly—the truffle layer starts to set as it cools. Immediately sprinkle ½ cup crushed candy canes over the top, pressing them gently into the truffle layer so they adhere. Refrigerate for at least 2 hours, or until the truffle layer is completely set. It should be firm to the touch but still yield slightly when pressed. For clean cuts, use a sharp knife dipped in hot water, wiping it clean between each cut. Cut into 24 squares for dessert portions, or 36 smaller pieces for a cookie platter.
Expert Tips
Temperature Matters
Always check your oven temperature with an oven thermometer. Many ovens run 25-50°F hot or cold, which can mean the difference between fudgy and cakey brownies. Dark metal pans also require reducing the temperature by 25°F to prevent over-browning.
Water Bath Trick
Place a rimmed baking sheet filled with water on the rack below your brownies. This creates steam that prevents the top from drying out and cracking, ensuring that perfectly smooth surface for your truffle layer.
Flour Measurement
Spoon flour into your measuring cup and level with a knife. Scooping directly from the bag compacts the flour, adding up to 2 extra tablespoons per cup. For accuracy, weigh your flour—1 cup equals 125 grams.
Timing is Everything
Underbake slightly for maximum fudginess. The brownies will continue to cook from residual heat as they cool. If you wait until a toothpick comes out clean, you've gone too far—they'll be dry and cakey.
Candy Cane Prep
Crush candy canes just before using. Pre-crushed candy canes absorb moisture and become sticky. For extra crunch, toss crushed candy canes with a teaspoon of granulated sugar to prevent clumping.
Altitude Adjustments
Above 3,000 feet? Reduce sugar by 2 tablespoons and increase flour by 1 tablespoon. This prevents the top from sinking and creates a more stable structure. Also reduce baking powder by ⅛ teaspoon.
Variations to Try
Mocha Peppermint
Add 1 tablespoon instant espresso powder to the chocolate-butter mixture. The coffee enhances the chocolate flavor while adding depth. Top with chocolate-covered espresso beans instead of candy canes.
Peppermint Bark
Replace half the semisweet chocolate chips with white chocolate chips. Drizzle melted white chocolate over the truffle layer before adding candy canes for that classic peppermint bark look.
Gluten-Free Version
Replace flour with ¾ cup almond flour plus ¼ cup cornstarch. The almond flour adds richness while the cornstarch provides structure. Add an extra egg yolk for binding.
Spicy Mexican Hot Chocolate
Add ½ teaspoon cinnamon and ⅛ teaspoon cayenne pepper to the dry ingredients. Replace peppermint extract with 1 teaspoon vanilla plus ¼ teaspoon almond extract. Top with cinnamon-sugar instead of candy canes.
Storage Tips
These brownies actually improve with age—up to a point. Store them in an airtight container in the refrigerator for up to 5 days. The cold temperature helps the flavors meld and intensify. For best texture, let them sit at room temperature for 15 minutes before serving to take the chill off.
For longer storage, these brownies freeze beautifully. Cut them into individual squares and layer between sheets of parchment paper in an airtight container. They'll keep for up to 3 months in the freezer. Thaw overnight in the refrigerator, then let come to room temperature for 30 minutes before serving. The truffle layer may develop a slight white bloom—this is just cocoa butter rising to the surface and doesn't affect the taste.
If you're making these for a party or cookie exchange, I recommend baking and cooling the brownies, then adding the truffle layer the day before serving. This ensures the freshest appearance and prevents the candy canes from becoming sticky. Store in the refrigerator, loosely covered with plastic wrap, until ready to serve.
Frequently Asked Questions
Rich Chocolate Peppermint Truffle Brownies for Holiday Dessert
Ingredients
Instructions
- Prep the pan: Line a 9×13-inch pan with parchment, leaving overhang. Butter and dust with cocoa powder. Preheat oven to 350°F (325°F if using dark pan).
- Melt chocolate: Melt unsweetened chocolate with butter over low heat. Cool 10 minutes.
- Beat eggs: Whip eggs, yolks, and both sugars on medium-high for 3 minutes until thick and pale.
- Combine: Mix in cooled chocolate mixture, vanilla, and peppermint extract on low speed.
- Add dry ingredients: Fold in flour, cocoa, salt, and baking powder just until combined. Stir in chocolate chips.
- Bake: Pour into prepared pan, smooth top, and bake 28-32 minutes. Cool completely.
- Make truffle layer: Heat cream until just steaming. Pour over chopped chocolate, let stand 2 minutes, then whisk until smooth. Add ¼ teaspoon peppermint extract.
- Assemble: Pour truffle over cooled brownies, spread evenly. Sprinkle with crushed candy canes. Chill 2 hours until set.
- Serve: Cut with a hot knife, wiping between cuts. Store refrigerated for up to 5 days or freeze for up to 3 months.
Recipe Notes
For the cleanest cuts, chill brownies until very firm, then use a sharp knife dipped in hot water. These brownies taste even better after 24-48 hours as the flavors meld. Let sit at room temperature 15 minutes before serving for the best texture.