I was halfway through a midnight snack, scrolling through endless recipe blogs, when my phone buzzed with a friend’s dare: “Show me a dessert that tastes like summer and feels like a hug.” I stared at my fridge, which held nothing but a jar of kefir and a bag of frozen berries, and thought, “Why not?” The kitchen lights flickered, the kettle hissed, and I was about to turn a simple idea into a culinary revelation.
The first bite hit my tongue like a gentle wave—sweet, tangy, and velvety. The aroma was a bouquet of ripe berries mingled with the faint, yeasty perfume of fermented milk. The texture was silky, almost like a mousse, yet it carried a subtle crunch from the frozen berries. My eyes widened when the cold hit my palate, and I could feel the chill dancing across my tongue. The moment felt like a secret handshake between the fridge and my cravings.
This isn’t just another berry dessert; it’s a celebration of kefir’s probiotic power and honey’s natural sweetness. I’ve spent weeks tweaking ratios, and the result is a drinkable, scoopable, and utterly satisfying treat that melts in your mouth. It’s the kind of recipe that turns a simple kitchen into a laboratory of flavors. The secret? A precise blend of chilled kefir, frozen berries, and raw honey that balances tartness and sweetness in perfect harmony.
I dare you to taste this and not go back for seconds. If you’ve ever struggled to find a dessert that’s both healthy and indulgent, you’re not alone—and I’ve got the fix. Picture yourself pulling this out of the fridge, the whole kitchen smelling incredible, and sharing it with friends who will instantly say, “I need this.” Let me walk you through every single step — by the end, you’ll wonder how you ever made it any other way.
What Makes This Version Stand Out
- Flavor: The combination of kefir’s subtle sourness with the bright sweetness of berries creates a depth of flavor that lingers on the tongue, unlike any standard smoothie or popsicle.
- Texture: The frozen berries give a light, icy snap that contrasts beautifully with the creamy kefir, resulting in a mouthfeel that feels both refreshing and comforting.
- Health: With probiotics from kefir and natural sugars from honey, this dish is a low-fat, high-protein snack that supports gut health without compromising taste.
- Ease: No cooking, just blend and freeze—perfect for busy mornings or last‑minute dessert cravings.
- Versatility: It can be served as a frozen treat, a thick smoothie, or a light dessert topped with fresh fruit.
- Make‑ahead: Freeze in advance, pop out when hunger strikes, and enjoy a ready‑to‑eat, guilt‑free snack.
Inside the Ingredient List
The Flavor Base
Kefir is the backbone of this recipe. It’s a fermented dairy product that offers a tangy, slightly sour note that balances the sweetness of the berries. Using chilled kefir not only enhances the flavor but also keeps the mixture cool and refreshing. If you can’t find kefir, Greek yogurt with a splash of milk works as a substitute, though the probiotic benefits will be slightly reduced. For the freshest taste, look for kefir that is unflavored and has a natural, grassy aroma.
The cold temperature of the kefir is crucial—it keeps the final product icy and prevents the berries from melting too quickly. If you’re using a full-fat version, the richness will increase, making the texture more indulgent. Conversely, a low‑fat kefir will give a lighter mouthfeel. Experimenting with kefir strains can subtly alter the flavor profile; a whey‑based kefir tends to be milder, while a casein‑based kefir offers a stronger tang.
The Texture Crew
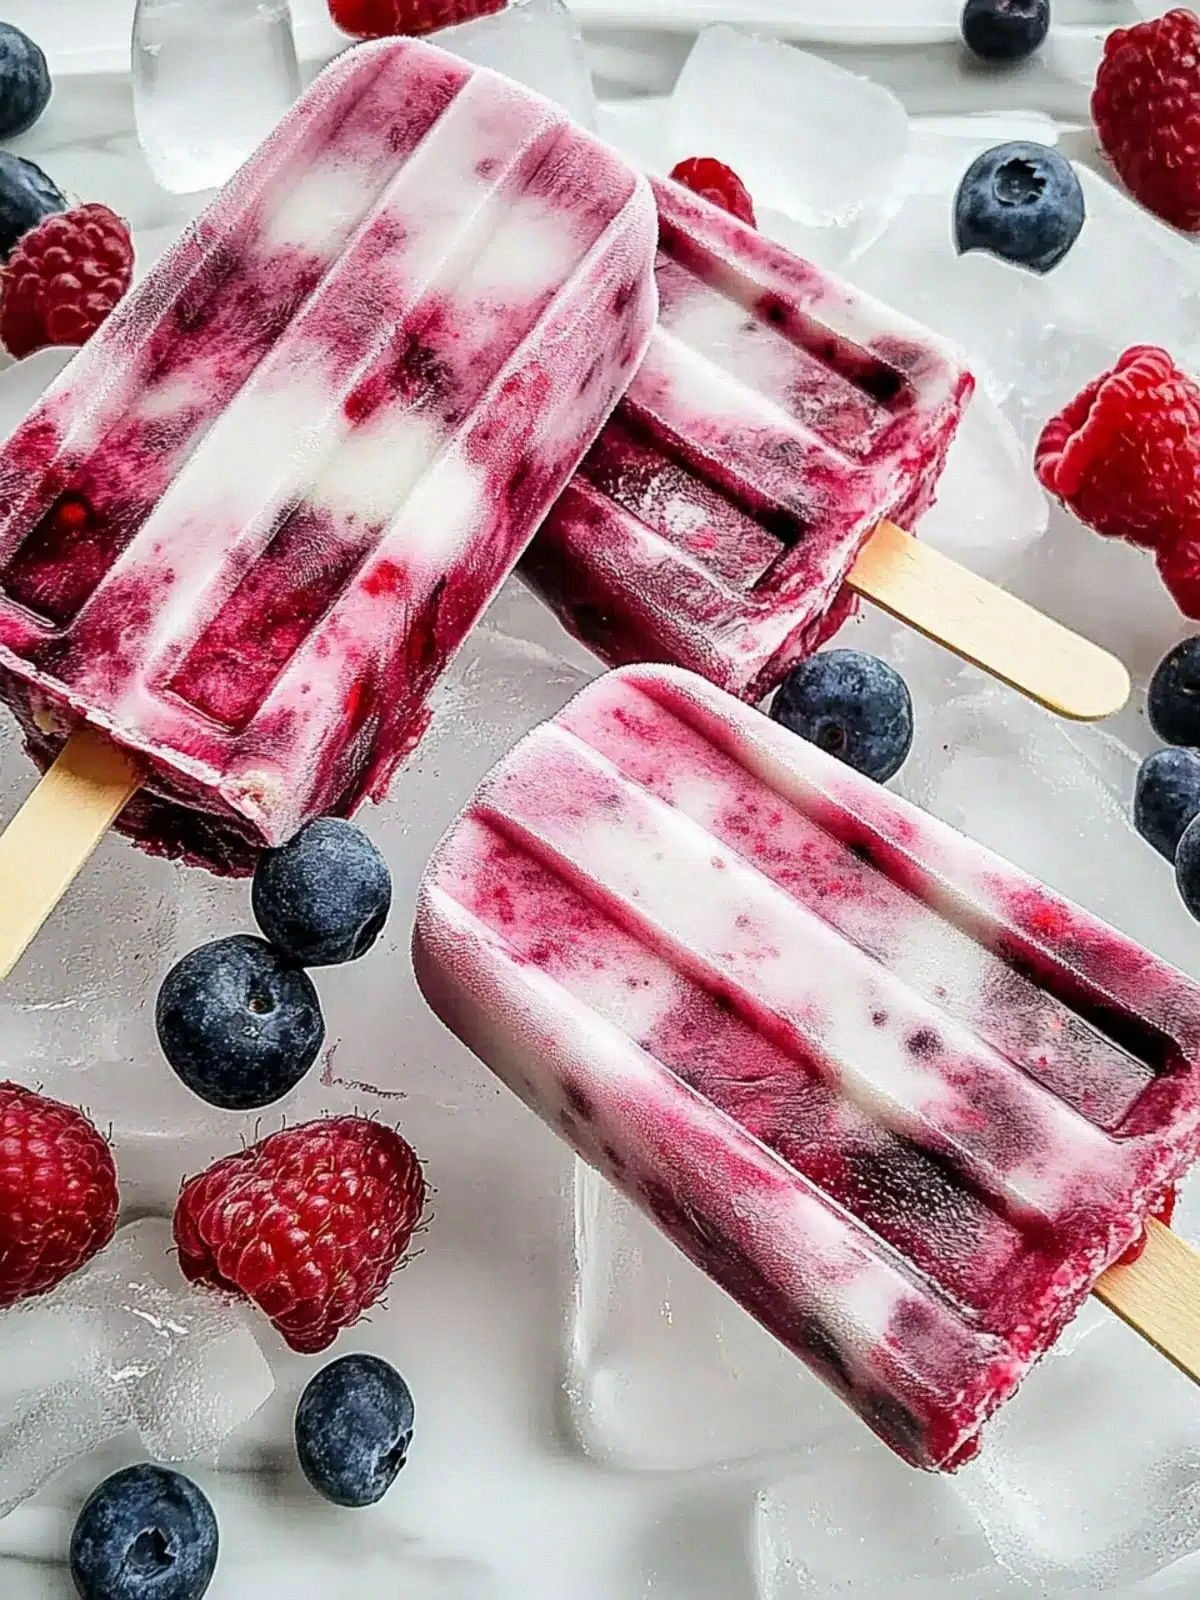
Frozen berries are the secret to that satisfying bite. They add natural sweetness, color, and a hint of crunch that contrasts the creamy kefir. Using a mix of strawberries, blueberries, and raspberries creates a multi‑layered flavor experience. If you prefer a smoother consistency, blend the berries until completely pureed before adding kefir.
The size of the berry chunks matters. Small pieces melt faster, giving a smoother texture, while larger chunks give a more rustic feel. You can also add a tablespoon of chia seeds for a slight gel effect, turning the drink into a parfait‑like texture. Just remember that chia seeds absorb liquid, so adjust the kefir amount slightly if you go this route.
The Unexpected Star
Raw local honey is the sweetener that brings everything together. Its floral notes amplify the berry flavor, while its natural enzymes add a subtle depth that refined sugars lack. Honey also serves as a natural preservative, extending the shelf life of the frozen treat. If you’re vegan or lactose‑free, a maple syrup or agave nectar can replace honey, but the flavor profile will shift slightly.
Honey’s viscosity ensures that the mixture stays cohesive, preventing the berries from floating to the top during freezing. A drizzle of honey on top before freezing adds an extra layer of sweetness and a glossy finish. If you’re watching calories, reduce the honey to 2 tablespoons, but be prepared for a less sweet finish.
The Final Flourish
A pinch of sea salt brightens the overall taste, cutting through the sweetness and highlighting the tartness of the kefir. Salt also balances the natural flavors, preventing any one component from overpowering the others. If you’re on a low‑sodium diet, a few drops of liquid sea salt can suffice. Adding a splash of lemon juice can also brighten the flavor, but be careful not to add too much, or the kefir may curdle.
The final flourish is optional but recommended: a handful of fresh mint leaves or basil for a herbal note. The herbs add a refreshing aroma that complements the berries. When adding herbs, blend them with the berries for a uniform distribution, or sprinkle them on top as a garnish after freezing.
Everything's prepped? Good. Let's get into the real action, where the magic truly happens.
The Method — Step by Step
- Start by gathering all ingredients on a clean counter. The kefir should be freshly chilled; this ensures a smooth blend. The berries are best when they’re still frozen—they give that icy snap you crave. If you’re using a mix of berries, rinse them gently under cold water to remove any ice crystals. This step also removes any residual sugar from the packaging.
- Place the frozen berries in a high‑speed blender. Pulse them briefly until they’re broken down but still have visible chunks. This creates a layered texture that’s both creamy and crunchy. If you prefer a smoother consistency, continue blending until fully pureed.
- Add the chilled kefir to the blender. The cold liquid will start to swirl, creating a frothy, cloud‑like mixture. Let the blender run for about 30 seconds, ensuring the kefir and berries are fully integrated. If you’re using chia seeds, add them now to allow them to absorb some of the liquid.
- Stir in the raw honey. The honey should be at room temperature to dissolve smoothly; if it’s too thick, warm it slightly in the microwave. The sweetness will mellow as the mixture chills, giving a balanced finish. Taste the blend; if it’s too tart, add a splash of honey or a pinch of salt.
- Pour the mixture into silicone popsicle molds or a shallow baking dish. The silicone molds give individual servings, while a shallow dish allows you to cut the frozen block into portions later. Leave a small space at the top for expansion during freezing. This step is crucial to prevent cracks or spills.
- Place the molds in the freezer for at least 3 hours, or until firm. The freezing time can vary based on your freezer’s temperature—check the consistency every hour to avoid over‑freezing. When the mixture is solid, it should feel like a thick gel, not a hard block. This ensures a smooth bite each time.
- When ready, pop the popsicles out of the molds. If they’re stubborn, run the molds under warm water for a few seconds to loosen them. Serve immediately for the best texture, or store in an airtight container for up to a week. The popsicles maintain their flavor and texture when kept properly frozen.
- Enjoy your homemade kefir berry popsicles with a spoonful of fresh berries or a drizzle of honey on top. The final touch adds a burst of flavor and visual appeal. If you’re feeling adventurous, sprinkle a pinch of sea salt for a sweet‑savory twist. Remember, this treat is as versatile as it is delicious.
That’s it — you did it. But hold on, I've got a few more tricks that'll take this to another level. Stay tuned for insider tips that will elevate your popsicle game from good to unforgettable.
Insider Tricks for Flawless Results
The Temperature Rule Nobody Follows
The key to a perfectly smooth popsicle is starting with the coldest kefir and berries you can find. Even a slight temperature difference can affect how the mixture freezes. I keep my kefir in a dedicated freezer compartment, and I double‑freeze the berries for an extra 30 minutes before blending. This ensures a consistent, creamy texture that doesn’t develop ice crystals.
Why Your Nose Knows Best
When blending, pay close attention to the aroma. A subtle, yeasty scent indicates the kefir is active and full of probiotics. If the smell is flat, the kefir might be past its prime, and the final product will lack depth. I always smell the kefir before blending to ensure it’s fresh and potent.
The 5‑Minute Rest That Changes Everything
After blending, let the mixture rest for 5 minutes before pouring. This brief pause allows the bubbles to settle, preventing a frothy, uneven texture. A friend once skipped this step and ended up with a lumpy popsicle that was more like a frozen yogurt than a smooth treat. Trust me, that 5‑minute rest is worth every second.
Avoiding Freezer Burn
Seal the popsicles in airtight containers or wrap them tightly in plastic wrap. Freezer burn can dry out the surface, ruining the flavor and texture. I always double‑wrap the molds, especially if I plan to store them for more than a week. The extra layer of protection keeps the popsicles fresh and tasty.
Reheating for a Warm Twist
If you’re craving a warm dessert, let a popsicle sit at room temperature for 5 minutes. The outer layer will soften, revealing a creamy center that’s still cold but more comforting. This simple trick turns a frozen treat into a cozy snack that feels like a dessert and a comfort food in one.
Creative Twists and Variations
This recipe is a playground. Here are some of my favorite ways to switch things up:
Tropical Twist
Swap the berries for a mix of mango, pineapple, and coconut water. The result is a sun‑kissed, sweet‑tart flavor that transports you to a beach vacation. Add a splash of lime juice for a citrus kick, and garnish with shredded coconut for a beachy finish.
Chocolate‑Berry Fusion
Blend in a tablespoon of cocoa powder or a few squares of dark chocolate before freezing. The chocolate coats the berries in a velvety, slightly bitter layer that balances the sweetness. Top with a drizzle of melted chocolate for an indulgent finish.
Minty Freshness
Add a handful of fresh mint leaves to the blender for a cooling, herbal note. The mint enhances the berry flavor and adds a refreshing aroma. Sprinkle a pinch of sea salt on top before freezing for a sweet‑savory contrast.
Protein Power
Stir in a scoop of vanilla protein powder after blending. This turns the popsicles into a post‑workout snack that’s both refreshing and muscle‑fueling. The protein powder also thickens the mixture, giving a richer mouthfeel.
Spiced Berry
Add a pinch of cinnamon or nutmeg for a warm, aromatic twist. The spices complement the berries’ natural sweetness and add depth to the flavor profile. This variation is perfect for a cozy winter treat.
Almond Butter Swirl
Stir in a tablespoon of almond butter before freezing. The nutty flavor pairs wonderfully with the berries, creating a layered taste experience. The almond butter also adds healthy fats, making the popsicles even more satisfying.
Each variation offers a new sensory adventure, proving that a simple recipe can become a culinary canvas. Experiment and let your taste buds guide you to the next flavor frontier.
Storing and Bringing It Back to Life
Fridge Storage
Store popsicles in an airtight container or resealable bag for up to one week. Keep them in the coldest part of the freezer to maintain their texture. When you’re ready to eat, let them sit at room temperature for 2 minutes to soften slightly. This brief thawing ensures a smooth bite without melting.
Freezer Friendly
For longer storage, keep the popsicles in a freezer bag with a vacuum seal. This prevents freezer burn and preserves the flavor. When you’re ready to enjoy them, pop them straight from the freezer for a quick, refreshing snack.
Best Reheating Method
If you prefer a warmer treat, let a popsicle sit at room temperature for 5 minutes. Add a splash of water to the container before microwaving for 10-15 seconds. The water steams the popsicle, restoring its creamy texture without melting it entirely. This trick works well for those who crave a warm dessert that’s still cool.