I still remember the morning I accidentally created the most addictive savory pancakes known to humankind. There I was, half-awake, trying to impress my in-laws with a fancy brunch spread when I realized I was out of maple syrup. Panic mode activated. But instead of admitting defeat and serving sad, dry pancakes, I pivoted hard into uncharted territory. What emerged from that kitchen chaos was nothing short of magical — golden discs studded with sharp cheddar and garden-fresh chives that had everyone fighting for the last one. My father-in-law, a man who typically regards anything without meat as "rabbit food," actually asked if I could make these for every family gathering. That's when I knew I'd stumbled onto something special.
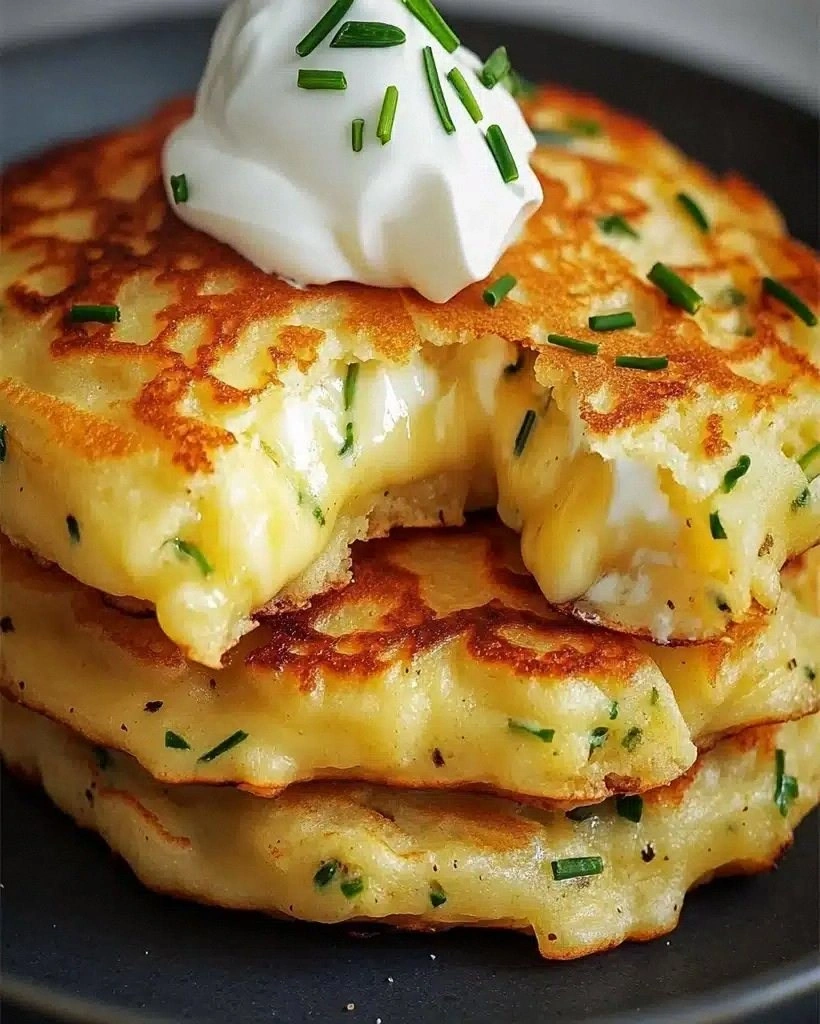
Picture this: it's Sunday morning, sunlight streaming through your kitchen window, and the aroma of melting cheese mingling with the subtle oniony perfume of chives wafting through your home. These aren't your average breakfast pancakes — oh no, these are the sophisticated cousin that shows up to brunch wearing a leather jacket and makes everyone wonder where they've been all their lives. The edges get this incredible crispy lace that shatters like thin ice when you bite into it, while the inside stays tender and almost custard-like from all that glorious cheese. Trust me when I say this is hands down the best version you'll ever make at home, and I've tested enough recipes to fill a small library.
Here's the thing that most recipes get completely wrong about savory pancakes — they treat them like regular pancakes with some cheese thrown in. But what I'm about to share with you is a completely different beast. We're talking about a batter that hits that perfect balance between fluffy and substantial, with pockets of gooey cheese that create these incredible stretchy pulls when you break them apart. The chives aren't just a garnish here; they're integral to the flavor profile, adding bright, grassy notes that cut through the richness like a knife through butter.
Let me walk you through every single step — by the end, you'll wonder how you ever made it any other way. And yes, I'll be honest — I ate half the batch before anyone else got to try it. The micro-challenge I'm issuing today? I dare you to taste this and not go back for seconds. Actually, make that thirds. Okay, ready for the game-changer?
What Makes This Version Stand Out
Cheese Distribution: Unlike other recipes where the cheese just melts into oblivion, my technique creates distinct pockets of cheesy goodness throughout each pancake. The key is using two types of cheese — sharp cheddar for that bold flavor and aged Parmesan for umami depth. The result? Every bite delivers that perfect cheese pull without making the pancakes greasy or heavy.
Chive Strategy: Most recipes just stir chives into the batter and call it a day. But here's what actually works: we incorporate them at two different stages. Some get mixed into the batter for that essential onion flavor, while we sprinkle fresh ones on top right before flipping for maximum color and aromatic impact. It's like getting hit with fresh chive flavor twice, but in completely different ways.
Texture Magic: These pancakes achieve what I call the "golden ratio" — crispy, lacy edges that extend about a quarter inch around the entire pancake, with a tender, almost soufflé-like interior. The secret lies in the batter consistency and the pan temperature. Picture yourself pulling this out of the oven, the whole kitchen smelling incredible, and hearing that satisfying sizzle when the batter hits the pan.
Weekend-Proof Method: If you've ever struggled with pancakes that burn on the outside while staying raw inside, you're not alone — and I've got the fix. This recipe uses a slightly lower cooking temperature with a longer cook time, giving the interior time to set while the exterior develops that gorgeous golden-brown color. No more playing breakfast roulette.
Crowd Psychology: Here's something fascinating — when I serve these at brunch, people who swear they "don't like savory breakfast" go back for seconds. It's the combination of familiar pancake format with unexpected flavors that triggers this automatic response. The brain recognizes the comfort food aspect while the taste buds get pleasantly surprised by the savory twist.
Make-Ahead Champion: Unlike regular pancakes that turn into hockey pucks when reheated, these actually improve with a brief rest. The cheese sets up slightly, and when you reheat them in a dry skillet, they get even crispier. I make double batches on Sunday and have breakfast sorted for the entire week.
Alright, let's break down exactly what goes into this masterpiece...
Inside the Ingredient List
The Flavor Base
All-purpose flour forms the backbone of these pancakes, but here's where it gets interesting — we're using slightly less than traditional recipes to create a more tender crumb. The reduced flour content allows the cheese and eggs to take center stage, resulting in a pancake that's almost custard-like in its richness. Don't even think about using whole wheat flour here; it competes too aggressively with the delicate cheese flavor and creates a dense, heavy texture that nobody wants first thing in the morning.
Baking powder might seem like a background player, but it's crucial for achieving that perfect rise. I use a touch more than usual because the weight of the cheese needs extra lift to keep the pancakes light and fluffy. The reaction between the baking powder and the slight acidity from the buttermilk creates tiny carbon dioxide bubbles that expand during cooking, giving you those beautiful air pockets that make each bite melt in your mouth.
Salt isn't just about seasoning here — it's a flavor amplifier that makes the cheese taste more cheese-like and the chives more chive-y. I use kosher salt because the larger crystals distribute more evenly throughout the batter, preventing those unpleasant salty surprises that can happen with table salt.
The Texture Crew
Buttermilk is my liquid of choice for several reasons beyond just tradition. The acid in buttermilk tenderizes the gluten in the flour, creating a more tender pancake that still holds together beautifully. It also reacts with the baking powder to create extra lift, and adds a subtle tang that complements the sharp cheddar perfectly. If you don't have buttermilk, you can make a quick substitute by adding a tablespoon of lemon juice to regular milk, but the real stuff creates noticeably better results.
Eggs serve multiple purposes in this recipe — they provide structure, richness, and that gorgeous golden color. I use large eggs at room temperature because cold eggs can cause the melted butter to seize up, creating little hard bits throughout your batter. The proteins in the eggs coagulate during cooking, giving the pancakes enough structure to flip without falling apart while keeping the interior tender.
Melted butter in the batter keeps everything moist and tender, while butter in the pan creates those crave-worthy crispy edges. I use unsalted butter because it allows me to control the salt level precisely, and I brown it slightly for extra nutty flavor that pairs beautifully with the cheese. That sizzle when it hits the pan? Absolute perfection.
The Unexpected Star
Sharp cheddar is where the magic happens, but not all cheddars are created equal. I use a good quality aged cheddar that's been aged for at least 12 months — it has that crystalline texture that melts into these incredible pockets of cheese throughout the pancake. Avoid mild cheddar like the plague; it just disappears into the batter without making any real impact. And please, for the love of all that is holy, don't use pre-shredded cheese. It contains cellulose that prevents it from melting smoothly.
Parmesan might seem like overkill, but hear me out — just a quarter cup of finely grated Parm adds this incredible umami depth that makes people ask "what's in these?" in the best possible way. It melts completely into the batter, creating this savory backbone that supports the bolder cheddar flavor. Think of it as the bass line in your favorite song — you might not notice it specifically, but you'd miss it if it were gone.
The Final Flourish
Fresh chives are non-negotiable here. Dried chives taste like green cardboard and will ruin everything you've worked for. When selecting chives at the store, look for bright green, perky stems without any wilting or brown spots. Store them in a jar with an inch of water like flowers, covered with a plastic bag, and they'll last for over a week. The snappy, oniony flavor they provide is the perfect counterpoint to all that rich cheese.
Everything's prepped? Good. Let's get into the real action...
The Method — Step by Step
- Start by grating your cheese — and I mean really grating it, not just halfway. Use the large holes for the cheddar and the fine side for the Parmesan. This isn't just busy work; the different sizes create different melting patterns. The fine Parmesan essentially disappears into the batter, seasoning every bite, while the larger cheddar shreds create those Instagram-worthy cheese pulls. Set aside about a quarter cup of the cheddar for topping later — trust me on this one. This next part? Pure magic.
- Whisk together your dry ingredients in a large bowl, but here's the key — whisk them for a full 30 seconds. This isn't just mixing; you're aerating the flour and ensuring the baking powder distributes evenly. Nobody wants to bite into a pancake that tastes like a salt lick because the salt didn't get properly mixed. Use a balloon whisk if you have one; the wire design incorporates more air than a spoon ever could.
- In a separate bowl, beat your eggs until they're completely homogenous and slightly frothy. This step incorporates air that contributes to the fluffy texture we're after. Add the buttermilk and melted butter, but wait — let that butter cool slightly. If it's too hot, it'll scramble your eggs and you'll end up with breakfast that looks like it lost a fight. The mixture should be smooth and slightly glossy when it's ready.
- Now for the moment of truth: combine your wet and dry ingredients. But here's where most recipes lead you astray — they tell you to mix until smooth. Don't do it! Mix just until the flour disappears, even if you see a few small lumps. Overmixing develops gluten, which makes tough pancakes. You want to treat this batter like it owes you money — mix it just enough to get the job done and no more.
- Fold in your cheese using a rubber spatula, starting with the Parmesan and ending with the cheddar. The key here is to fold, not stir — you want to maintain those distinct cheese pockets. As you fold, you'll notice the batter getting thicker; that's the cheese absorbing moisture. When you see evenly distributed cheese throughout with no dry flour pockets, you're done. Resist the urge to keep mixing!
- Heat your griddle or heavy-bottomed skillet over medium heat — and I mean proper medium, not "medium" that every stove interprets differently. Here's how you know it's ready: flick a few drops of water onto the surface. They should dance and evaporate within 2-3 seconds. Too fast and your pan's too hot, too slow and it's not hot enough. This is the difference between golden perfection and burnt disappointment.
- Add just enough butter to lightly coat the surface — you're not deep-frying here. Swirl it around and wait for the foaming to subside. That sizzle when the butter hits the pan? That's the sound of success. Using a 1/4 cup measure, drop batter onto the griddle, leaving space between each pancake. They'll spread slightly, and you want room to maneuver your spatula.
- This is where patience pays off. Don't walk away from the stove here. Watch for the edges to start looking set and small bubbles to form on the surface — this takes about 3-4 minutes. But here's the real test: gently lift a corner with your spatula. If it releases easily and the bottom is golden brown, it's flip time. If it sticks, give it another 30 seconds. The first pancake is always your tester — adjust heat as needed.
- After flipping, cook for another 2-3 minutes until golden brown and the cheese starts to caramelize on the surface. You'll know they're done when they feel springy to the touch and the edges have that gorgeous lacy appearance. Remove to a wire rack set over a baking sheet in a warm oven while you cook the remaining batter. This prevents the bottoms from getting soggy while you finish the batch.
- Here's my secret move: while the last batch is cooking, sprinkle those reserved cheddar shreds over the cooked pancakes in the warm oven. The residual heat melts them into a thin, crispy cheese layer that adds incredible texture. Stack them high, scatter with fresh chives, and prepare for the oohs and aahs. And now the fun part — watching people try to eat just one.
That's it — you did it. But hold on, I've got a few more tricks that'll take this to another level...
Insider Tricks for Flawless Results
The Temperature Rule Nobody Follows
Here's the thing about pancake temperature — everyone thinks hotter is better for faster cooking, but that's exactly how you end up with raw centers and burnt edges. The sweet spot is between 325-350°F, which on most stoves translates to the low side of medium. I use an infrared thermometer to check my griddle, but you can also do the water drop test I mentioned earlier. A friend tried skipping this step once — let's just say it didn't end well for her breakfast reputation.
The real game-changer is maintaining that temperature throughout cooking. Most people don't realize that each batch of batter lowers the griddle temperature, so you need to adjust as you go. I start at medium-low and bump it up slightly after the first batch, then keep adjusting every 2-3 pancakes. It sounds obsessive, but it's the difference between amateur and restaurant-quality results.
Why Your Nose Knows Best
Don't underestimate the power of smell in determining doneness. When the butter stops smelling like butter and starts taking on nutty, toasty notes, your pan is ready. As the pancakes cook, you'll smell the cheese melting and caramelizing — it goes from sharp and tangy to rich and nutty. When that aroma intensifies and you can smell the chives releasing their oniony perfume, you're 30 seconds from perfect.
This sensory checkpoint has saved me more times than I can count, especially during those early morning cooking sessions when my brain isn't fully online yet. The smell of properly cooked cheese and chives together is intoxicating — like walking into a French bistro at breakfast time. If your kitchen doesn't smell absolutely incredible halfway through cooking, something's wrong with your heat level.
The 5-Minute Rest That Changes Everything
After mixing your batter, let it rest for exactly 5 minutes before cooking. This isn't just extra time to clean up — it's when the flour fully hydrates and the gluten relaxes, creating more tender pancakes. During this rest, the baking powder starts its first chemical reaction with the buttermilk's acid, creating tiny bubbles that will expand into fluffy perfection on the griddle.
But here's the kicker — don't rest it longer than 10 minutes or the baking powder loses its punch and your pancakes will be flat and dense. Set a timer, use those 5 minutes wisely (I usually prep my serving plates and warm the oven), and you'll be rewarded with noticeably fluffier results. This is one of those "why didn't anyone tell me this sooner?" moments that changes your pancake game forever.
The Cheese Placement Strategy
Instead of mixing all the cheese into the batter, reserve about a tablespoon per pancake and sprinkle it on top right after you pour the batter onto the griddle. This creates these incredible crispy cheese edges that extend beyond the pancake itself — they're like cheese frills that get all caramelized and crunchy. It's the difference between good pancakes and "holy cow, what did you put in these?" pancakes.
The timing here is crucial — add the cheese too early and it just sinks into the batter, too late and it won't adhere properly. I wait about 30 seconds after pouring, just until the surface starts to set slightly. Then I sprinkle the cheese in a ring around the edge. As the pancake cooks, the cheese melts and spreads, creating these lacy, crispy edges that shatter when you bite into them.
Creative Twists and Variations
This recipe is a playground. Here are some of my favorite ways to switch things up:
The Everything Bagel Remix
Replace the chives with scallions and add 2 tablespoons of everything bagel seasoning to the dry ingredients. Top each pancake with a sprinkle of seasoning before flipping for maximum crunch. The sesame seeds, poppy seeds, and dried garlic create this incredible crust that tastes exactly like your favorite bagel, minus the carb coma. Serve with cream cheese mixed with a touch of honey for the full experience.
Smoky Bacon Bliss
Fold in 1/2 cup of crumbled crispy bacon along with the cheese, and replace half the chives with scallions. The bacon fat renders slightly during cooking, basting the pancakes from the inside out. Reserve some of the bacon grease to cook the pancakes in instead of butter — it creates this incredible smoky, meaty flavor that makes these taste like the world's most sophisticated breakfast sandwich without any sandwich at all.
Mediterranean Escape
Swap the cheddar for crumbled feta and the chives for chopped fresh dill and mint. Add 1/4 teaspoon of lemon zest to the batter and serve with a dollop of Greek yogurt mixed with cucumber and garlic. The salty, tangy feta pairs beautifully with the herbaceous dill, creating a pancake that tastes like you're having brunch on a Greek island. These are particularly amazing served alongside tomatoes dressed with olive oil and oregano.
Spicy Southwest
Add 1/2 cup of pepper jack cheese to the cheddar blend, and replace the chives with chopped cilantro. Mix in 1/4 teaspoon of chipotle powder and serve with avocado crema. The pepper jack adds heat without overwhelming, while the chipotle provides that smoky undertone that makes these incredibly addictive. I serve these with a fried egg on top for the ultimate hangover cure.
Truffle Luxury
Keep the original recipe but add 1 teaspoon of truffle oil to the batter and use a mix of Gruyère and Parmesan instead of cheddar. Finish with fresh chives and a drizzle of white truffle oil. These are outrageously decadent — the kind of thing you serve when you want to impress without trying too hard. The earthy truffle flavor transforms these from humble pancakes into something you'd expect at a Michelin-starred brunch spot.
Herb Garden Explosion
Use the original recipe but replace half the chives with a mix of whatever fresh herbs you have — parsley, tarragon, chervil, even basil works beautifully. The key is using at least three different herbs to create complexity. Each herb brings its own personality: parsley adds freshness, tarragon contributes anise notes, and chervil brings delicate sweetness. It's like springtime in pancake form.
Storing and Bringing It Back to Life
Fridge Storage
These pancakes store beautifully in the refrigerator for up to 5 days, which is practically unheard of in the pancake world. The key is cooling them completely on a wire rack before storing — this prevents condensation that makes them soggy. Layer them between sheets of parchment paper in an airtight container, with the paper preventing them from sticking together. The cheese actually helps them stay moist rather than drying out like regular pancakes.
When you're ready to eat them, resist the microwave temptation — it turns the cheese rubbery and ruins that crispy edge we worked so hard for. Instead, reheat them in a dry skillet over medium heat for 2-3 minutes per side. The cheese re-melts and the edges get even crispier than the first time around. It's like they're improving with age, which is honestly kind of magical.
Freezer Friendly
These freeze like champions for up to 2 months. Lay them in a single layer on a baking sheet and freeze until solid, then transfer to freezer bags with parchment between layers. The flash-freezing prevents them from sticking together, so you can pull out exactly how many you need. Pro tip: wrap them individually in plastic wrap before freezing if you're only cooking for one or two — it's like having homemade frozen pancakes but way better.
Thaw overnight in the refrigerator or go straight from freezer to toaster on the medium setting. Yes, toaster — it creates incredible crispy edges and warms them through perfectly. Just watch them closely because the cheese can drip if your toaster runs hot. Alternatively, reheat in a 350°F oven for 8-10 minutes from frozen, which gives you that fresh-from-the-griddle texture.
Best Reheating Method
The absolute best way to reheat these is in a covered skillet over low heat with a tiny splash of water added to the pan before covering. The water creates steam that warms them through gently without drying them out, while the cover traps moisture. After 3-4 minutes, remove the lid and crank the heat to medium-high for 30 seconds to crisp up the bottom. It's like having freshly made pancakes all over again.
For larger quantities, the oven is your friend. Arrange pancakes in a single layer on a wire rack set over a baking sheet, cover loosely with foil, and warm at 325°F for 10-12 minutes. The wire rack allows hot air to circulate underneath, preventing soggy bottoms. Remove the foil for the last 2 minutes if you want to recapture some of that original crispness. Add a tiny splash of water before reheating — it steams back to perfection.