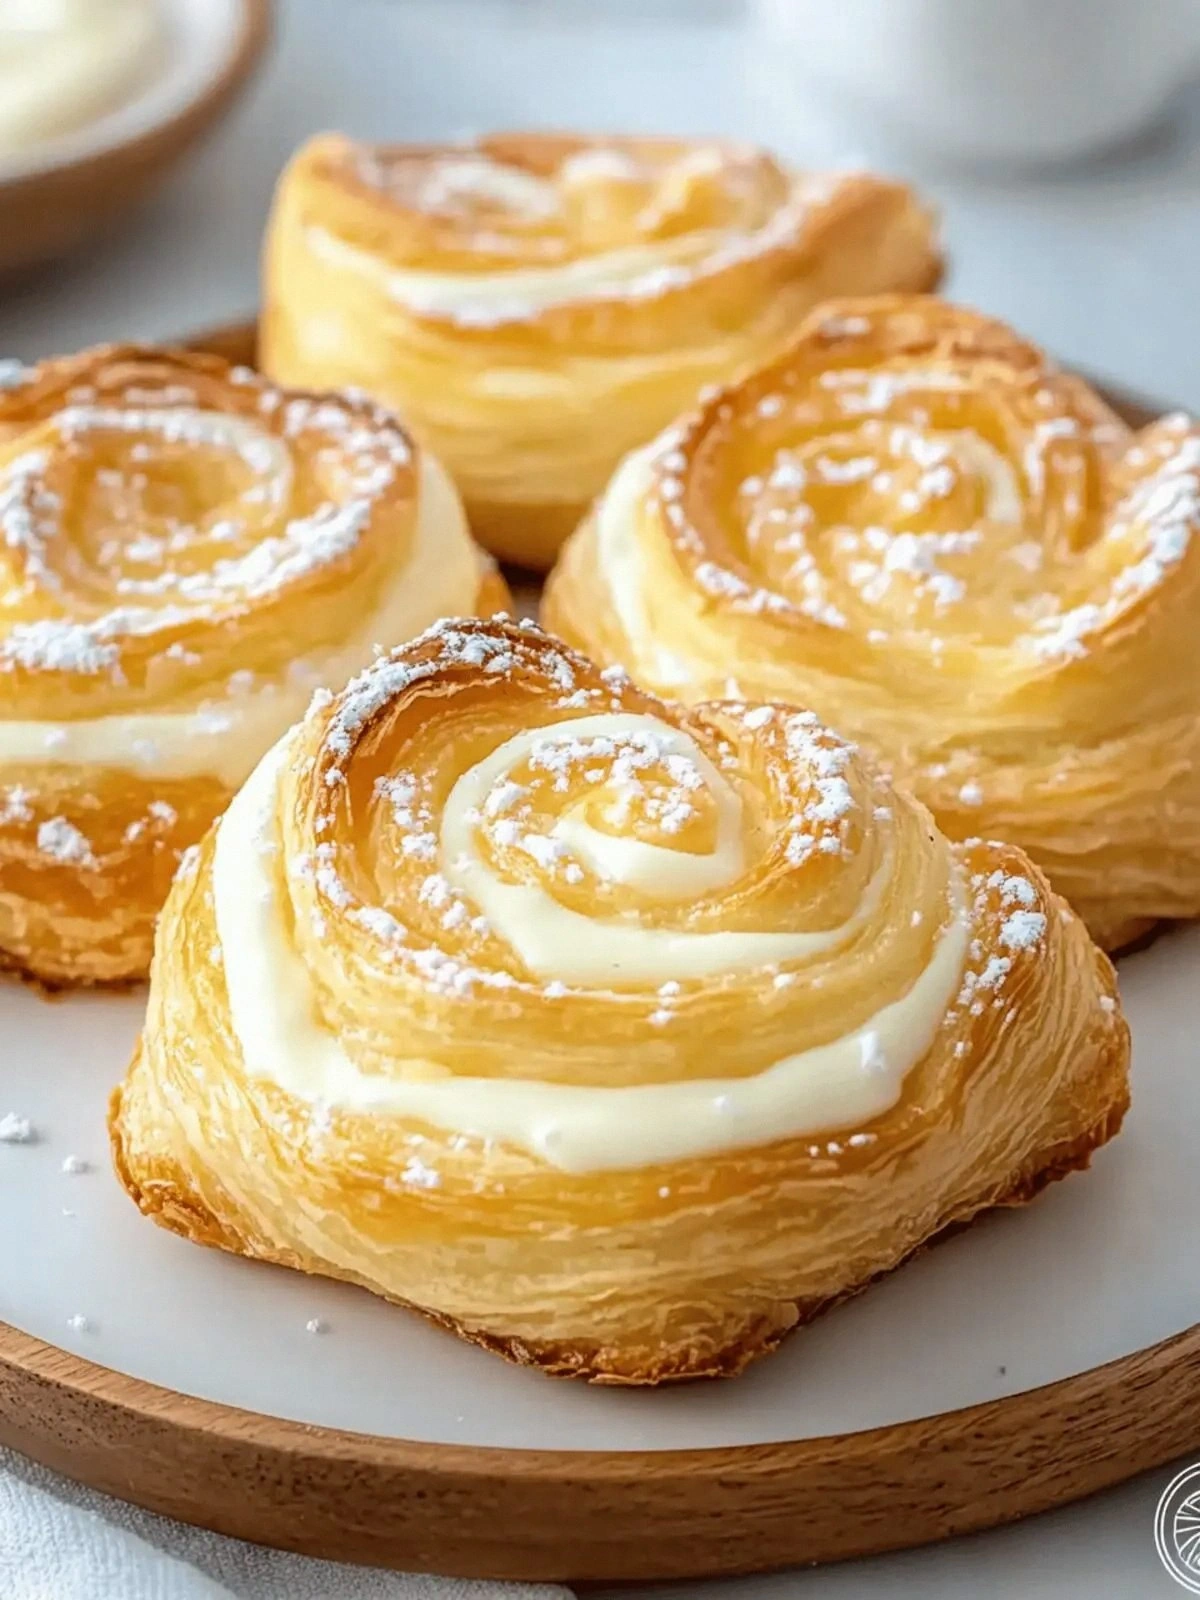
Picture this: a Sunday morning, the kitchen smelling like burnt toast and stale croissants, and I’m staring at a pile of flour that looks more like a snowstorm than a baking ingredient. I had a craving for something buttery, sweet, and with a flaky texture that makes your taste buds sing. I knew I was about to embark on a culinary quest that would turn that disaster into a triumph. The moment my eyes fell on the recipe for Homemade Danish: Flaky Perfect, I felt a spark of excitement that could only be described as culinary fireworks.
I’ve tried dozens of Danish recipes, from the flaky, buttery rolls you find in the grocery aisle to the dense, sweet pastries that come out of a fancy bakery. Each attempt left me with something that was either too heavy or too dry, a sad compromise between texture and flavor. This version, however, is a revelation: it delivers a tender crumb that melts in your mouth, a buttery crust that crackles with every bite, and a sweet filling that lingers on the tongue. I dare you to taste this and not go back for seconds, because the first bite is a revelation that will leave you craving more. If you’ve ever struggled with flaky pastries, you’re not alone — and I’ve got the fix.
What makes this recipe stand out isn’t just the ingredients, but the way they’re combined, the techniques I’ve refined over countless trials, and the secret touch that turns a simple Danish into a showstopper. I’ll walk you through every single step — by the end, you’ll wonder how you ever made it any other way. From the moment you whisk the dough to the final glaze, every action is a piece of a symphony that sings with buttery richness and delicate sweetness.
And here’s a teaser: there’s a trick involving cream cheese that you won’t find in most recipes. It’s a subtle but essential step that gives the Danish that signature melt‑in‑your‑mouth texture. Let’s dive in and discover how this simple tweak can elevate your pastry game to professional levels.
What Makes This Version Stand Out
- Flake: The dough is layered with cold butter and cream cheese, creating pockets of steam that puff up during baking, giving you that coveted flaky texture that shatters like thin ice.
- Balance: The ratio of flour to butter is carefully calibrated to avoid a dense crumb while still maintaining structural integrity.
- Sweetness: The combination of granulated and powdered sugar, along with lemon zest, creates a layered sweetness that isn’t cloying but rather nuanced and bright.
- Convenience: The method is straightforward, with no need for a stand mixer or fancy dough shears; a simple rolling pin and a bit of patience are all you need.
- Versatility: It’s a blank canvas: add fruit, nuts, or spices, and you have a new creation every time.
- Make‑Ahead: The dough can be prepared a day in advance, refrigerated, and baked fresh when you’re ready, making it perfect for brunch parties.
- Texture: The final product has a crisp exterior that gives way to a tender, buttery interior, a contrast that delights the palate.
- Presentation: The golden, caramelized edges and the glossy glaze make these Danishes look as good as they taste, a feast for the eyes and the tongue.
Inside the Ingredient List
The Flavor Base
All‑Purpose Flour is the foundation of any dough, but in this recipe it’s more than just a binder; it’s the canvas that holds the butter, cream cheese, and sugar together. The 4 cups of flour absorb the liquid components, creating a dough that’s supple enough to roll out yet firm enough to hold its shape. Skipping flour or using a lower quantity will result in a sticky mess that can’t be shaped into neat rolls. For a richer flavor, consider using a blend of whole wheat and all‑purpose flour, which adds a nutty undertone without compromising the flakiness.
The Texture Crew
Unsalted Butter and Cream Cheese are the dynamic duo that give the Danish its signature layers. The butter, cut into cold cubes, creates steam pockets when baked, while the cream cheese adds a subtle tang and a silky mouthfeel. If you prefer a dairy‑free version, replace the butter with coconut oil and the cream cheese with a dairy‑free cream cheese alternative; the texture will still be delightful, though the flavor will shift slightly. The 1/4 cup of granulated sugar in the dough balances the richness of the butter and cream cheese, ensuring the pastry doesn’t become overly sweet.
The Unexpected Star
Lemon zest isn’t just a garnish; it’s a flavor enhancer that brightens the entire pastry. The citrus oils in the zest cut through the buttery richness, adding a refreshing zing that keeps the taste fresh. If you’re not a fan of citrus, try adding a pinch of orange zest for a sweeter note, or a dash of almond extract for a nutty undertone. The lemon zest also contributes a subtle color contrast, making the finished Danish visually appealing.
The Final Flourish
The powdered sugar glaze, combined with a splash of milk or lemon juice, gives the Danish a glossy finish that’s both beautiful and delicious. The glaze coats the surface like velvet, creating a sweet, slightly tangy finish that balances the buttery dough. If you’re feeling adventurous, swirl in a tablespoon of melted dark chocolate into the glaze for a decadent twist. The glaze also helps seal in moisture, keeping the Danish fresh for longer.
Everything’s prepped? Good. Let’s get into the real action.
The Method — Step by Step
- In a large bowl, whisk together the flour, 1/4 cup granulated sugar, and 1 teaspoon salt until evenly mixed. Sprinkle the active dry yeast over the dry ingredients; let it sit for 30 seconds so the yeast can wake up. This step is crucial for a good rise. The dough will be slightly tacky but not sticky.
- Heat the whole milk in a small saucepan just until it’s warm, about 110°F (43°C). Add the egg and whisk until fully incorporated. Pour this liquid mixture into the dry ingredients and stir with a wooden spoon until a shaggy dough forms. The dough should feel slightly sticky, but manageable.
- Turn the dough onto a lightly floured surface and knead for about 5 minutes until it’s smooth and elastic. At this point, the dough should be pliable and not tear when stretched. This kneading step develops the gluten structure necessary for the dough to hold its shape during baking.
- Roll the dough into a rectangle about 12x16 inches. Place the cold butter cubes on one half of the dough and fold the other half over the butter, sealing the edges by pinching them together. The butter should be completely enclosed, creating a sealed layer that will puff up during baking.
- Using a rolling pin, gently roll the dough into a long loaf, keeping the thickness even at about 1/2 inch. Cut the loaf into 12 equal squares, each about 4 inches. This step is the moment of truth; the dough should feel cool to the touch, indicating the butter is still cold and ready for layering.
- Place the squares on a parchment‑lined baking sheet. Let them rest for 15 minutes at room temperature; this rest allows the dough to relax and the butter to remain cold, which is key for flakiness. During this time, preheat the oven to 375°F (190°C). The dough should look slightly puffy, a sign that the yeast is active.
- Brush the tops of the squares with a lightly beaten egg for a shiny finish. Sprinkle the lemon zest evenly across the tops. The glaze will give the Danish a golden crust. Bake for 20-22 minutes, until the tops are golden brown and the edges pull away from the parchment.
- While the Danishes are still warm, whisk together 1 cup powdered sugar, 2 tablespoons milk or lemon juice, and a pinch of salt until smooth. Drizzle this glaze over the tops of the pastries, letting it pool in the corners. The glaze should coat the pastry like a fine, sweet mist.
- Let the glaze set for 5 minutes before serving. The glaze should be glossy, but not runny. This final touch turns a simple pastry into a showstopper. Serve warm for the best flavor.
That’s it — you did it. But hold on, I've got a few more tricks that'll take this to another level. These insider tips will help you perfect the texture, flavor, and presentation, ensuring every bite is a masterpiece.
Insider Tricks for Flawless Results
The Temperature Rule Nobody Follows
The temperature of the butter is the secret to flakiness. If it’s too warm, it will melt into the dough, resulting in a greasy pastry. Keep the butter chilled and cut it into cubes just before rolling. This ensures that steam pockets form during baking, creating those coveted flaky layers.
Why Your Nose Knows Best
Baking is as much about aroma as it is about taste. As the dough rises, you’ll notice a faint yeasty scent. When the butter starts to melt, a buttery aroma will fill the kitchen. These cues confirm that the dough is in the right state for the next step.
The 5-Minute Rest That Changes Everything
After rolling the dough into squares, give them a 5‑minute rest before baking. This short pause allows the gluten to relax, making the dough easier to handle and the final product more tender. Skipping this step can lead to a dense, tough pastry.
The Sweet‑Savory Balance
Adding a pinch of salt to the glaze might sound odd, but it actually balances the sweetness and enhances the buttery flavor. I learned this trick after a friend complained that my Danishes were too sweet. The subtle salt note made a world of difference.
The Quick Chill Trick
If you’re short on time, you can chill the dough for 30 minutes instead of an hour. The dough will still rise adequately, but the result will be slightly less flaky. It’s a great compromise when you’re pressed for time.
Creative Twists and Variations
This recipe is a playground. Here are some of my favorite ways to switch things up:
Berry Burst
Add fresh blueberries or raspberries to each square before folding. The berries burst with juice as they bake, creating a sweet, tart contrast that pairs beautifully with the buttery dough. Use a handful of berries per square for maximum flavor.
Nutty Delight
Sprinkle chopped walnuts or pecans into the dough before rolling. The nuts add a crunchy texture and a rich, earthy flavor. Toast the nuts lightly before adding for an extra layer of flavor.
Chocolate Swirl
Fold a few tablespoons of melted dark chocolate into the glaze. The chocolate glaze adds depth and a slightly bitter undertone that balances the sweetness of the pastry. This variation is perfect for chocolate lovers.
Cinnamon Spice
Add a teaspoon of ground cinnamon to the flour mixture. The cinnamon gives the dough a warm, spicy note that’s reminiscent of autumn. Pair this with a dusting of powdered sugar for a festive touch.
Maple Syrup Finish
Replace the powdered sugar glaze with a thin layer of maple syrup. The syrup gives the pastry a caramelized, slightly smoky flavor. Drizzle the maple syrup over the warm Danishes for a glossy finish.
Lemon Ricotta
Replace the cream cheese with ricotta and add a tablespoon of lemon zest. This creates a lighter, more airy pastry with a bright citrus flavor. The ricotta also adds a subtle tang that complements the sweet glaze.
Storing and Bringing It Back to Life
Fridge Storage
Store the finished Danishes in an airtight container at room temperature for up to 3 days. The dough’s buttery layers will stay fresh, and the glaze will remain glossy. Keep the container away from direct sunlight to avoid melting the glaze.
Freezer Friendly
For longer storage, place the Danishes in a freezer‑safe bag and freeze for up to 2 months. When ready to serve, let them thaw at room temperature for 30 minutes before reheating. This keeps the pastry fresh and the glaze intact.
Best Reheating Method
Reheat the Danishes in a preheated 350°F (175°C) oven for 5-7 minutes, or until warmed through. Add a tiny splash of water to the bottom of the baking sheet to create steam, which keeps the pastry moist. A quick microwave burst can work, but it may make the glaze slightly soggy.