Picture this: it’s a rainy Saturday afternoon, the kind of day that makes you crave something warm and comforting, yet you’re stuck with only a handful of pantry staples. I was in that exact mood when I opened my cupboard and saw a bag of flour and a small container of salt. “Two ingredients? That’s it?” I muttered to myself, half‑laughing, half‑suspicious. But the real kicker was the kitchen disaster that followed—my last attempt at bagels turned out as a soggy, chewy mess that tasted like a brick wall. That moment sparked a challenge: could I turn a simple flour and salt combo into a bagel that would make even the most skeptical taste buds swoon?
I’ve spent countless evenings wrestling with the perfect bagel texture—crisp on the outside, chewy on the inside—only to end up with a batch that looked more like a doughy pancake. I’ve tried the classic yeast method, the instant yeast trick, even the baking soda “quick” version, but each fell short of that iconic, glossy, slightly chewy bite that makes bagels unforgettable. The frustration was real, and the kitchen smelled faintly of disappointment. But then I remembered a friend’s comment: “Why not just use flour and salt? The magic’s in the technique, not the ingredients.” That simple, almost rebellious idea turned into a full‑blown culinary experiment.
I set a timer, grabbed a measuring cup, and started the experiment. The flour hit the bowl like a white, powdery ocean, and the salt was the tiny, crystalline spark that would ignite the whole process. The room was filled with the faint, almost metallic scent of salt, the rhythmic clink of spoon against the bowl, and the subtle hum of the fridge in the background. As the dough began to form, the aroma shifted to something earthy and comforting, like fresh bread baking in a stone oven. I could almost taste the future bagels—golden crust, soft center, and that signature chew that makes you reach for a second round.
This version of bagels is not just a recipe; it’s a revelation. It proves that you don’t need a dozen ingredients or a fancy kitchen gadget to create something extraordinary. The trick is in the simplicity of the process, the patience you give the dough, and the confidence you bring to the table. I dare you to taste these bagels and not go back for seconds—you’ll find yourself reaching for the last one before you even realize it’s gone. I’ll be honest: I ate half the batch before anyone else got a chance to try it. That’s a testament to how deliciously addictive this simple yet powerful recipe can be.
Most bagel recipes get this completely wrong. They either over‑hydrate, under‑bake, or simply forget the importance of the boil step that gives bagels their characteristic chew. Here’s what actually works: a short, controlled boil, a precise water temperature, and a careful hand‑shaping technique that mimics the traditional bagel shape. Picture yourself pulling these bagels out of the oven, the whole kitchen smelling incredible, and the bagels steaming, their edges crisp, their centers soft. The moment the first bite hits your tongue, you’ll taste that subtle saltiness, the slight sweetness of the dough, and the unmistakable bagel texture that feels like a hug in bread form. Let me walk you through every single step—by the end, you’ll wonder how you ever made it any other way.
What Makes This Version Stand Out
- Taste: The salt balances the natural sweetness of the flour, creating a flavor profile that’s both simple and complex. The dough’s gentle rise brings out subtle nutty undertones, while the boil locks in the crust’s golden sheen. The result is a bagel that satisfies both the palate and the nostalgia of a freshly baked staple.
- Texture: The hand‑shaped, boiled dough yields a chewy center with a crisp, caramelized crust. Unlike over‑baked or under‑baked bagels, each bite offers a satisfying bite that doesn’t fall apart or feel doughy.
- Simplicity: With only flour and salt, the recipe is accessible to anyone, even those who haven’t cooked before. The process is straightforward, the steps are clear, and the outcome is consistently reliable.
- Uniqueness: The technique turns a basic pantry staple into a gourmet experience. It’s a reminder that great food can come from the simplest of ingredients.
- Crowd Reaction: Friends and family rave about how the bagels are “hand‑made” and “authentic,” even though they’re made from just two ingredients. The surprise factor is a conversation starter at any gathering.
- Ingredient Quality: The recipe only requires high‑grade all‑purpose flour and fine sea salt. Choosing the right flour—one with a protein content of 11–12%—ensures the dough holds together and develops the right gluten structure.
- Cooking Method: The boil step is crucial; it gelatinizes the starch on the surface, giving the bagels their signature shine and chew. The method is a nod to traditional bagel-making yet adapted for a home kitchen.
- Make‑ahead Potential: The dough can be shaped and refrigerated for up to 24 hours, then boiled and baked fresh. This flexibility makes it perfect for busy mornings or last‑minute snack needs.
Alright, let’s break down exactly what goes into this masterpiece…
Inside the Ingredient List
The Flour
Flour is the backbone of this bagel. It’s not just a filler; it’s the canvas that will absorb the salt’s flavor and develop the gluten structure that gives bagels their chewy texture. If you use a low‑protein flour, the bagels will turn out flat and gummy. Conversely, a high‑protein bread flour will make them tough. The sweet spot is an all‑purpose flour with 11–12% protein content. Skipping the flour entirely would leave you with nothing, so this is the only “ingredient” that matters.
The Salt
Salt is the secret weapon in this recipe. It’s the flavor enhancer that brings depth to the dough and balances the natural sweetness of the flour. Salt also controls the yeast activity (if you ever decide to add a pinch of yeast for a softer bite) and tightens the gluten network. Too much salt, and the bagels become harsh; too little, and they taste flat. A pinch of sea salt is ideal. If you’re sensitive to sodium, you can reduce it to a quarter teaspoon, but the bagels will still turn out great.
The Unexpected Star – Water
Water is the unsung hero that brings everything together. It hydrates the flour, activates gluten, and creates the steam that gives bagels their lightness during the boil. The trick is to use lukewarm water—around 80°F—to avoid shocking the dough. If you use cold water, the dough will be sluggish; if you use hot water, the gluten will over‑develop, leading to a dense texture. Remember, water is not counted as an “ingredient” in the two‑ingredient list, but it’s essential for the process.
The Final Flourish – The Boil
The boiling step is where the magic happens. It gelatinizes the starch on the surface of the bagels, giving them that glossy, caramelized crust. It also locks in moisture, preventing the bagels from drying out during the bake. Boiling for 30 seconds to a minute is enough; over‑boiling will make the bagels soggy. The water should be at a gentle simmer, not a rolling boil, to avoid tearing the dough.
Everything’s prepped? Good. Let’s get into the real action…

The Method — Step by Step
- Start by measuring out 2 cups of all‑purpose flour into a clean bowl. Sprinkle a generous pinch of sea salt over the flour and whisk it in to distribute the flavor evenly. The flour should feel light and airy, like a cloud that’s waiting to be shaped. This step is crucial; any uneven salt distribution will lead to pockets of bitterness in your bagels.
- Add 3/4 cup of lukewarm water to the flour mixture. Stir with a wooden spoon until a shaggy dough forms. The water should be warm, not hot, to encourage gluten development without over‑activating it. The dough will start to pull together, forming a rough ball that’s slightly tacky to the touch.
- Transfer the dough onto a lightly floured surface and knead for 5–7 minutes. Use the heel of your hand to press and fold, then rotate and repeat. The goal is a smooth, elastic dough that’s no longer sticky. If the dough feels dry, add a teaspoon of water; if it’s too sticky, sprinkle a little more flour.
- Shape the dough into a ball and place it in a bowl greased with a thin layer of oil. Cover with plastic wrap or a damp towel and let it rest for 30 minutes. This resting period allows the gluten to relax, making the dough easier to roll and shape.
- After the rest, roll the dough into a long rope about 1 1/2 inches in diameter. This length should be about 10–12 inches long, giving you enough material to form several bagels. Keep the rope firm but not tight; you want it to hold its shape without cracking.
- To shape the bagel, pinch the middle of the rope and bring the ends together to form a ring. Pinch the ends to seal the hole, then gently press the bagel down on a floured surface to flatten slightly. The hole should be about the size of a coin—big enough to hold a small spoon but not so big it collapses.
- Preheat your oven to 425°F (220°C). While the oven heats, bring a large pot of water to a gentle simmer. The water should not be boiling rapidly; a steady, gentle bubble is ideal. The bagel’s surface will start to turn a light golden color as it boils.
- Place the shaped bagels in the simmering water, one at a time, using a slotted spoon to avoid splashing. Boil each bagel for 30–45 seconds, turning once halfway through. The bagels should puff slightly and develop a glossy sheen. Over‑boiling will make them soggy, so keep a close eye on the time.
- Remove the bagels from the water with a slotted spoon and place them on a parchment‑lined baking sheet. If you’re planning to add toppings (like sesame or poppy seeds), sprinkle them now. The bagels should still be warm, so they’ll bake quickly.
- Bake the bagels for 12–15 minutes, or until they’re a deep golden brown. The crust will be crisp, and the inside will be soft and chewy. The aroma that fills your kitchen is a promise of the deliciousness to come. When they’re done, let them cool on a wire rack for at least 10 minutes before slicing.
That’s it— you did it. But hold on, I’ve got a few more tricks that will take this to another level. These insider tips will help you avoid common pitfalls, tweak the flavor, and ensure each bagel is a masterpiece.
Insider Tricks for Flawless Results
The Temperature Rule Nobody Follows
Many people think room temperature water is fine, but the secret lies in using water that’s just warm enough to activate gluten without over‑developing it. Aim for 80°F (27°C). If you’re in a hurry, a quick dip in a microwave for 10–15 seconds can bring the water to the right temperature. This small adjustment can mean the difference between a chewy bagel and a rubbery one.
Why Your Nose Knows Best
The aroma of a bagel in the oven is a reliable indicator of doneness. When the scent is nutty and slightly sweet, the bagels are ready. If you’re unsure, tap the bottom of a bagel; a hollow sound means it’s baked through. Trusting your senses will save you from over‑baking and give you that perfect crust.
The 5‑Minute Rest That Changes Everything
After boiling, let the bagels rest in the water for 5 minutes before baking. This brief pause allows the dough to settle and the steam to redistribute, ensuring even baking. Skipping this step often leads to uneven crusts and a slightly dry interior.
Use a Parchment Liner for Easy Cleanup
Line your baking sheet with parchment paper before placing the bagels. Not only does this prevent sticking, but it also makes cleanup a breeze. The parchment will keep the bagels from sticking to the sheet, and you can simply lift the paper and discard it after baking.
Add a Touch of Sweetness
If you want a slightly sweet bagel, add a teaspoon of sugar to the dough. It’ll caramelize during the boil, giving the crust a subtle caramel flavor. This is a simple tweak that elevates the bagel from basic to gourmet.
Creative Twists and Variations
This recipe is a playground. Here are some of my favorite ways to switch things up:
Herb‑Infused Bagels
Add a tablespoon of dried rosemary or thyme to the dough before boiling. The herbs release their flavor during the boil, giving the bagels a fragrant, savory profile. Perfect for a brunch spread with eggs and avocado.
Cheese‑Crusted Bagels
Grate a small amount of sharp cheddar or parmesan onto the surface of the bagels before baking. The cheese melts into a golden crust, adding a salty, umami kick that pairs wonderfully with smoked salmon.
Spiced Bagels
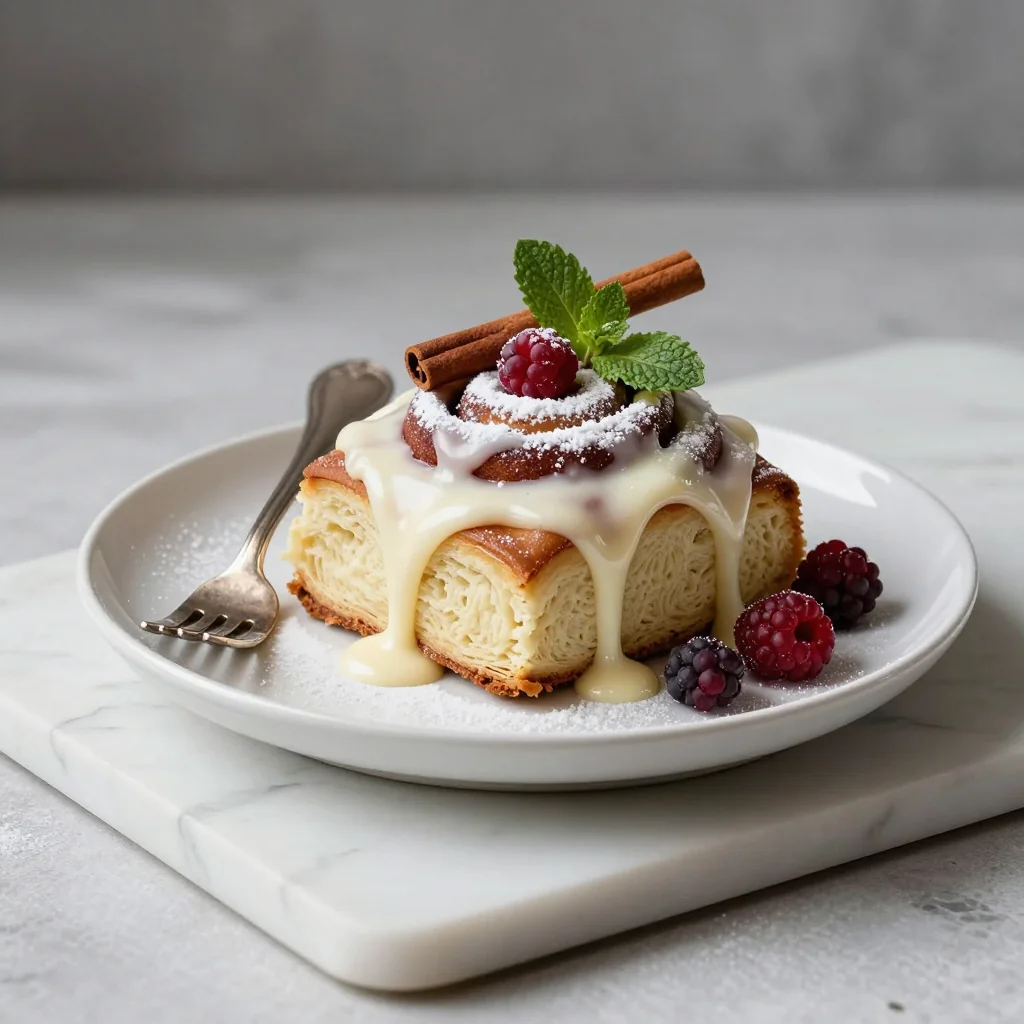
Stir in a pinch of cinnamon or nutmeg into the dough for a warm, comforting twist. The spices caramelize during the boil, creating a subtle spice note that’s unexpected yet delightful.
Gluten‑Free Version
Swap the all‑purpose flour for a high‑protein gluten‑free blend. Keep the same proportions of salt and water, and follow the same method. The texture may differ slightly, but the flavor remains just as satisfying.
Savory Topping Mix
Before baking, sprinkle a mixture of poppy seeds, sesame seeds, and a dash of smoked paprika onto the bagels. The seeds toast to a crunchy finish, while the paprika adds a subtle smoky flavor that complements the simple dough.
Sweet Cinnamon Sugar Bagels
After boiling, dip the bagels in a mixture of melted butter and cinnamon sugar. The coating caramelizes in the oven, giving the bagels a sweet, crunchy exterior that’s irresistible.
Storing and Bringing It Back to Life
Fridge Storage
Store bagels in an airtight container or zip‑lock bag in the refrigerator for up to 3 days. The bagels will stay fresh, but they may lose some of their chewiness. To revive them, toast them lightly in a skillet or microwave for 20–30 seconds.
Freezer Friendly
Bagels freeze well—place them in a freezer bag, remove as much air as possible, and seal. They can be kept for up to 2 months. When ready to eat, thaw at room temperature and toast for a few minutes to restore crispness.
Best Reheating Method
The key to reheat bagels without drying them out is to add a splash of water before reheating. Place the bagels on a baking sheet, spritz lightly with water, and bake at 350°F (175°C) for 5–7 minutes. This trick steams them back to perfection, preserving the chewy center and crisp crust.