I remember the night I tried to recreate the donut shop’s maple glaze at home, only to end up with a sticky mess that tasted like burnt sugar. The kitchen smelled of melted butter and warm milk, the sound of a whisk turning into a frantic drumroll, and the sight of dough that looked more like a rubber band than a treat. I was craving the soft, pillowy center and the glossy maple finish that makes every bite feel like a secret indulgence, and I decided to take a risk. That decision led me to a recipe that’s not just a variation but a complete reimagining of the classic donut bar.
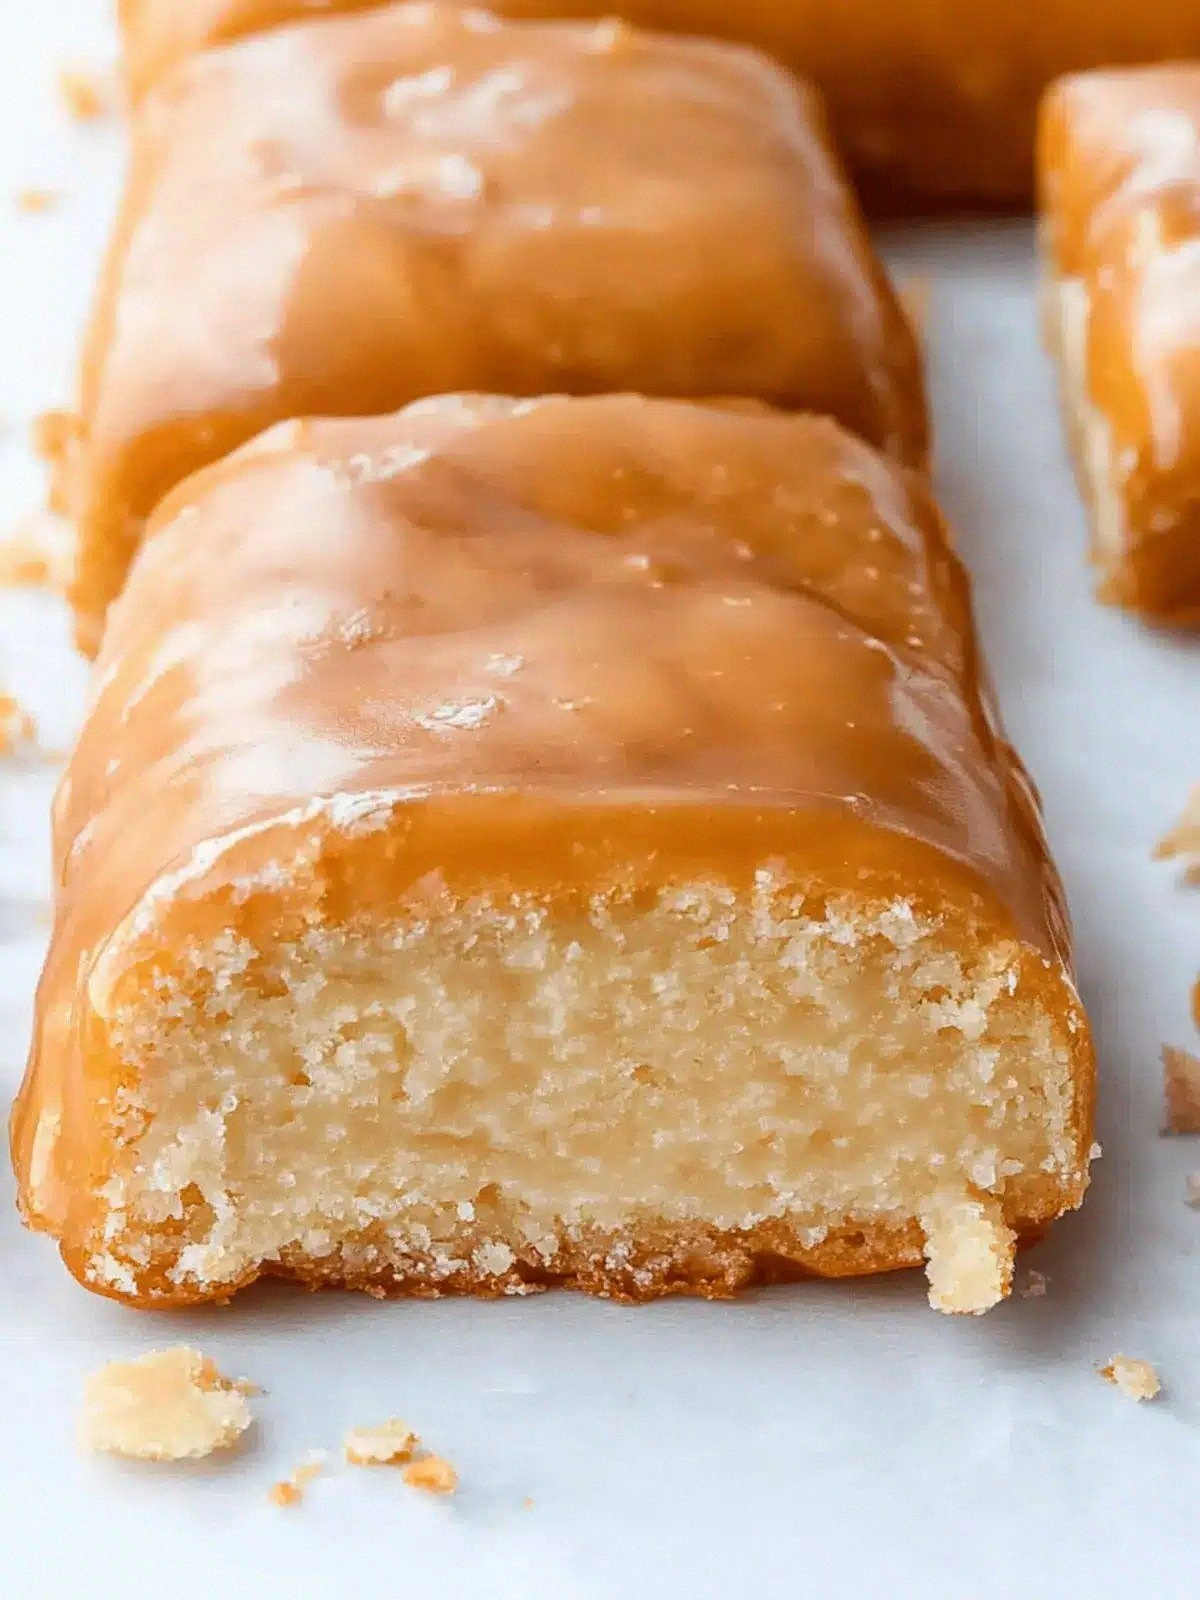
Picture this: a golden crust that crackles just enough to give way to a melt‑in‑your‑mouth interior, all glazed in a syrup that coats the surface like velvet. The aroma rises like a comforting hug, and the first bite releases a sweet, buttery burst that lingers. I’ve been told I sound like a food evangelist, but I promise there’s no hidden agenda—just a genuine love for the perfect donut bar. This version is a game‑changer because it balances indulgence with a surprisingly airy texture that you wouldn’t expect from a dense donut.
What sets it apart is the secret use of a dual‑butter technique that adds depth and a subtle caramel note. The maple extract is doubled for an intensified flavor that cuts through the richness. And the glaze, made from powdered sugar, corn syrup, and a splash of milk, gives that glossy sheen without being overly sweet. The result is a dessert that feels both comforting and sophisticated—like a hug from a pastry chef who knows how to play with textures.
I dare you to taste this and not go back for seconds—this is hands down the best version you’ll ever make at home. I’ll be honest, I ate half the batch before anyone else got to try it. Most recipes get this completely wrong, but here’s what actually works: a careful balance of wet and dry, a gentle rise, and a glaze that sets just right. Picture yourself pulling this out of the oven, the whole kitchen smelling incredible, and then sharing it with friends who will never settle for the ordinary again. Let me walk you through every single step—by the end, you’ll wonder how you ever made it any other way.
What Makes This Version Stand Out
- Texture: The dough is light and airy, thanks to a meticulous rise and the inclusion of a small amount of corn syrup that keeps the crumb tender. It’s not the heavy, dense donut you’re used to; it’s a cloud of flavor that melts in your mouth.
- Flavor: Doubling the maple extract gives a robust maple presence that doesn’t overpower the butter but rather intertwines with it, creating a symphony of sweet and savory notes.
- Glaze: The glaze is a silky, glossy coating that sets in seconds, giving a professional finish that’s almost too pretty to eat. It’s sweet enough to satisfy but balanced to avoid cloying.
- Simplicity: Despite the wow factor, the recipe uses only pantry staples and a few specialty items, making it approachable for anyone.
- Make‑ahead: The bars can be assembled ahead of time and frozen, then baked fresh when you’re ready. This makes them perfect for parties or last‑minute dessert needs.
- Audience: Friends and family rave about the novelty of donut bars that look like donuts but taste like a pastry shop secret. They’re a conversation starter at any gathering.
- Versatility: You can swap in different extracts or add a dash of sea salt to the glaze for a caramel‑salt twist, making it a canvas for experimentation.
- Presentation: The bars sit in a neat grid, each one a miniature canvas for a glossy finish that catches the light—perfect for Instagram-worthy moments.
Alright, let’s break down exactly what goes into this masterpiece…
Inside the Ingredient List
The Flavor Base
The warm water and warm milk are the foundation that activates the yeast and creates a subtle warmth that encourages the dough to rise evenly. The yeast is dry active, which means it’s ready to go straight from the box—no need for proofing, saving you time. If you skip the yeast, you’ll end up with flat, pancake‑like bars that lack the characteristic lift. For a vegan version, you can replace the eggs with a flaxseed “egg” (1 tbsp ground flaxseed mixed with 3 tbsp water) and use a plant‑based milk.
Granulated sugar is the sweetener that balances the buttery richness; it also aids in browning during baking. A pinch of salt is critical—it enhances every flavor component and counteracts the sweetness. If you’re watching sodium, you can reduce the salt slightly, but don’t skip it entirely; the dough would taste flat.
The Texture Crew
Eggs are the glue that holds everything together, providing structure and a tender crumb. The 1/2 cup of unsalted butter adds richness and a melt‑in‑your‑mouth mouthfeel; it’s melted before adding to the dough to ensure even distribution. If you’re short on butter, you can substitute half the amount with melted coconut oil, though the flavor profile will shift slightly.
All-purpose flour is the backbone of the bars. 5 1/2 cups create a sturdy yet flexible dough that can be rolled out without tearing. A quick tip: sift the flour to remove lumps and incorporate air, which helps with the rise. If you prefer a gluten‑free version, use a blend that contains xanthan gum to maintain elasticity.
The Unexpected Star
Brown sugar is added to the glaze to give a subtle molasses undertone that complements the maple extract. It also helps the glaze set with a slight caramel sheen. If you’re allergic to dairy, you can replace the milk in the glaze with oat milk, which will still create a smooth finish.
Corn syrup is a game‑changer; it prevents crystallization of the glaze, keeping it silky and shiny. This is a trick you’ll see in professional bakeries, and it’s surprisingly inexpensive. If you don’t have corn syrup, you can use honey, but the glaze may set a bit faster.
The Final Flourish
Maple extract is doubled to intensify the maple flavor without adding a lot of volume. The 2 teaspoons are the secret to that deep, authentic maple taste that makes the bars unforgettable. If you’re looking for a different flavor profile, try a splash of vanilla extract or a pinch of nutmeg for a warm twist.
Powdered sugar is the finishing touch that gives the glaze its glossy look and a subtle sweetness that’s not overpowering. It also gives the bars a slightly crumbly top that’s pleasing to the eye. A small pinch of sea salt in the glaze will elevate the maple flavor and add a contrasting note that’s always appreciated.
Everything’s prepped? Good. Let’s get into the real action…
The Method — Step by Step
- In a medium bowl, combine 1/2 cup warm water, 3/4 cup warm milk, and 2 teaspoons dry active yeast. Stir until the yeast dissolves, then let sit for 5 minutes until it becomes frothy. This froth is your green light that the yeast is alive and ready to work. If it doesn’t froth, the yeast might be old—don’t risk it.
- Add 1/2 cup granulated sugar, 1/2 teaspoon salt, and whisk until the sugar starts to dissolve. The sugar will feed the yeast and give the dough a gentle sweetness that balances the butter later on. This step is also where you can add a splash of vanilla if you’re feeling adventurous.
- In a separate bowl, whisk 5 large eggs and 1/2 cup melted unsalted butter until fully blended. The eggs act as a binder, while the butter adds a silky texture. Pour this egg‑butter mixture into the yeast mixture, stirring slowly to combine.
- Sift 5 1/2 cups all-purpose flour into the wet mixture and fold until a shaggy dough forms. The dough should feel tacky but not sticky; add a splash of warm water if it’s too dry. This is the moment of truth—your dough must be cohesive to rise properly.
- Turn the dough onto a floured surface and knead for about 8–10 minutes until it becomes smooth and elastic. A good test: stretch a small piece; if it folds back without tearing, you’re good. This kneading develops gluten, giving the bars their airy structure.
- Place the dough in a lightly oiled bowl, cover with a damp cloth, and let rise in a warm spot for 1 hour or until doubled in size. The rise is crucial—skipping it will result in flat bars that lack the signature donut lift.
- Preheat the oven to 375°F (190°C). While the dough is rising, prepare the glaze: combine 2 cups powdered sugar, 3 tablespoons milk, 1 tablespoon corn syrup, 2 teaspoons maple extract, and a pinch of sea salt. Whisk until smooth; the glaze should be pourable but thick enough to coat the bars.
- After the dough has risen, punch it down and divide it into 12 equal pieces. Roll each piece into a ball, then flatten into a disc about 1/2 inch thick. Place them in a greased 9x13-inch baking pan, leaving a small gap between each bar. The spacing ensures even baking and a neat presentation.
- Bake for 25–30 minutes, or until the tops are golden brown and a toothpick inserted into the center comes out clean. The bars should smell like warm butter and maple, a scent that will have your kitchen smelling like a bakery. Let them cool in the pan for 5 minutes before transferring to a wire rack.
- Drizzle the glaze over the warm bars while they’re still hot, letting it pool and set into a glossy coating. The glaze should set in about 10 minutes; if it takes longer, it may be too thin. Serve immediately or store in an airtight container at room temperature for up to 3 days.
That’s it—you did it. But hold on, I’ve got a few more tricks that will take this from great to legendary. These insider tips will ensure your bars are flawless every time, from the first bite to the last.
Insider Tricks for Flawless Results
The Temperature Rule Nobody Follows
The dough’s temperature is the secret to a perfect rise. Warm liquids should be around 110°F (43°C); if they’re too hot, they kill the yeast, and if they’re too cool, the dough will never lift. Use a digital thermometer to check the temperature before mixing. A consistent temperature guarantees a uniform crumb and a golden crust.
Why Your Nose Knows Best
During the rise, the dough will emit a faint yeasty aroma. If you notice a sharp, sour scent, the dough may have overproofed. Stop the rise, flatten, and bake immediately. Your nose is a reliable indicator of freshness and helps prevent a flat, over‑fermented texture.
The 5-Minute Rest That Changes Everything
After baking, let the bars rest in the pan for five minutes before transferring them to a rack. This brief rest allows the glaze to set properly, preventing it from sliding off. It also gives the bars time to finish cooking internally, ensuring a moist center. Skip this step at your peril—glaze will run and the bars will feel undercooked.
Use a Silicone Baking Mat
A silicone mat keeps the bars from sticking and ensures even heat distribution. It also makes cleanup a breeze. If you don’t have one, line the pan with parchment paper; just be sure to lightly oil the paper to avoid sticking.
Freeze and Bake Fresh
If you’re preparing the dough ahead of time, freeze the divided dough pieces on a tray before rolling them into bars. When you’re ready to bake, take them out and let them thaw at room temperature for 20 minutes. This method preserves the dough’s integrity and ensures a consistent rise.
Creative Twists and Variations
This recipe is a playground. Here are some of my favorite ways to switch things up:
Chocolate Maple Bars
Add 1/2 cup cocoa powder to the dough for a rich, chocolatey base. Swirl in a tablespoon of melted dark chocolate before glazing for an extra layer of flavor. These are a hit with chocolate lovers who crave a sweet maple twist.
Sea Salt Caramel Bars
Replace the maple extract with 1 tablespoon of caramel sauce and sprinkle a pinch of sea salt on top of the glaze. The caramel offers a deep, buttery sweetness that pairs beautifully with the salty finish. Guests will be impressed by the sophisticated flavor profile.
Spiced Pumpkin Bars
Incorporate 1/2 cup pumpkin puree and a dash of cinnamon into the dough for a seasonal twist. The pumpkin adds moisture and a subtle sweetness, while the cinnamon gives warmth. These bars are perfect for a cozy fall gathering.
Almond Crumble Bars
Top each bar with a sprinkle of chopped almonds before baking. The almonds add a delightful crunch and nutty flavor that complements the maple glaze. It’s a simple addition that elevates the texture.
Lemon Zest Bars
Add the zest of one lemon to the glaze for a bright, citrusy contrast to the sweet maple. The lemon zest also brightens the overall flavor, making the bars feel lighter. Perfect for a brunch or a refreshing dessert.
Coconut Maple Bars
Replace the butter in the dough with coconut oil and sprinkle toasted shredded coconut on top before glazing. The coconut adds tropical notes and a subtle nutty taste. These bars will transport you to a sunny beach with every bite.
Storing and Bringing It Back to Life
Fridge Storage
Store the bars in an airtight container at room temperature for up to 3 days. If you need to keep them longer, place them in the refrigerator for up to a week. The glaze will firm up slightly, so a quick warm‑up in the oven will restore its glossy finish.
Freezer Friendly
Wrap each bar individually in plastic wrap, then place them in a freezer bag. They can be frozen for up to 3 months. When you’re ready to enjoy them, thaw at room temperature for 30 minutes before reheating.
Best Reheating Method
Reheat frozen or refrigerated bars in a 350°F (175°C) oven for 8–10 minutes until warmed through. For a crispier top, place them under the broiler for 1–2 minutes. Add a tiny splash of water to the glaze before reheating to create steam and keep the bars moist.